Accounting Dimensions Filters
> Introduced in Version 13
In ERPNext, you can control the tagging of various accounting dimensions against a specific account. You can either allow or restrict certain accounting dimensions against an account using the accounting dimension filters
To access the Accounting Dimension Filter list, go to: > Home > Accounting > Accounting Dimension Filters
1. How to create an Accounting Dimension Filter in ERPNext.
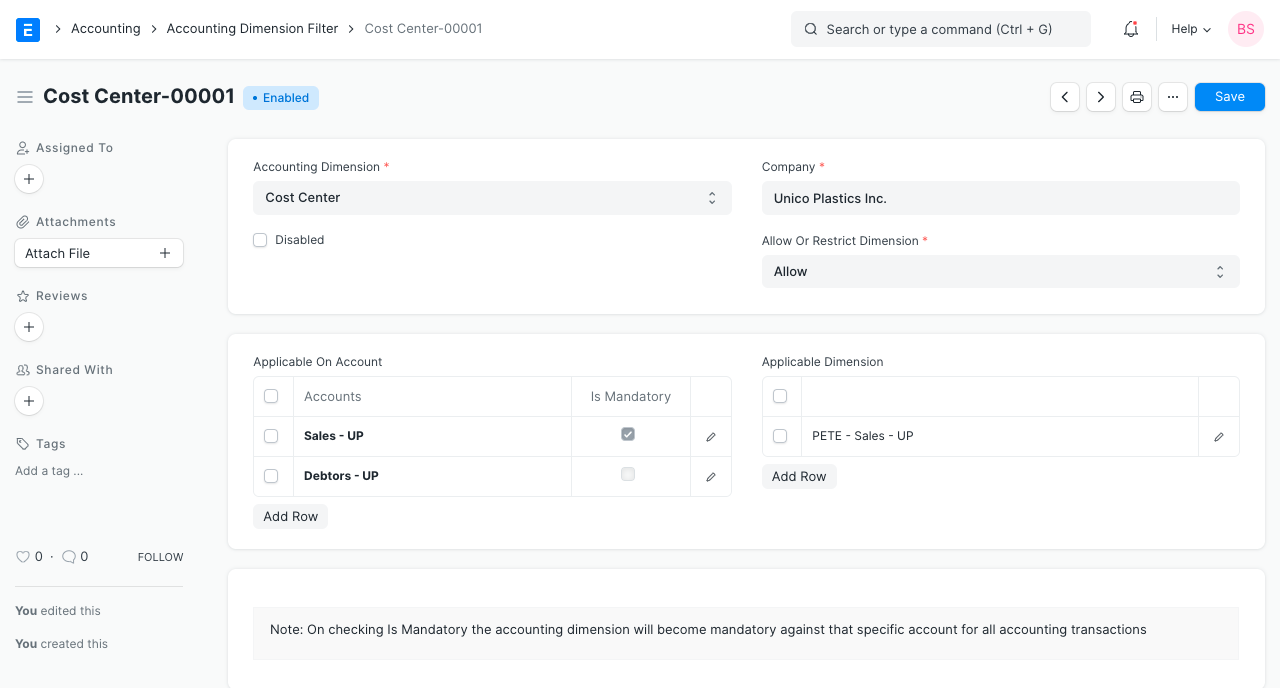
- Go to the Accounting Dimension Filter list and click on New.
- Select the Accounting Dimension on which restriction has to be applied.
- Select "Allow" or "Restrict" in the Allow Or Restrict field based on the type of restriction you want to apply.
- Add accounts on which restriction will be applied in the Accounts table. Optionally you can also check the "Is Mandatory" checkbox if the accounting dimension has to be made mandatory for any specific account.
- Add dimension values in the Dimensions table that will be allowed or restricted for the mentioned accounts.
2. Features
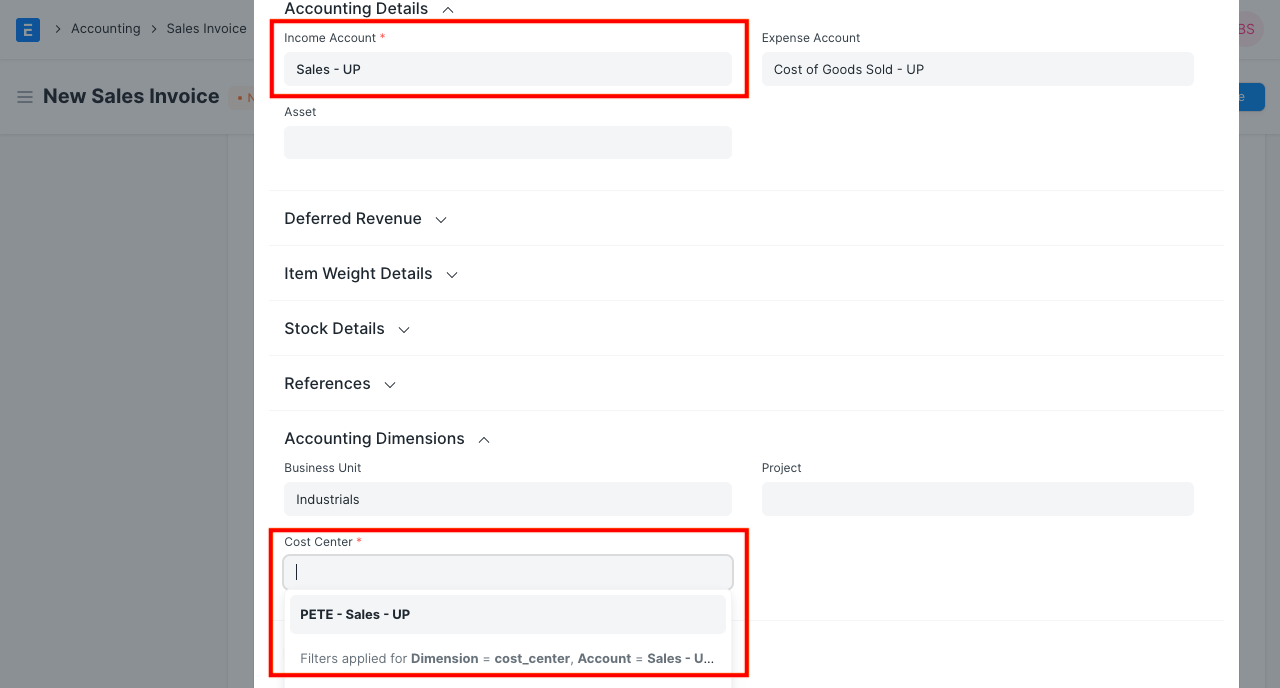
2.1 Filtering accounting dimensions in transactions
Based on the restrictions applied on the account, only allowed dimensions will be filtered and shown in the transactions.
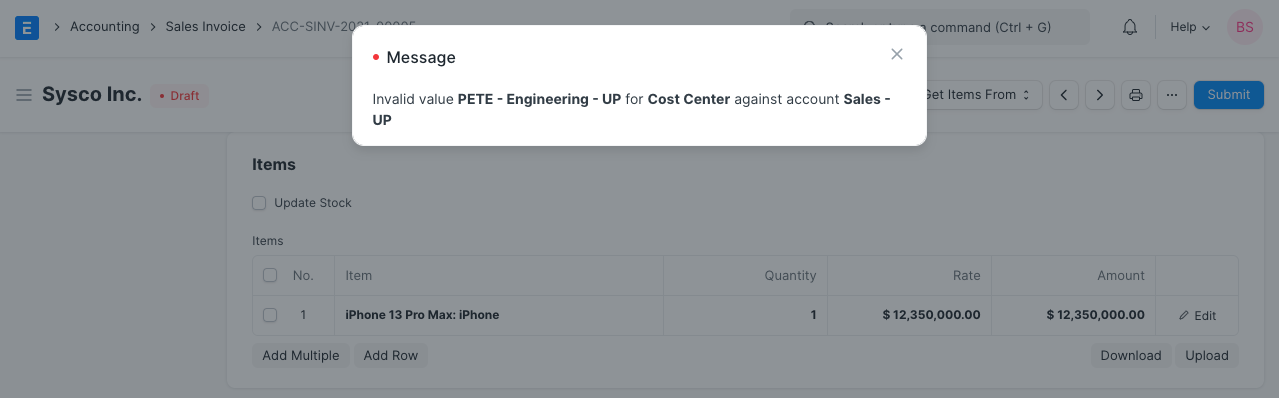
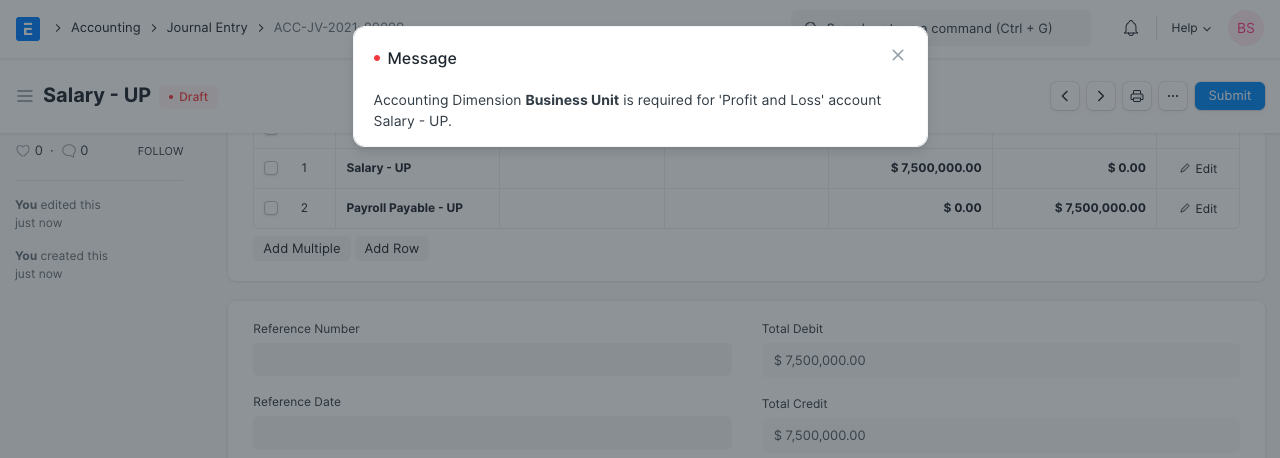
2.2 Validations for Invalid and Mandatory Dimensions
In case any mandatory dimension is missing or a restricted dimension is tagged against any applicable account, the system won't allow submitting that transaction until the correct accounting dimension is selected.