Email Account
You can sync your email account with ERPNext to send and receive emails from ERPNext.
You can manage multiple incoming and outgoing Email Accounts in ERPNext. There has to be at least one default outgoing account and one default incoming account. If you are on the ERPNext cloud, the default outgoing email is set by us.
To access Email Accounts, go to:
Home > Settings > Email Account
1. Prerequisites
Before creating an Email Account, you need an Email Domain. However, you can skip creating an Email Domain if you're using one of the services listed below, then create here for set up
- Gmail
- Yahoo
- Sparkpost
- SendGrid
- Outlook.com
- Yandex.mail
2. How to create an Email Account
- Go to the Email Account list, click on New.
- Enter the email address with the domain. Domains need to be created in order to create an email account. You don't need to create a domain if you're syncing an email from certain providers as listed here.
- Enter the email account password.
- Save. If the credentials are correct, the email account will be synced.
For some services like Gmail, you may need to enable 2FA and use App Passwords.
2.1 Additional options when creating an Email Account
- Use Different Email Login ID: To use an alternative email login and password to access this account. For example, if you have notifications@example.com and you want users to access this email with an alternate email ID, they should tick this checkbox. The recipients will see notifications@example.com as the sender.
- Awaiting password: If you're creating this account on behalf of someone and the password is unknown, tick this checkbox. When the other user logs in, they'll be prompted to enter the password.
- Use ASCII encoding for password: Ticking this will use ASCII encoding for the password.
3. Configuration of the Email Account
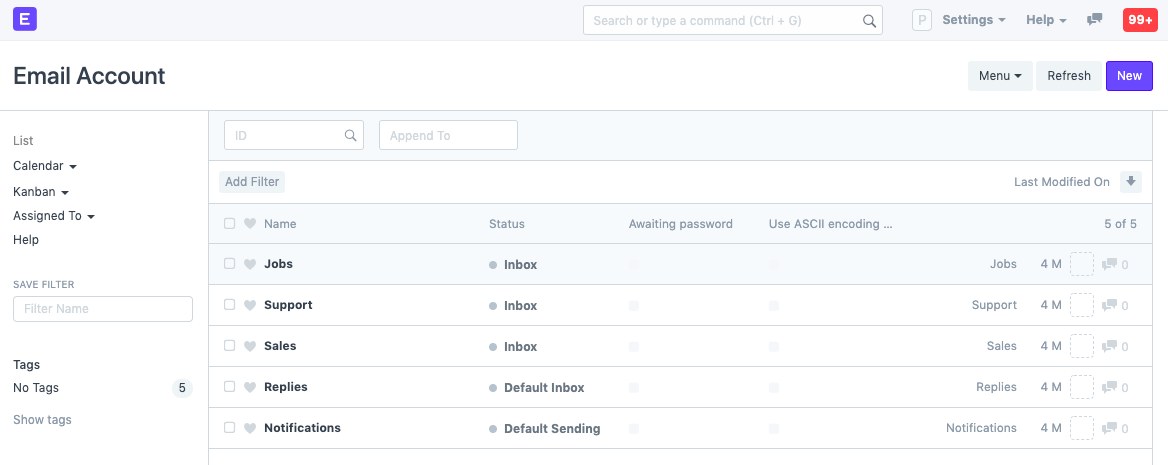
3.1 Default Email Accounts
ERPNext will create templates for a bunch of email accounts by default. Not all of them are enabled. To enable them, you must set valid email account details.
There are two types of email accounts, outgoing and incoming. Outgoing email accounts use an SMTP service to send emails and emails are retrieved from your inbox using an IMAP or POP. Most email providers such as Gmail, Outlook, or Yahoo provide these services.
3.2 Incoming Email Accounts
To set up an incoming Email Account, check on Enable Incoming and set your POP3 settings, if you are using a popular email service, these will be preset for you.
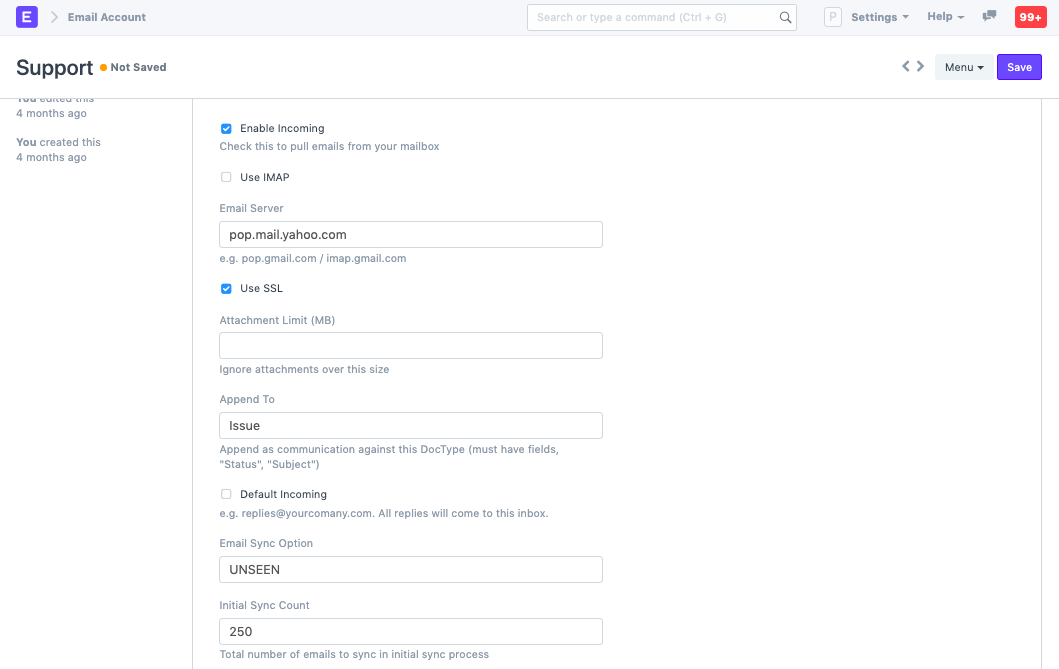
The following options are available for incoming emails:
- Use IMAP
- Use SSL
- Attachment Limit
- Default Incoming: If ticked, all replies to your company (eg: replies@yourcomany.com) will come to this account.
- Email Sync Option: Whether to sync all or only unseen emails.
- Initial Sync Count: Number of emails to sync the first time.
Automatic Document Creation Through Linked Emails
This feature creates documents when an email is sent to a particular pre-configured email.
For example, you can link support@example.com to the Issue DocType. After doing this, whenever an email is sent to support@example.com, the system will automatically create an Issue is the system.
Similarly, if you link jobs@example.com, when emails are sent to jobs@example.com, a Job Applicant document is automatically created.
Enable Automatic Linking in Documents will link emails to documents, to know more click here.
3.4 Outgoing Email Accounts
All emails sent from the system, either by the user to contact or via notifications or via transaction emails, will be sent from an Outgoing Email Account.
To set up an outgoing Email Account, check on Enable Outgoing and set your SMTP server settings, if you are using a popular email service, these will be preset for you.

The following options are available for outgoing emails:
- Use TLS
- Port
- Disable SMTP server authentication
- Add Signature: The default signature is appended to the end of each email.
- Default Outgoing: Notifications and bulk emails will be sent from this outgoing server.
- Always use Account's Email Address as Sender: The email address of this account will be mentioned as the sender for outgoing emails.
- Send unsubscribe message in an email: Send a link to unsubscribe from emails sent from this account.
- Track Email Status: Track if your email has been opened by the recipient. Note that, if you're sending to multiple recipients, even if one recipient reads the email, it'll be considered "Opened".
- Enable Auto Reply: If enabled, enter an auto-reply message.
- Append Outgoing Email to Sent Folder: If using custom email servers like Zimbra or CPanel, SMTP will not automatically append emails to the Sent folder. Enabling this option will ensure all emails are explicitly appended to the email account's Sent folder.
- Use SSL for Outgoing Emails: Use SSL as a standard for outgoing emails. Defaults to port 465.
4. How ERPNext handles replies
In ERPNext when you send an email to contact like a customer, the sender will be the user who sent the email. In the Reply-To property, the Email Address will be of the default incoming account (like [replies@yourcompany.com](mailto:replies@yourcompany.com)). ERPNext will automatically extract these emails from the incoming account and tag them to the relevant communication.
Note for self implementers: For outgoing emails, you should set up your own SMTP server or sign up with an SMTP relay service like mandrill.com or sendgrid.com that allows a larger number of transactional emails to be sent. Regular email services like Gmail will restrict you to a limited number of emails per day.
If you encounter errors when configuring an email account, refer to this page.