WooCommerce Integration
Deprecated in Version 15
Using WooCommerce Integration, the system creates Sales Orders in ERPNext for the orders created on WooCommerce using the WooCommerce webhook.
While creating a Sales Order from WooCommerce, if the Customer or Item is missing in ERPNext, the system will create new Customer/Item by using the respective details from WooCommerce order data. It also creates Address linked to the Customer using the shipping details from the order data.
1. How to set up WooCommerce?
1.1 Generate API Key and API Secret
- From your WooCommerce site's sidebar, click on Settings.
- Click on the "Advanced" tab then click on the REST API link.
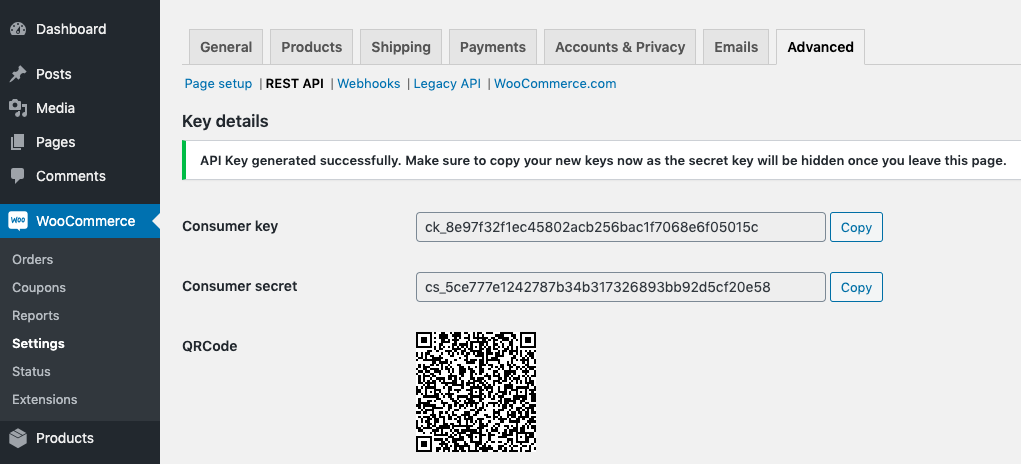
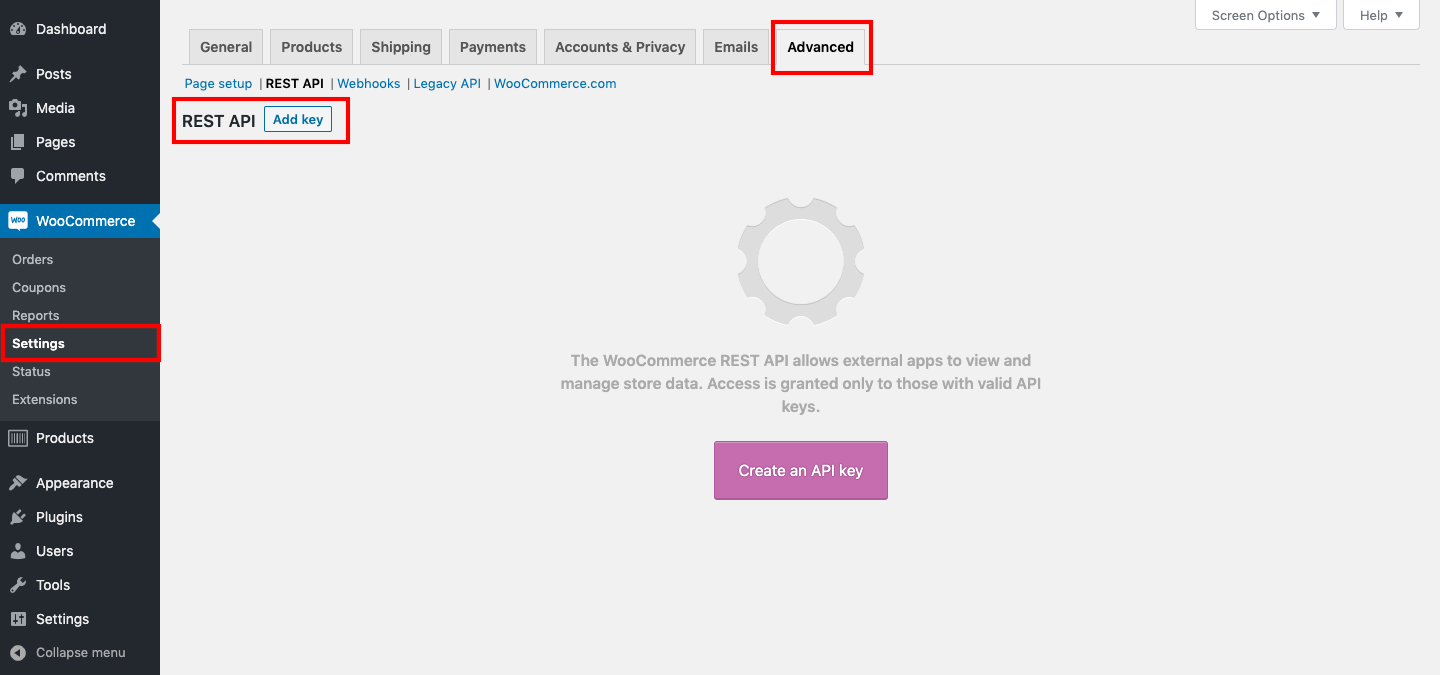 3. Click on "Add key" button. Provide the necessary details and click on "Generate API key" button.
1.2 Woocommerce Settings
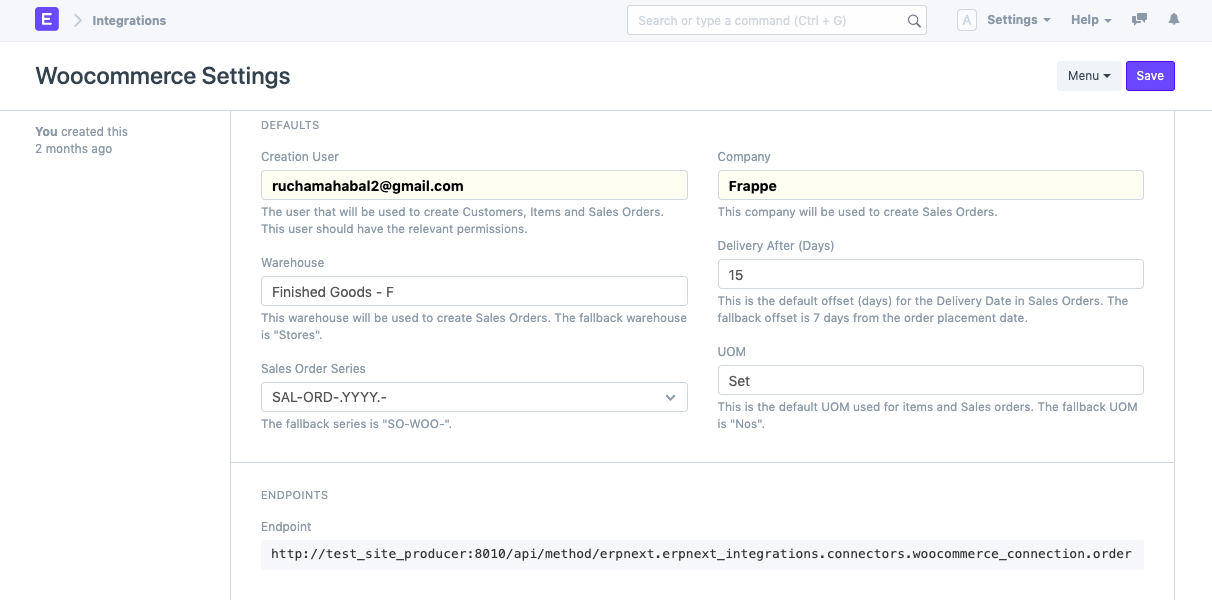
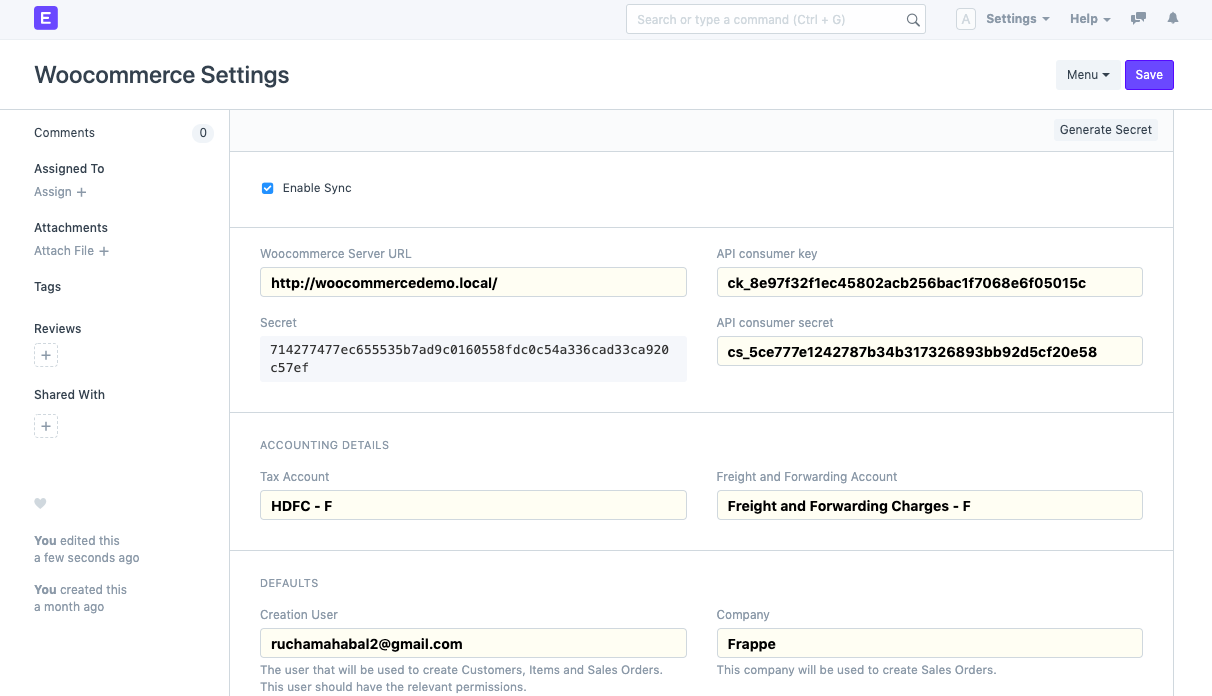
- On your ERPNext site, go to: Home > Integrations > Settings > Woocommerce Settings.
- Paste the API key and secret generated in the previous step into the "API consumer key" and "API consumer secret" fields.
- In the "Woocommerce Server URL" paste the url of your WooCommerce site.
- Make sure "Enable Sync" is checked.
- Select the "Tax Account" and "Freight and Forwarding Account" in the Account Details Section.
- Select the "Creation User" in Defaults section. This user will be used to create Customers, Items and Sales Orders. Ensure that the user has the relevant permissions.
- Select the "Company" that will be used to create the Sales Orders.
- Click Save.
- After saving the Woocommerce Settings, "Secret" and "Endpoint" are generated automatically.
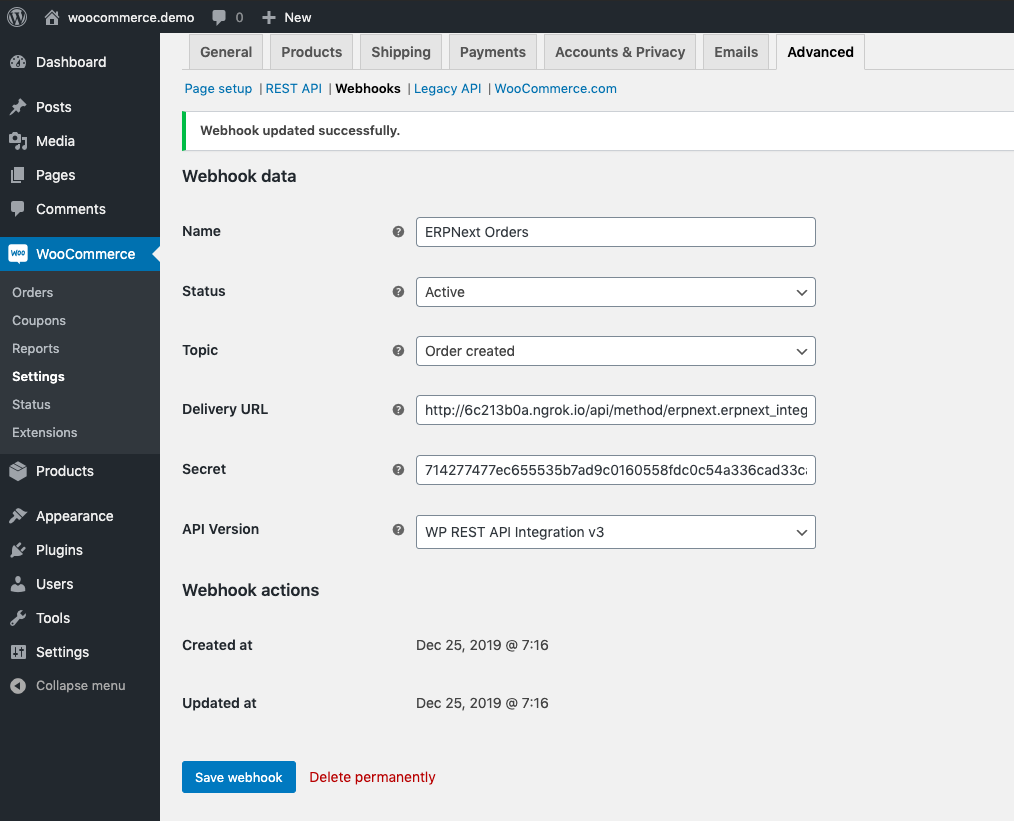
1.3 Woocommerce Webhook Settings
- Now from your woocommerce site's sidebar, go to Settings.
- Click on the "Advanced" tab then click on the Webhooks link and then click on "Add webhook" button.
- Give the webhook a name of your choice.
- Click on Status dropdown and select "Active".
- Select Topic as "Order created".
- Copy the "Endpoint" from "Woocommerce Settings" doctype in your ERPNext site and paste it in "Delivery URL" field.
- Copy "Secret" from "Woocommerce Settings" doctype in your ERPNext site and paste it in "Secret" field.
- Keep API VERSION as it is and click on Save Webhook. Now it is successfully set up.
A GIF below to show the entire process:
Note: In the above screenshot and GIF, in place of delivery url on woocommerce website, you need to paste the url you will obtain after saving the "Woocommerce Settings" in the "Endpoint" field in your ERPNext instance. Here other URL was pasted as localhost was being used.
1.4 Woocommerce order creation and syncing
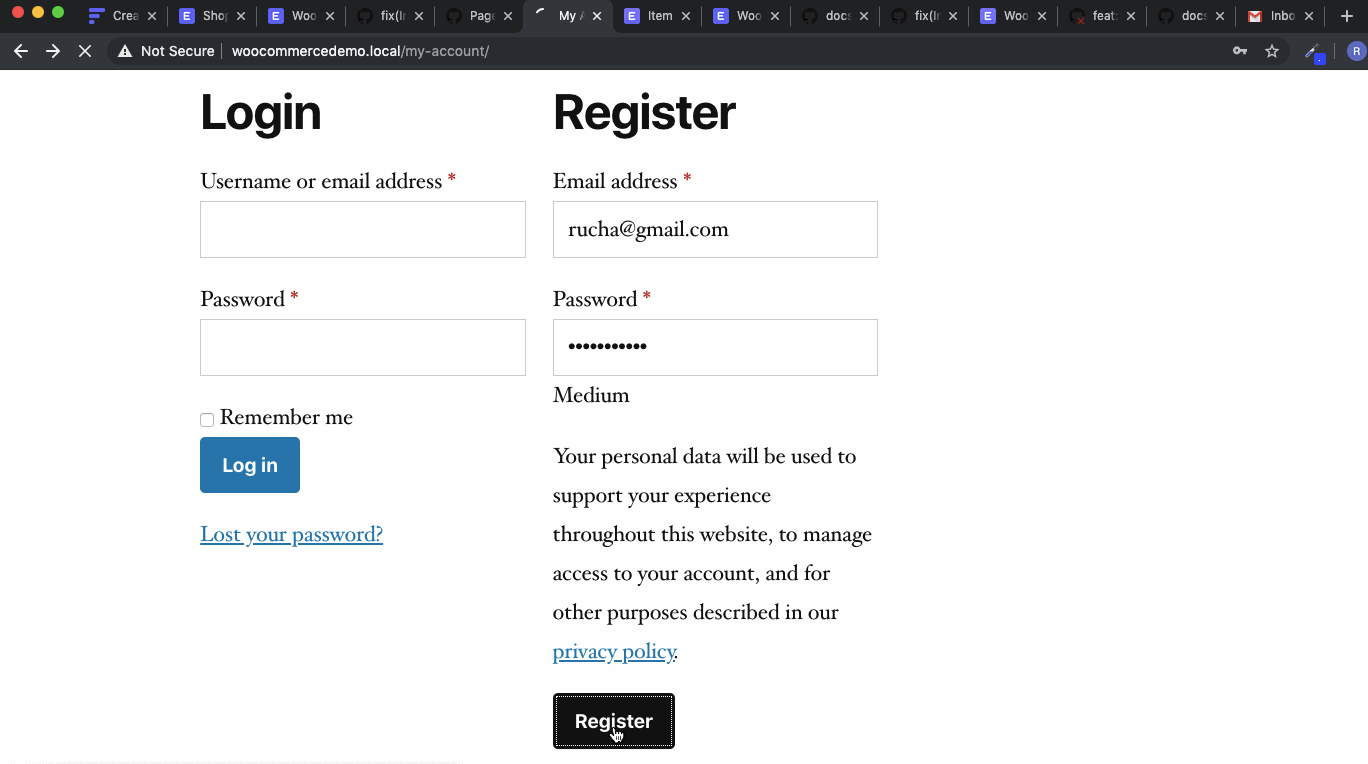
- From your Woocommerce website, register yourself as a user on the Account page.
- Now Click on Addresses option and provide the required details.
- Click on "Shop" option and now available products can be seen.
- Add the desired products into the cart and click on View Cart.
- From the cart, once you have added the desired products, you can click on "Proceed to Checkout".
- All billing details and Order details can be seen now. Once you are ok with it, click on Place Order button.
- "Order Received" message can been seen indicating that the order has been placed successfully.
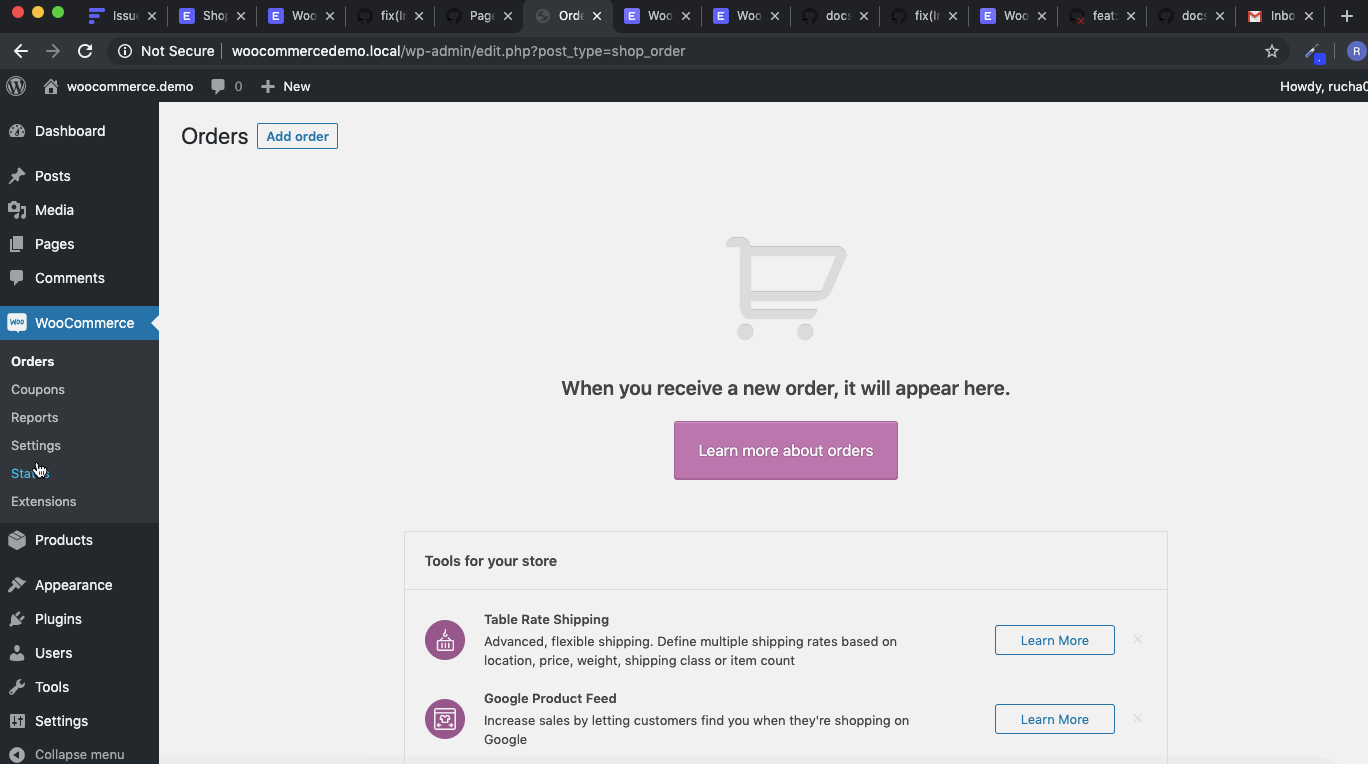
- Now on your ERPNext instance, check the following Document Types: Customer, Address, Item, Sales Order. They will be fetched and created from the webhook data.
- In case the orders are not synced, you can check the error in Home > Settings > Core > Error Log.
2. Features
2.1 Defaults
In the Woocommerce Settings DocType:
- Warehouse: This Warehouse will be used to create Sales Orders. The default Warehouse is "Stores".
- Delivery After (Days): This is the default offset (days) for the Delivery Date in Sales Orders. The default offset is 7 days from the order placement date.
- Sales Order Series: You can set a separate series for Sales Orders created via woocommerce. The default series is "SO-WOO-".
- UOM: This is the default UOM used for Items and Sales Orders. The default UOM is "Nos".