Item
An Item is a product or a service offered by your company.
The term Item is also applicable to raw materials or components of products yet to be produced (before they can be sold to customers). ERPNext allows you to manage all sorts of items like raw-materials, sub-assemblies, finished goods, item variants, and service items.
ERPNext is optimized for itemized management of your sales and purchase. If you are in services, you can create an Item for each service that you offer. Completing the Item Master is very essential for the successful implementation of ERPNext.
To access the Item list, go to: > Home > Stock > Items and Pricing > Item
1. Prerequisites
Before creating and using an Item, it is advised that you create the following first:
- Item Group
- Warehouse
- A Unit of Measure if required
2. How to create an Item
- Go to the Item list, click on new.
- Enter an Item Code, the name will be auto-filled the same as Item Code on clicking inside the Item Name field.
- Select an Item Group.
- Enter the opening stock units and standard selling rate.
- Save.
2.1 Item Properties
- Item Name: Item name is the actual name of your product or service.
- Item Code: Item Code is a short-form to denote your Item. If you have very few Items, it is advisable to keep the Item Name and the Item Code same. This helps new users to recognize and update Item details in all transactions. In case you have a lot of Items with long names and the list runs in hundreds, it is advisable to code. To understand naming Item codes see Item Codification. You can also generate Item Code based on a Naming Series by enabling this feature in Stock Settings.
- Item Group: Item Group is used to categorize an Item under various criteria like products, raw materials, services, sub-assemblies, consumables or all Item groups. Create your default Item Group list under Setup > Item Group and pre-select the option while filling your New Item details under Item Group. Item groups can be sub-assemblies, raw materials, etc, or based on your business use case.
- Default Unit of Measure: This is the default measuring unit that you will use for your product. It could be Nos, Kgs, Meters, etc. You can store all the UOMs that your product will require under Set Up> Master Data > UOM. These can be preselected while filling New Item by using % sign to get a pop up of the UOM list. Visit the UoM page for more details
2.2 Options when creating an item
- Disabled: If you disable an Item, it cannot be selected in any transaction.
- Allow Alternative Item: Sometimes when manufacturing a finished good, specific material may not be available. If you tick this, you can create and select an alternative item from the Item Alternative list. To know more, visit the Item Alternative page.
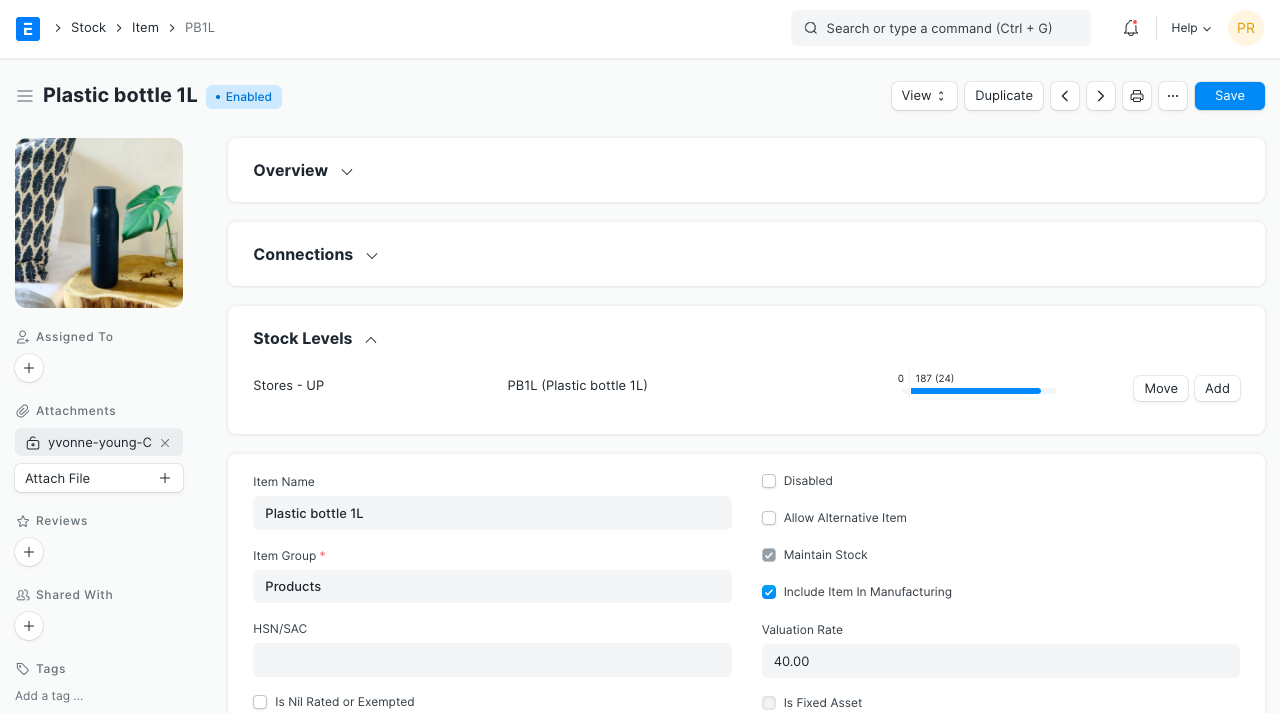
- Maintain Stock: If you are maintaining stock of this Item in your Inventory, ERPNext will make a stock ledger entry for each transaction of this item. Ensure to keep this option unchecked when creating a non-stock Item (make to order/engineer) or a service.
- Include Item in Manufacturing: This is for raw material Items that'll be used to create finished goods. If the Item is an additional service like 'washing' that'll be used in the BOM, keep this unchecked.
- Valuation Rate: There are two options to maintain valuation of stock. FIFO (first in - first out) and Moving Average. To understand this topic in detail please visit Item Valuation, FIFO and Moving Average.
- Standard Selling Rate: When creating an Item, entering a value for this field will automatically create an Item Price at the backend. Entering a value after the Item has been saved will not work. In this case, the Item Price is created from any transactions with the Item. The rate at which you'll sell the item. This will be fetched in Sales Orders and Sales Invoices.
- Is Fixed Asset: Tick this checkbox if this item is a company Asset. Check out the Asset Module to know more.
- Auto Create Assets on Purchase: If Item is a Company Asset, tick this checkbox if you want to auto create assets while purchasing this item through Purchase Cycle. Check out the Asset Page to know more.
- Allowance Percentage: This option will be available only when you create and save the item. This is the percent by which you will be allowed to over-bill or over-deliver this Item. If not set, it will select from Stock Settings.
- Uploading an Image: To upload an image for your icon that will appear in all transactions, save the partially filled form. Only after your file is saved the 'Change' button will appear on the Image icon. Click on Change, then click on Upload, and upload the image.
For India:
- HSN/SAC: Harmonized System of Nomenclature (HSN) and Service Accounting Code (SAC) for GST. These numbers are defined by the government and different Items fall under different codes. New HSN codes can be added if not present in the list.
- Is nil rated or exempted: For an Item that is under GST, but no tax is applied to it. Eg: Cereals.
- Is Non GST: For an item that is not covered under GST. Eg: petrol.
3. Features
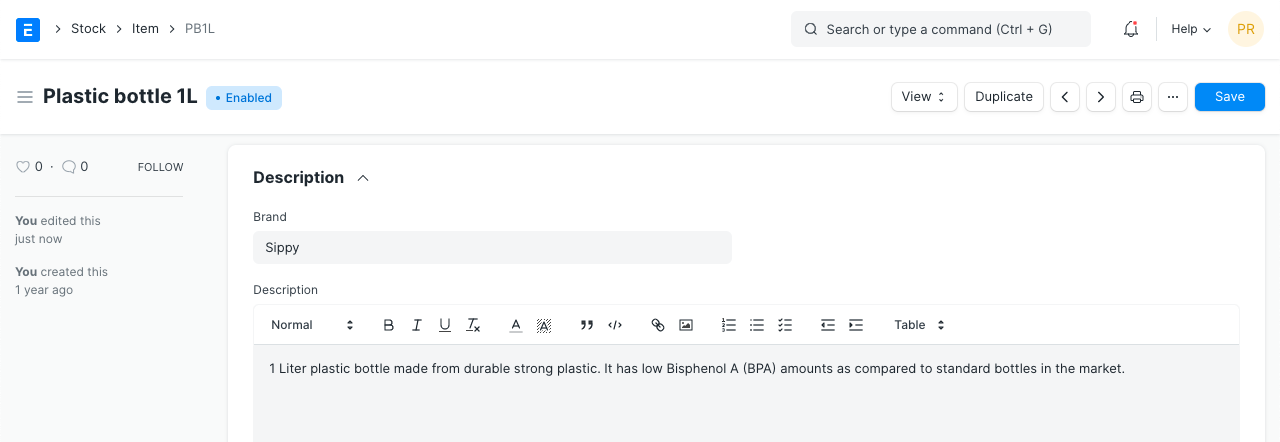
3.1 Brand and Description
- Brand: If you have more than one brand save them under Selling > Brand and pre-select them while filling a New Item.
- Description: Description of the item. The text from the Item Code will be fetched by default.
3.2 Barcodes
Barcodes can be recorded in Items to quickly scan and add them in transactions. In the Barcodes table you can add an Item's barcode for scanning. There are two types of barcodes in ERPNext:
- EAN: The European Article Number is a 13 digit number. EAN is used internationally and recognized by more POS systems.
- UPC: The Universal Product Code is a 12 digit number. UPC is generally used only in USA and Canada.
3.3 Inventory
- Shelf Life In Days: This is for a product Batch. The number of days after which product batch will be unusable. For example, medicines.
- End of Life: For a single item/product, the date after which it'll be completely unusable. That is, the item will be unusable in transactions and manufacturing. For example, you're using plastic crystals for manufacturing Items for the next 5 years after which you want to use plastic beads.
- Warranty: To track a warranty period, it is necessary that the Item is serialized. When this Item is delivered, the delivery date and the expiry period is saved in the Serial Number master. Through the serial number master, you can track the warranty status.
A warranty period is a time period in which a purchased product may be returned or exchanged.
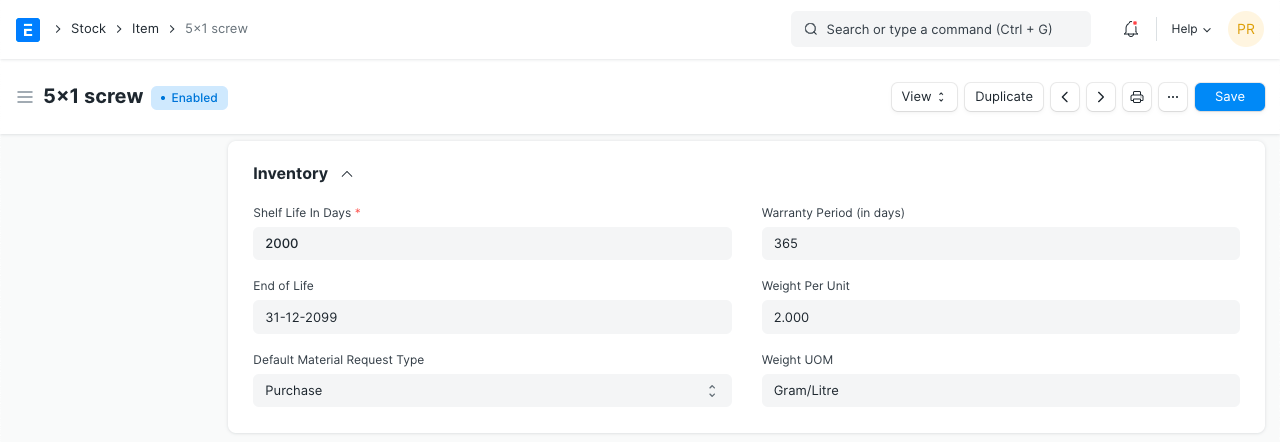 * Weight UOM: The Unit of Measure for the item. This can be Nos, Kilo, etc. The Weight UoM which you use internally can be different from the purchase UoM.
* Weight Per Unit: The actual weight per unit of the item. Eg: 1 kilo biscuits or 10 biscuits per pack.
* Default Material Request Type: When you create a new Material Request for this item, the field set here will be selected by default in the new Material Request. This is also known as an 'indent'.
* Valuation Method: Select the Valuation Method whether FIFO or Moving Average. Read Item Valuation methods to know more.
* Allow negative stock: When checked the item will be allowed to go negative even if negative stock is disabled from Stock Settings. This is useful if you don't want to enable negative stock on high value items but few select low value items are allowed to go negative for few days.
* Weight UOM: The Unit of Measure for the item. This can be Nos, Kilo, etc. The Weight UoM which you use internally can be different from the purchase UoM.
* Weight Per Unit: The actual weight per unit of the item. Eg: 1 kilo biscuits or 10 biscuits per pack.
* Default Material Request Type: When you create a new Material Request for this item, the field set here will be selected by default in the new Material Request. This is also known as an 'indent'.
* Valuation Method: Select the Valuation Method whether FIFO or Moving Average. Read Item Valuation methods to know more.
* Allow negative stock: When checked the item will be allowed to go negative even if negative stock is disabled from Stock Settings. This is useful if you don't want to enable negative stock on high value items but few select low value items are allowed to go negative for few days.
3.4 Automatic Reordering
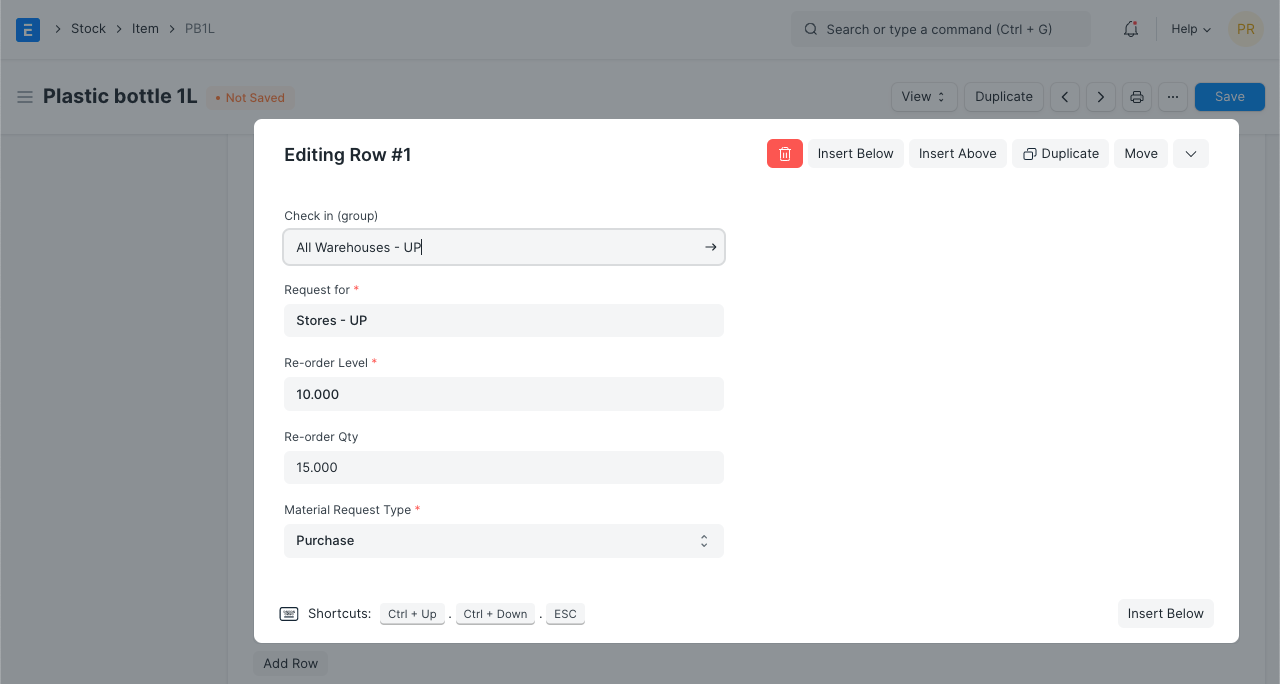
When the stock of an item dips under a certain quantity, you can set an automatic reorder under 'Auto Reorder' section. This should be enabled in Stock Settings. This will raise a Material Request for the Item. The user with roles Purchase Manager and Stock Manager will be notified when the Material Request is created.
- Check in (group): In which group warehouses to check the quantity of the item.
- Request for: Which warehouse to stock the item reorder.
- Re-order Level: When this quantity is reached, the reorder will be triggered. Re-order level can be determined based on the lead time and the average daily consumption. For example, you can set the reorder level of Motherboard at 10. When only 10 Motherboards are remaining in stock, the system will either automatically create a Material Request in your ERPNext account.
- Re-order Qty: The number of units to be reordered so that the sum of ordering cost and holding cost is at its minimum. The re-order quantity is based on the 'Minimum Order Qty' specified by the supplier and many other factors.
For example, If reorder level is 100 items, your reorder quantity may not necessarily be 100 items. The Reorder quantity can be greater than or equal to the reorder level. It may depend upon lead time, discount, transportation and average daily consumption. * Material Request Type: The Material Request type with which the stock will be reordered. This depends whether you buy the Item, manufacture it yourself or transfer it between Warehouses.
Note: The Material Request is created at 12 midnight depending on the set reorder level.
3.5 Multiple Units of Measure
You can add alternate UoMs for an Item. If the default UoM in which you sell is numbers (NoS) but you receive it in Kilos, you can set an additional UoM with an appropriate conversion factor. For example, 500 Nos of screws = 1 Kilogram, so select Kilogram/Litre as UOM and set the conversion factor as 500. To know more about selling in different UoM, visit this page.
3.6 Serial Numbers
Allow Negative Stock has removed for Serial / Batch Items from version 15. So from version 15 users won't be able to make negative stock transactions for serial /batch items even though Allow Negative Stock has enabled in the Stock Settings.
With Serial Numbers, you can track warranty and returns. In case any individual Item is recalled by the supplier the number system helps to track individual Item. The numbering system also manages expiry dates.
Please note that if you sell your items in thousands, and if the items are very small like pens or erasers, you need not serialize them.
In ERPNext, you will have to mention the Serial Number in some accounting entries. If your product is not a big consumer durable Item, if it has no warranty and has no chances of being recalled, avoid giving serial numbers.
3.7 Batches
Allow Negative Stock has removed for Serial / Batch Items from version 15. So from version 15 users won't be able to make negative stock transactions for serial /batch items even though Allow Negative Stock has enabled in the Stock Settings.
A set of Items can be manufactured in batches. This is useful for moving the batch and associate an expiry date with a certain batch.
- Has Batch No: Options for batch number, expiry date, and retaining sample stock will be revealed on ticking this checkbox. You cannot activate this if there is any pre-existing transaction for this item. If this is disabled, you'll have to enter the serial numbers manually for every transaction.
- Batch Number Series: Prefix that'll be applied to batch numbers. If you set 5x1SCR, then the first batch will be named like 5x1SCR00001 on first transaction/manufacture.
- Automatically Create New Batch: If the batch number is not mentioned in transactions, then they will be automatically created according to a format like AAAA.00001. If you always want to manually create a batch number for this item, leave this field blank. This setting will override 'Naming Series Prefix' in Stock Settings. Batch numbers can be set to be generated automatically if you manufacture the Items or can be entered manually if it comes from an external manufacturer.
- Has Expiry Date: If you tick this, the batch number will be created according to the expiry date. The expiry dates can be set in the 'Batch' master.
- Retain Sample: To retain a minimum number of sample stock of the item. You need to set a Sample Retention Warehouse in Stock Settings for this. To know more, click here.
- Has Serial No: This is similar to Batch Number Series, it'll be created when you make transactions/manufacture. If you set Serial Number Series as AA, then on the first transaction a serial number like AA00001 will be created.
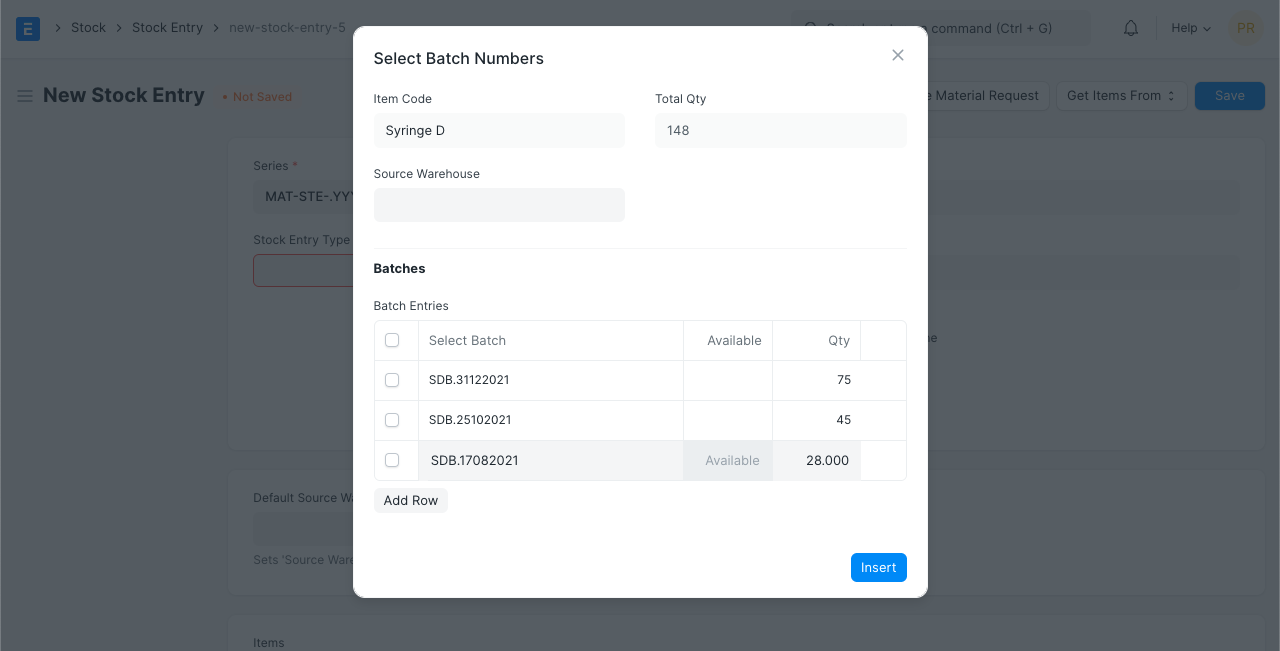
Tip: While entering an Item Code in an Items table, if the table requires inventory details, then depending on whether the entered item is batched or serialized, you can enter serial or batch numbers right away in a pop-up dialog.
Note: Once you mark an item as serialized or batched or neither, you cannot change it after you have made a Stock Entry.
To know more, visit the Stock Reconciliation page.
3.8 Variants
An Item Variant is a different version of a Item. To learn more about managing variants see Item Variants.
3.9 Item Defaults
In this section, you can define Company-wide transaction-related defaults for this Item.
- Default Warehouse: This is the Warehouse that is automatically selected in your transactions with this item.
- Default Price List: Whether Standard Selling or Standard Buying. Likewise, you can also set the purchasing and selling default accounts
- Supplier: If a default supplier is set, this supplier will be selected for new purchase transactions.
- Default Expense Account: It is the account in which cost of the Item will be debited.
- Default Income Account: It is the account in which income from selling the Item will be credited.
- Default Cost Center: It is used for tracking expense for this Item.
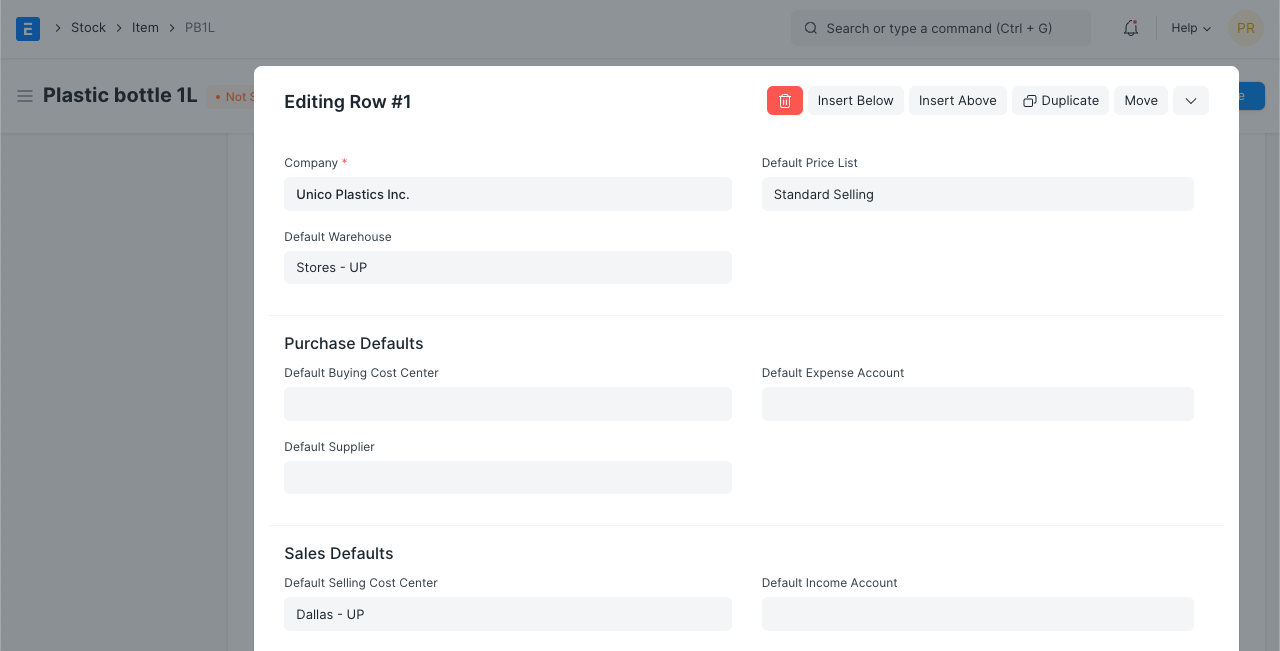
Tip: You can add more rows for multiple companies.
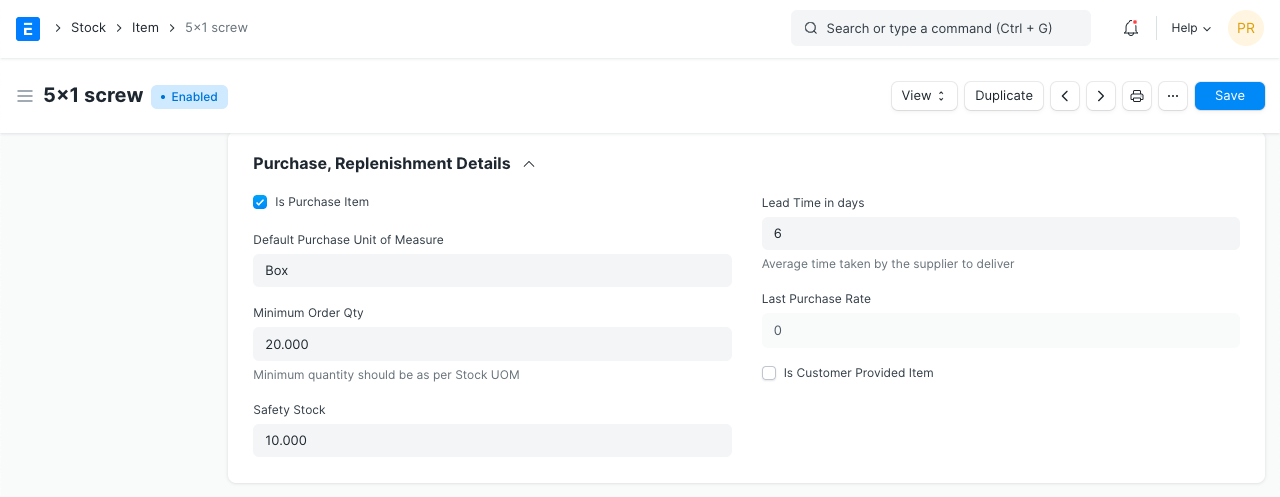
3.10 Purchase, Replenishment Details
- Default Purchase Unit of Measure: The default UoM that will be used in Purchase transactions.
- Minimum Order Qty: The minimum quantity required for purchase transactions like Purchase Orders. If set, the system will not let you proceed with the purchase transaction if the item quantity in the purchase transaction is lesser than the quantity set in this field.
- Safety Stock: “Safety Stock” is used in the report “Itemwise Recommended Reorder Level”. Based on Safety Stock, average daily consumption and the lead time, the system suggests Reorder Level of an item.
Reorder Level = Safety Stock + (Average Daily Consumption * Lead Time) * Last Purchase Rate: The rate at which you last purchased this item using a Purchase Invoice will be displayed here. * Is Purchase Item: If unticked, you won't be able to use this item in purchase transactions. * Is Customer Provided Item: Checked if Item is provided by a customer and received through Stock Entry > Material Receipt. If Checked, Customer field is Mandatory as the default customer for Material Request. To know more visit this page. * Lead time days: Lead time days are the number of days between ordering the Item and it to reach the Warehouse.
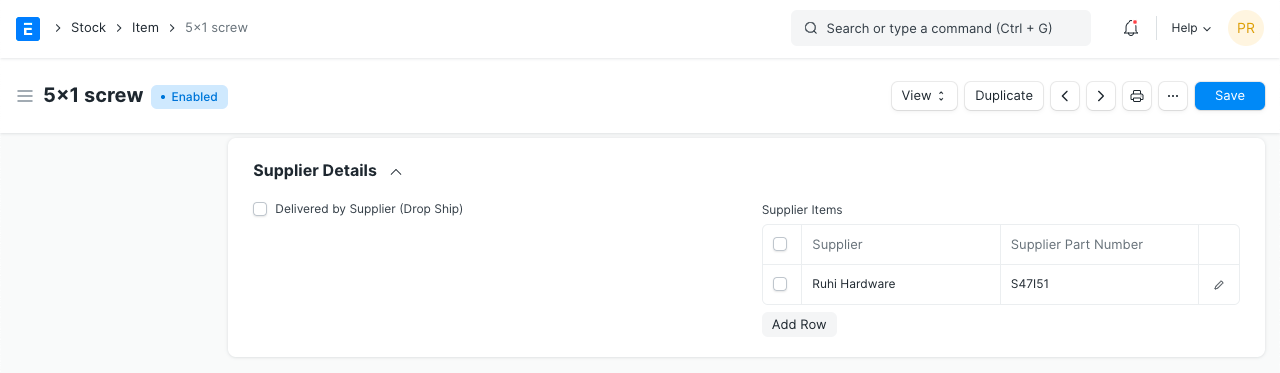
3.11 Supplier Details
- Delivered by Supplier (Drop Ship): If the item is delivered directly by the supplier to the customer, tick this checkbox. Read more here.
- Supplier Codes: Track Item Code defined by the Suppliers for this Item. In the Purchase transactions, on selecting an Item, a Supplier Part No. will be fetched as well for the Supplier's reference. You can read more about it here.
3.12 Foreign Trade Details
If you're sourcing the item from another country, you can set the details here.
- Country of Origin: The country from which you're sourcing the item.
- Customs Tariff Number: You can create a customs tariff number with a description and use it for reference here to share with custom agencies. Later it can be used to add in Delivery Notes.
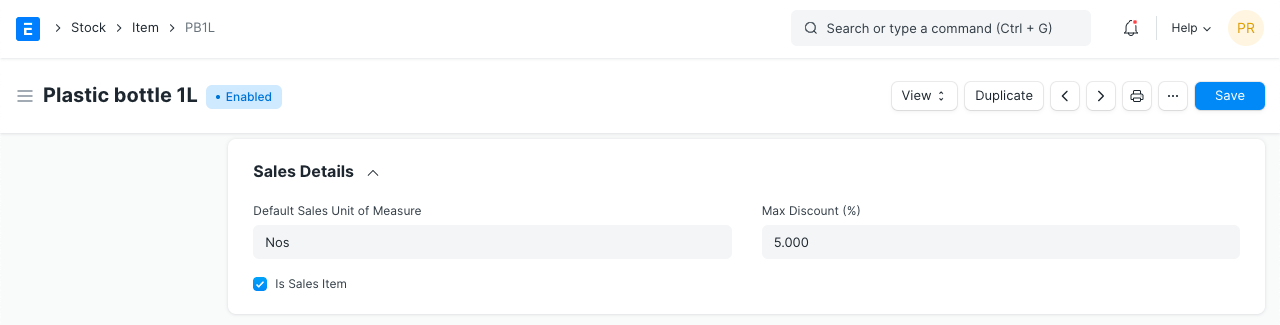
3.13 Sales Details
- Grant Commission: Grant a commission to Sales Person and Sales Partner when this item is sold. If disabled, the sales generated by this item will be ignored in the calculation of commission.
- Default Sales Unit of Measure: The default UoM that'll be fetched for sales transactions.
- Max Discount (%): You can define the maximum discount in % to be applied to an item. Eg: if you set 20%, you cannot sell this item with a discount greater than 20%.
- Is Sales Item: If unticked, you won't be able to use this item in sales transactions.
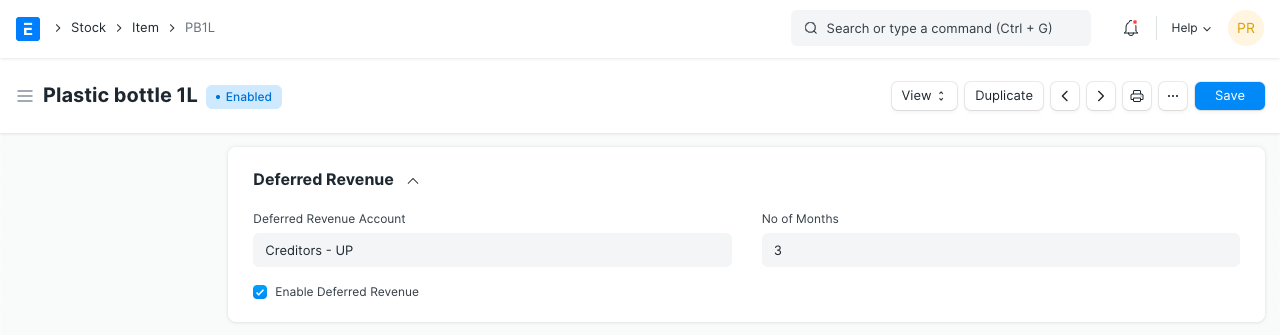
3.14 Deferred Revenue and Deferred Expense
You can enable deferred revenue or expense from the item. Once you tick the checkbox, you'll see options to set the Deferred Expense Account and the number of months through which the revenue/expense is deferred.
For example, consider a yearly gym membership, you pay the money upfront at once but the service is given throughout the year. For the gym owner, this is deferred revenue and for the customer, it is a deferred expense.
Check out the pages on Deferred Revenue for more details.
3.15 Customer Details
The Customer may identify an Item with a different Item Code. this is Similar to Supplier Code.
- Customer Name: Select a customer here.
- Customer Group: This will be fetched based on the Customer you selected in the previous field.
- Ref Code: A customer can identify this item with a different number. You can track Item Code assigned by the Customer for this Item. When you create a Sales Order, the Customer's Reference Code for this Item will be shown.
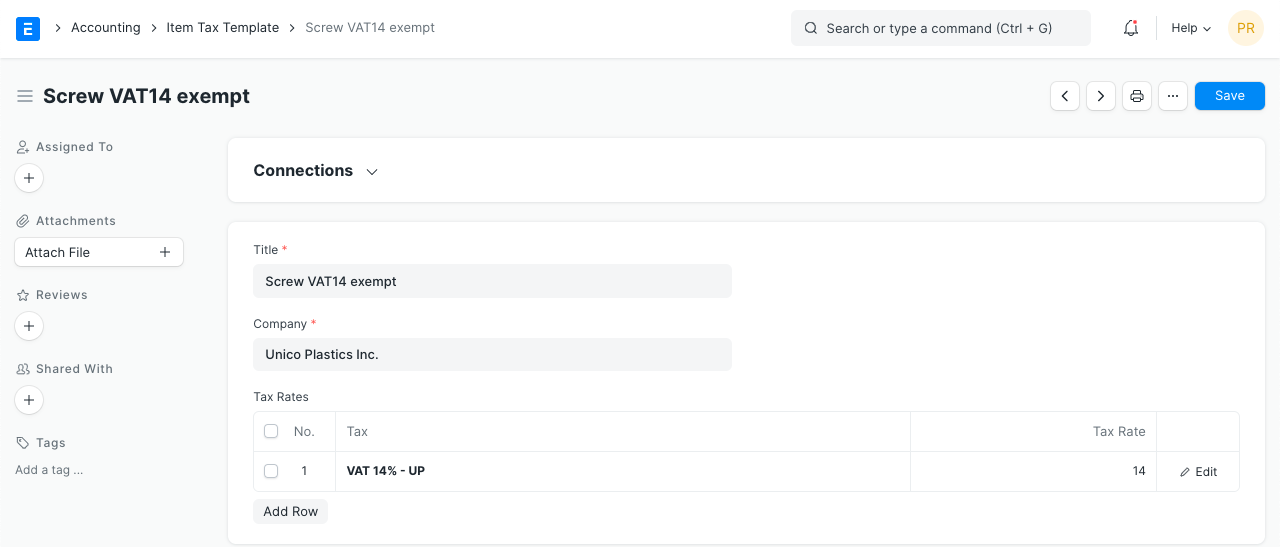
3.16 Item Tax
These settings are required only if a particular Item has a different tax rate than the rate defined in the standard tax Account.
You need to create a new 'Item Tax Template' or choose an existing one. For example, if you have a tax Account, “VAT 14%” and this particular Item is exempted from tax, then you select “VAT 14%” in the first column, and set “0” as the tax rate in the second column. Visit the Item Tax Template page for more details.
You can also set a Tax Category for this Item.
3.17 Inspection Criteria
- Inspection Required before Purchase: If an inspection is mandatory before the item is purchased, i.e., before you generate Purchase Receipt, tick this checkbox.
- Inspection Required before Delivery: If an inspection is required at the time of delivery from your Supplier is mandatory for this Item, tick this checkbox. That is, before you generate a Delivery Note.
- Quality Inspection Template: If a Quality Inspection is prepared for this Item, then this template of criteria will automatically be updated in the Quality Inspection table of the Quality Inspection. Examples of Criteria are: Weight, Length, Finish, etc.
Quality Inspection can be done with Quick View and you need not go to a different page to update the details inspection in ERPNext.
Read Quality Inspection to know more.
3.18 Manufacturing
- Default BOM: The default Bill of Materials used to manufacture this Item.
- Supply Raw Materials for Purchase: If you're subcontracting to a vendor, you can choose to provide them with the raw materials to manufacture the item using the default BOM.
- Manufacturer: Select the Manufacturer who manufactured this item.
- Manufacturer Part Number: Enter the manufacturer part number that the manufacturer has assigned to this item.
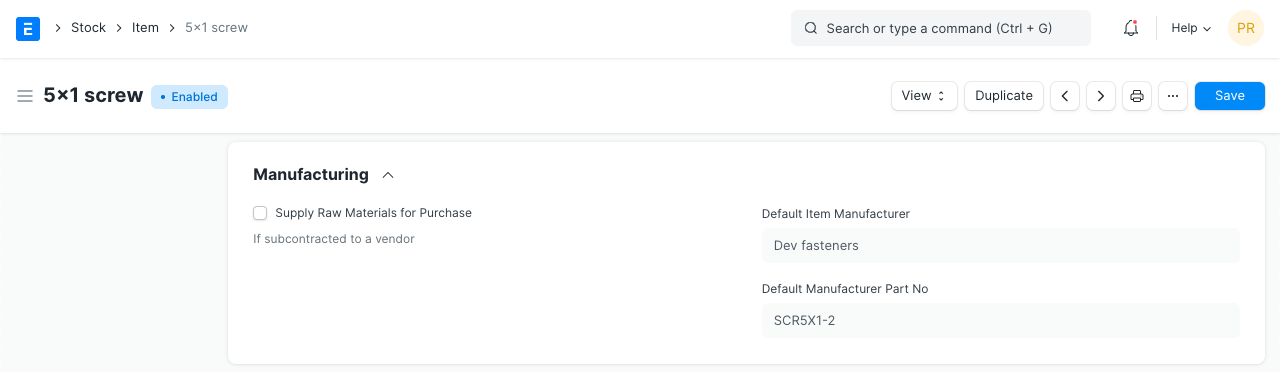 * The manufacturer details appear after you've created an 'Item Manufacturer' from the dashboard and selected that record as default. Here, add details for:
+ Item Code
+ Enter the manufacturer name
+ Enter the part number the manufacturer uses to identify this item
+ Select 'Is Default' to show the manufacturer and part number in the Item record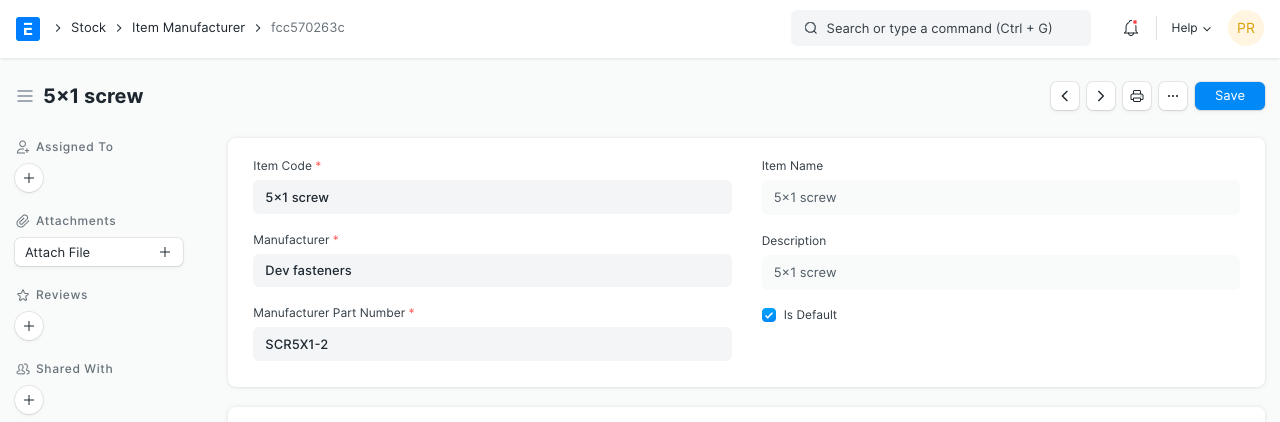
3.19 Website
- Show in Website: Choose if you want to show this Item on your website. Once you tick this, additional options will be visible to configure the item on your website. To view the item on the website click on the 'See on Website' link on the top left just above the item image. Visit the Website module to know more.
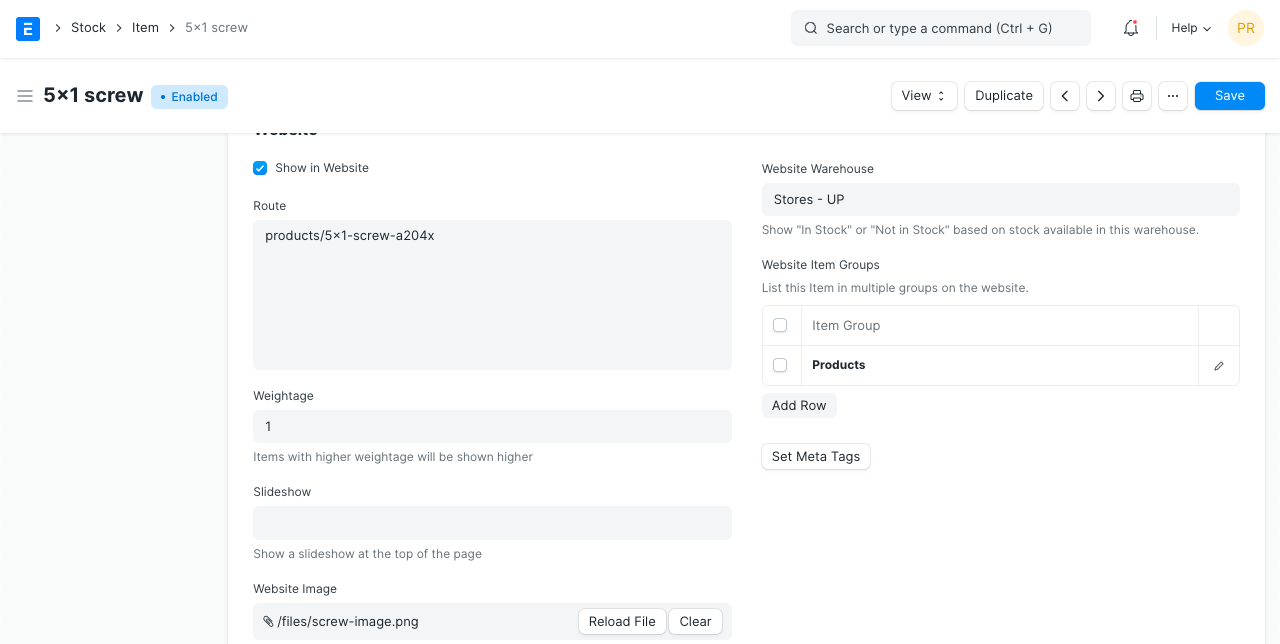 * Weightage: Items with higher weight will be displayed first on the website. The limit for the number you can enter here is very high.
* Slideshow: A slideshow can be displayed at the top of the page. Visit the Homepage page in Website module to know more.
* Image: You can attach an image instead of a Slideshow.
* Website Warehouse: Select an existing or create a new warehouse for transactions via your website. This Warehouse will be different from your offline Warehouses. Stock for any online transactions will be deducted from the Warehouses set under Website Warehouse.
* Website Item Groups: In this table you can select existing or create new Item Groups to classify items on your website.
* Set Meta Tags: Meta tags help with SEO. See Web Page to know how to add them.
* Weightage: Items with higher weight will be displayed first on the website. The limit for the number you can enter here is very high.
* Slideshow: A slideshow can be displayed at the top of the page. Visit the Homepage page in Website module to know more.
* Image: You can attach an image instead of a Slideshow.
* Website Warehouse: Select an existing or create a new warehouse for transactions via your website. This Warehouse will be different from your offline Warehouses. Stock for any online transactions will be deducted from the Warehouses set under Website Warehouse.
* Website Item Groups: In this table you can select existing or create new Item Groups to classify items on your website.
* Set Meta Tags: Meta tags help with SEO. See Web Page to know how to add them.
Visit Manufacturing and Website to understand these topics in detail.
3.20 Website Specifications
This section is for configuring other details about the item.
- Copy from Item Group: The 'Website Specifications' details will be fetched as set in a specific Item Group chosen on the previous section (2.17).
- Website Specifications: Label and its description for the item. For example, 'Warranty: 1 year'.
- Website Description: This will appear on the item page.
- Website Content: (Introduced in v12) You can create additional styling, etc., use Bootstrap 4 markup to display on the item page.
3.21 Hub Publishing Details
The hub is a free online marketplace where Suppliers and Customers can transact. If both parties are on ERPNext, the transactions happen seamlessly. You can visit the hub at: https://hubmarket.org.
- Publish in Hub: Choose if you want to publish your item on https://hubmarket.org/. It is a free marketplace. If your supplier/customer is also on ERPNext, the transactions will be seamless. For example, on creating a Purchase Order from your end, a Sales Order will be created on the Supplier's end.
- Hub Warehouse: This is a separate Warehouse to maintain the stock for your hub transactions.
- Synced With Hub: Sync item and other details with the hub when transactions take place.