Point of Sale
A Point of Sale refers to the time and place where a retail transaction takes place.
For retail operations, the delivery of goods, accrual of sale and payment all happens in one event, that is usually called the 'Point of Sale' (POS).
In ERPNext Sales Invoices can be generated from the POS. There are two steps to set up POS:
To access POS, go to:
Home > Retail > Retail Operations > POS
1. Prerequisites
Before creating and using Point of Sale, it is advisable to create the following first:
2. How to create a POS Invoice
Once you set up a POS profile, you can start billing on POS.
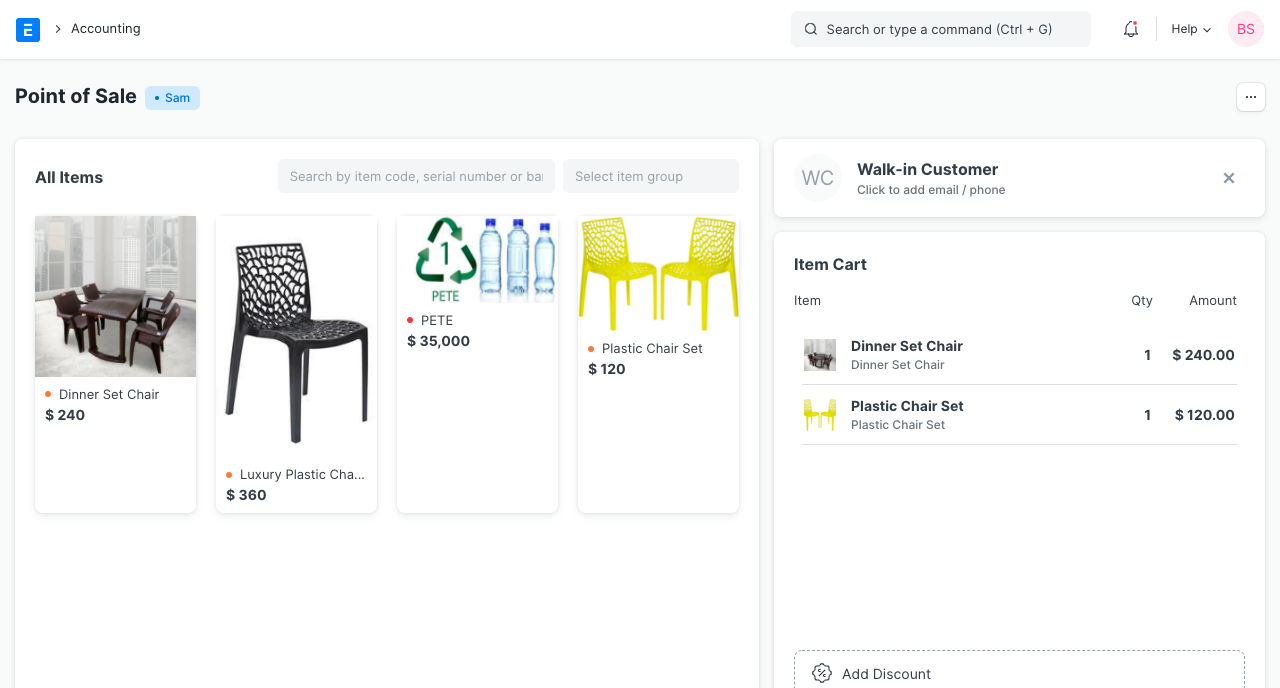
- Go to POS and select a Customer.
- Add Items from the list displayed on the right by clicking on them.
- Ensure that the Item has a Selling Price set in the Item Price list.
- Edit the quantities as needed.
- In order to edit Rate and Discount, you need to enable them in the POS Profile.
- A default Warehouse needs to be set to complete the transaction. If Warehouse is set in both Item and POS profile, the one in POS Profile will be given preference.
- Do note that you need to have Items in your Warehouse before you can sell. If Items are not available, a red dot will be shown next to the Item when selected.
- When all Items are added, cross check the net and grand totals and also the total quantity in the summary at the bottom.
- Select the payment mode and click on Complete Order. You'll be asked to submit the Sales Invoice.
- You can then print the POS invoice.
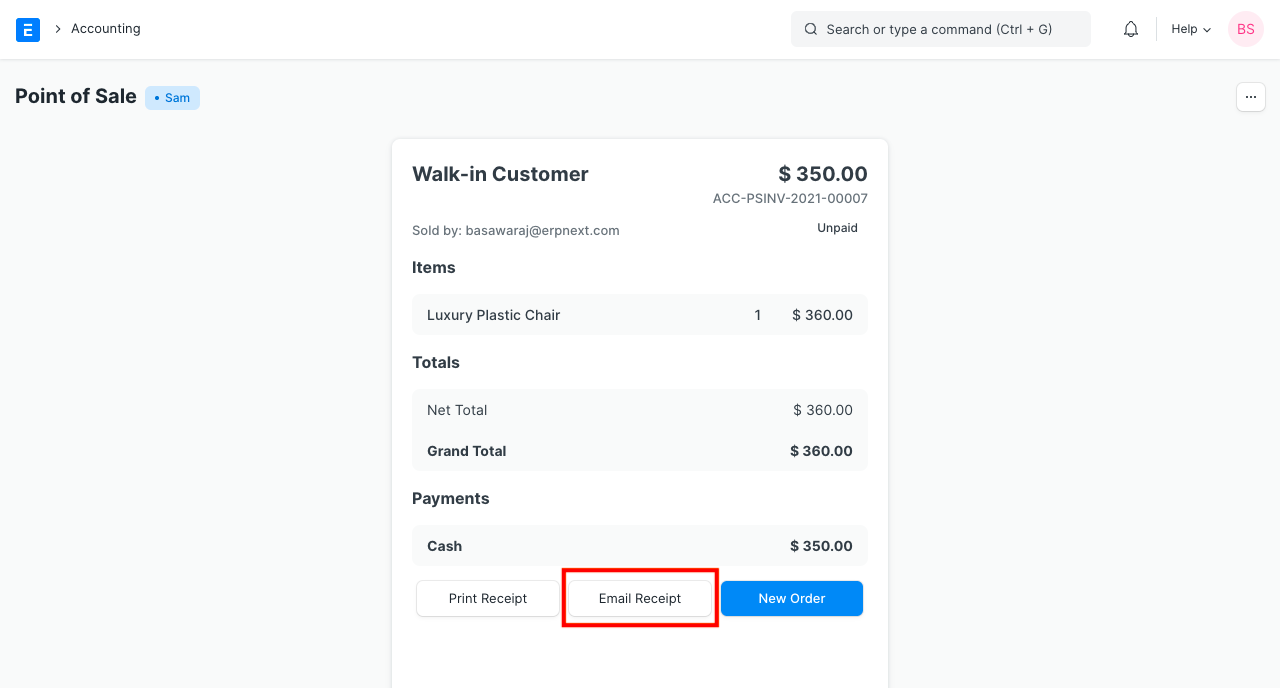
After the Sales Invoice is submitted, you can either print or email it directly to the customer.
2.2 Adding an Item
At the billing counter, the retailer needs to select Items which the Customer buys. In the POS interface you can select an Item by two methods. One, is by clicking on the Item image and the other, is through the Barcode / Serial No.
- Select Item: To select a product click on the Item image and add it into the cart. A cart is an area that prepares a customer for checkout by allowing to edit product information, adjust taxes and add discounts.
- Barcode / Serial No: A Barcode / Serial No is an optical machine-readable representation of data relating to the object to which it is attached.
- Enter Barcode / Serial No in the box as shown in the image below and pause for a second, the item will be automatically added to the cart.
Tip: To change the quantity of an Item, enter your desired quantity in the quantity box. These are mostly used if the same Item is purchased in bulk.
If your product list is very long use the Search field, type the product name in Search box.
2.3 Removing an Item from the Cart
- Select row in the cart and click on 'Remove' button in the numeric keypad
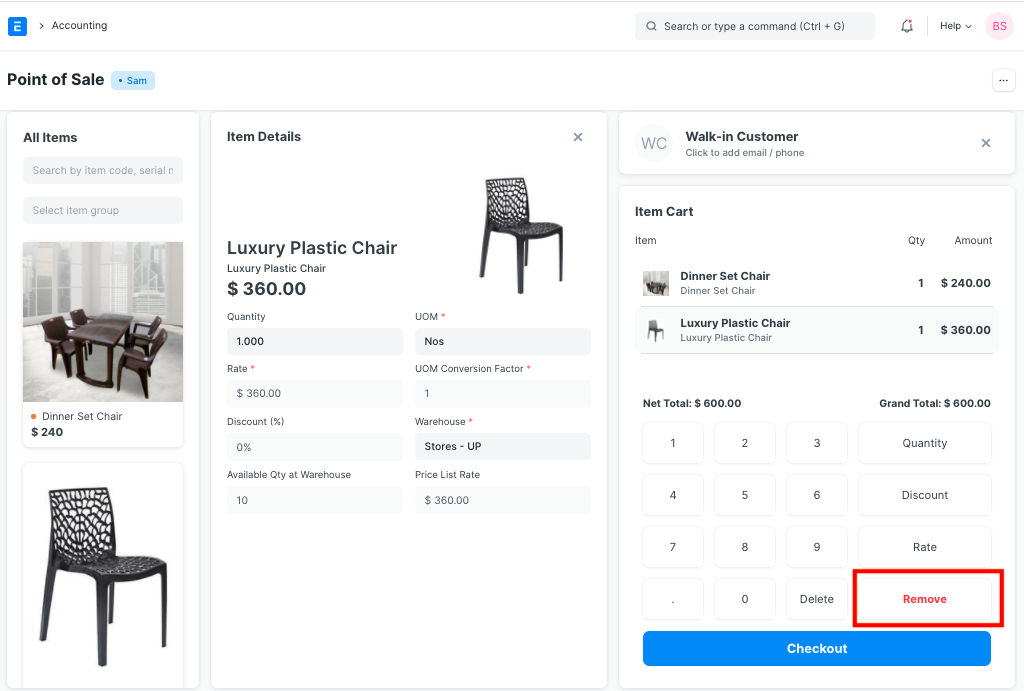
- Set Qty as zero to remove Item from the POS invoice. There are two ways to remove an Item.
- If Item's Qty is 1, click on a minus sign to make it zero.
- Manually enter 0 (zero) quantity.
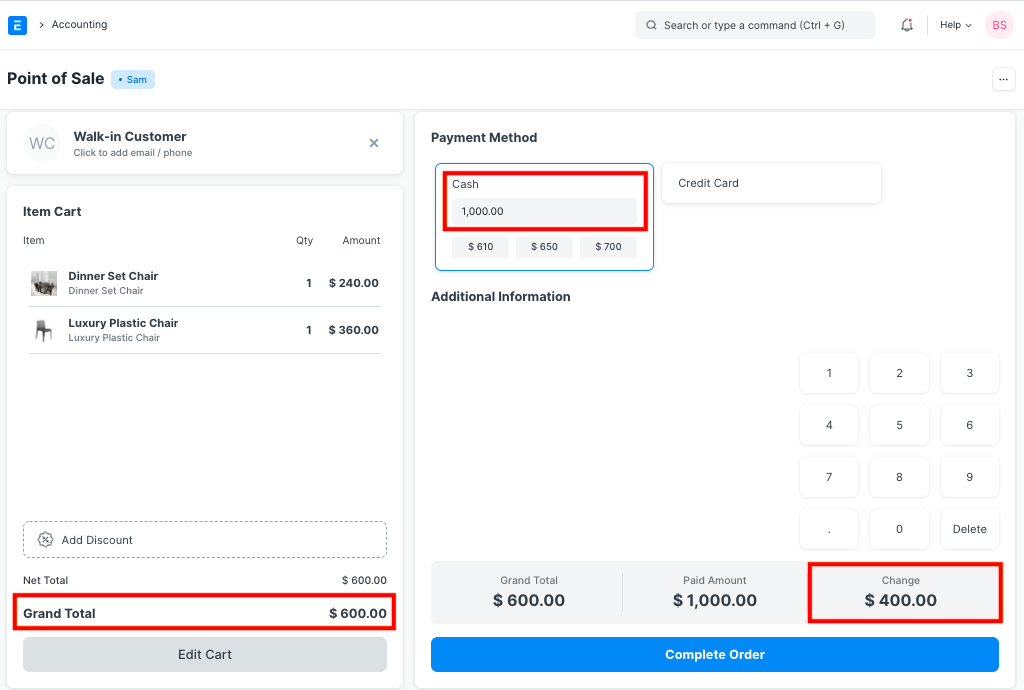
2.4 Change Amount
POS calculates the extra amount paid by the customer, which user can return from the cash account. User has to set the account for the change amount on the POS profile.
3. Features
3.1 Adding a new Customer
In POS, user can select the existing Customer during making an order or create a new customer. This feature works in the offline mode also. User can also add the customer details like contact number, address details, etc on the form. The Customer which has been created from the POS will be synced when the internet connection is active.
3.2 Accounting entries (GL Entry) for a Point of Sale:
Debits:
- Customer (grand total)
- Bank/Cash (payment)
Credits:
- Income (net total, minus taxes for each Item)
- Taxes (liabilities to be paid to the government)
- Customer (payment)
- Write Off (optional)
- Account for Change Amount (optional)
To see entries after submitting the Sales Invoice, click on View Ledger.
3.3 Email
You can also send the receipt via email.
3.4 Create Return Credit Note
You can also create a return credit note against a POS Invoice in case of return of items or the entire order. Below are the steps for issuing a credit note against an invoice:
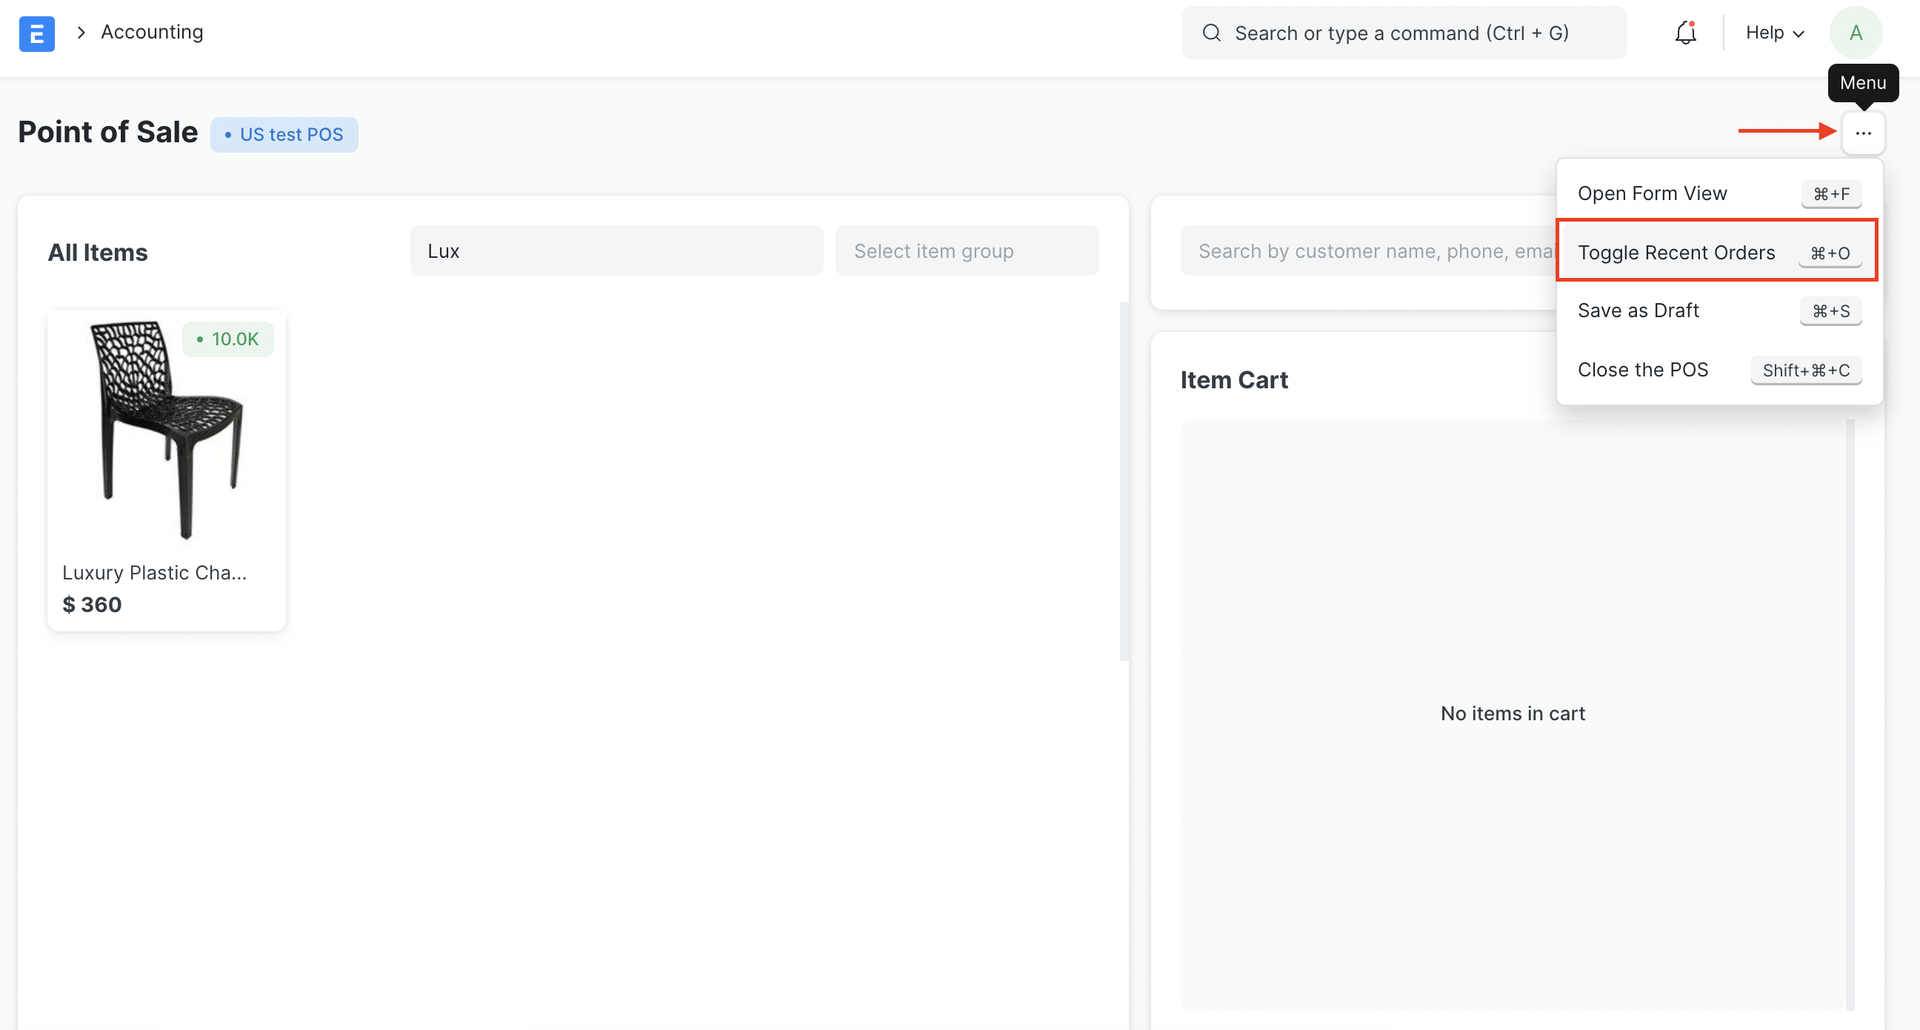
Click on menu (3 dots) and then click on Toggle Recent Orders. Keyboard shortcut for the same is ⌘+O.
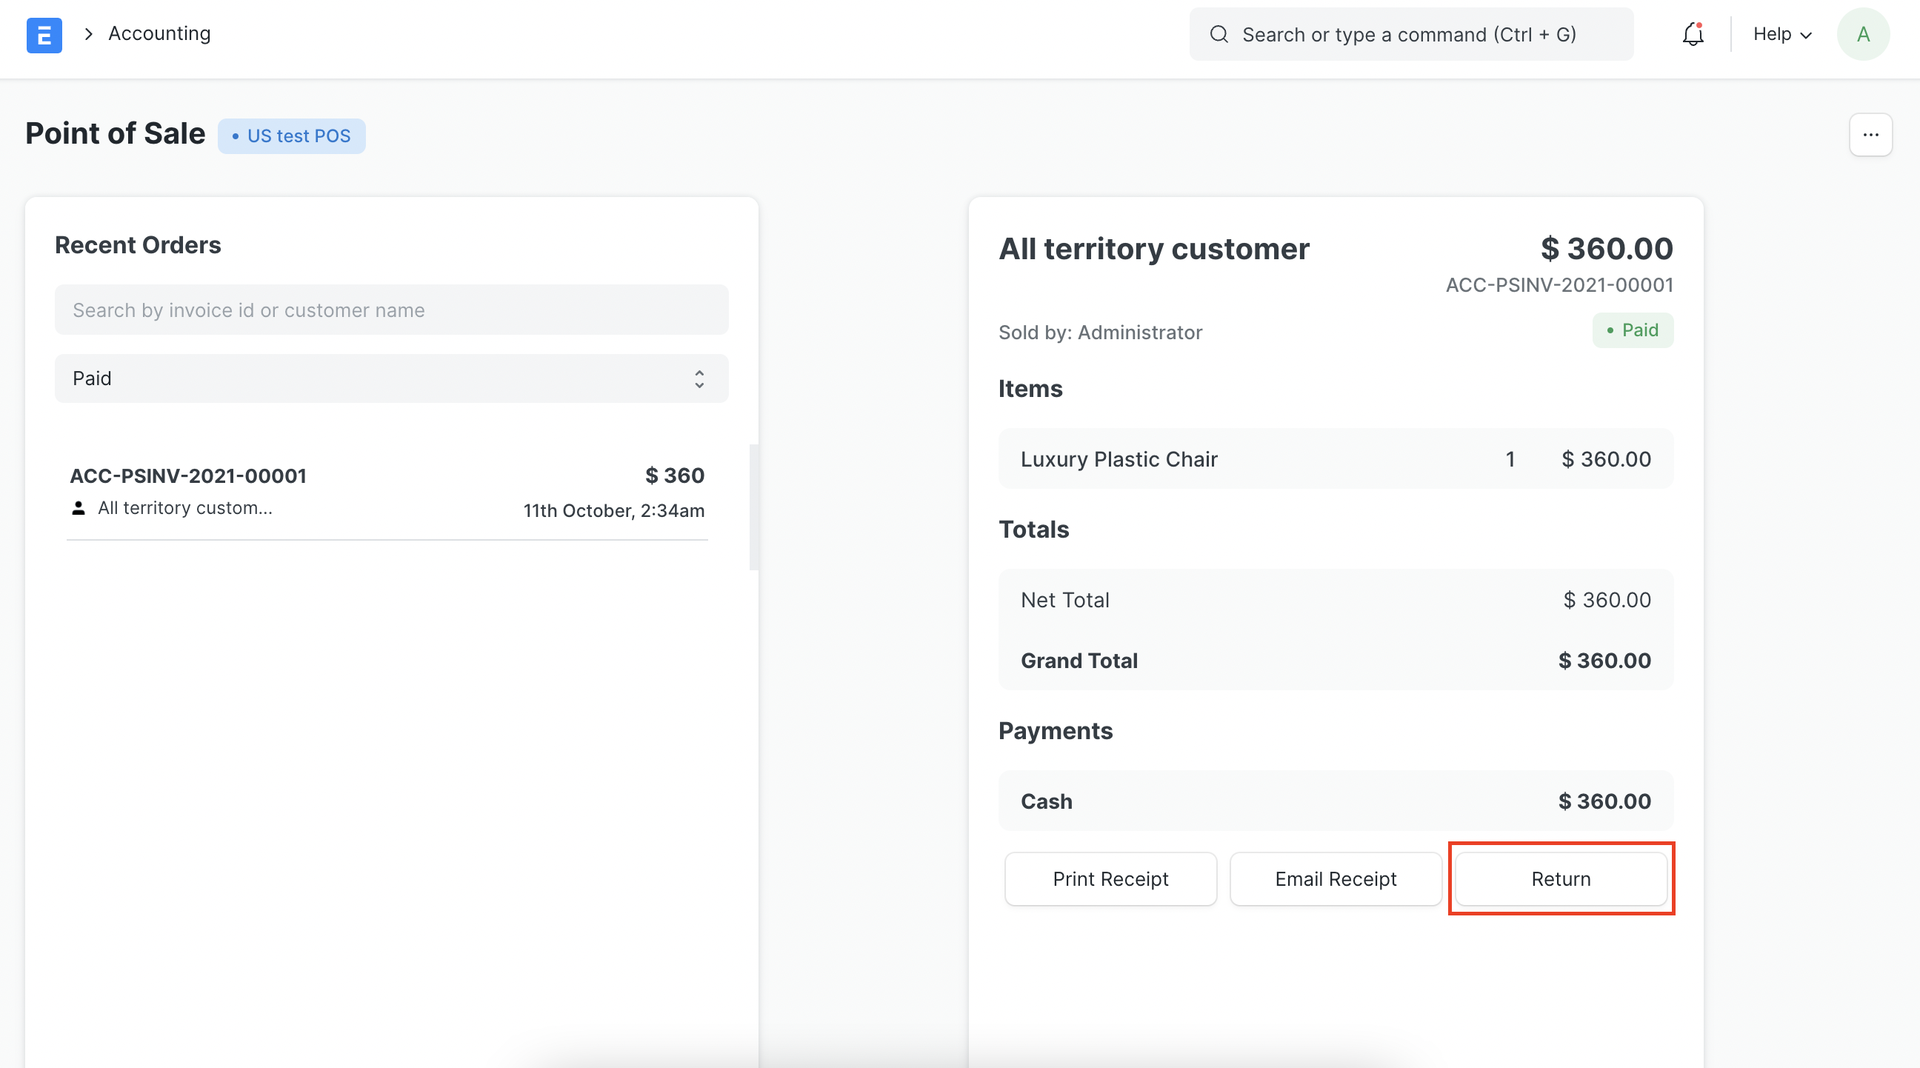
All the invoices from recent POS transactions will be displayed under the Recent Orders pane. You can either search for the invoice directly with its name or filter search results as per the status of the invoice which can be Paid, Consolidated, Draft, Return.
Select the invoice against which you need to create the credit note after which you will see the invoice details and the options to Print, Email the receipt and an option to make a Return. Click on 'Return'.
The POS screen will display the items in the invoice, along with respective negative quantities and totals in the Item Cart which indicates that it is a return credit note.
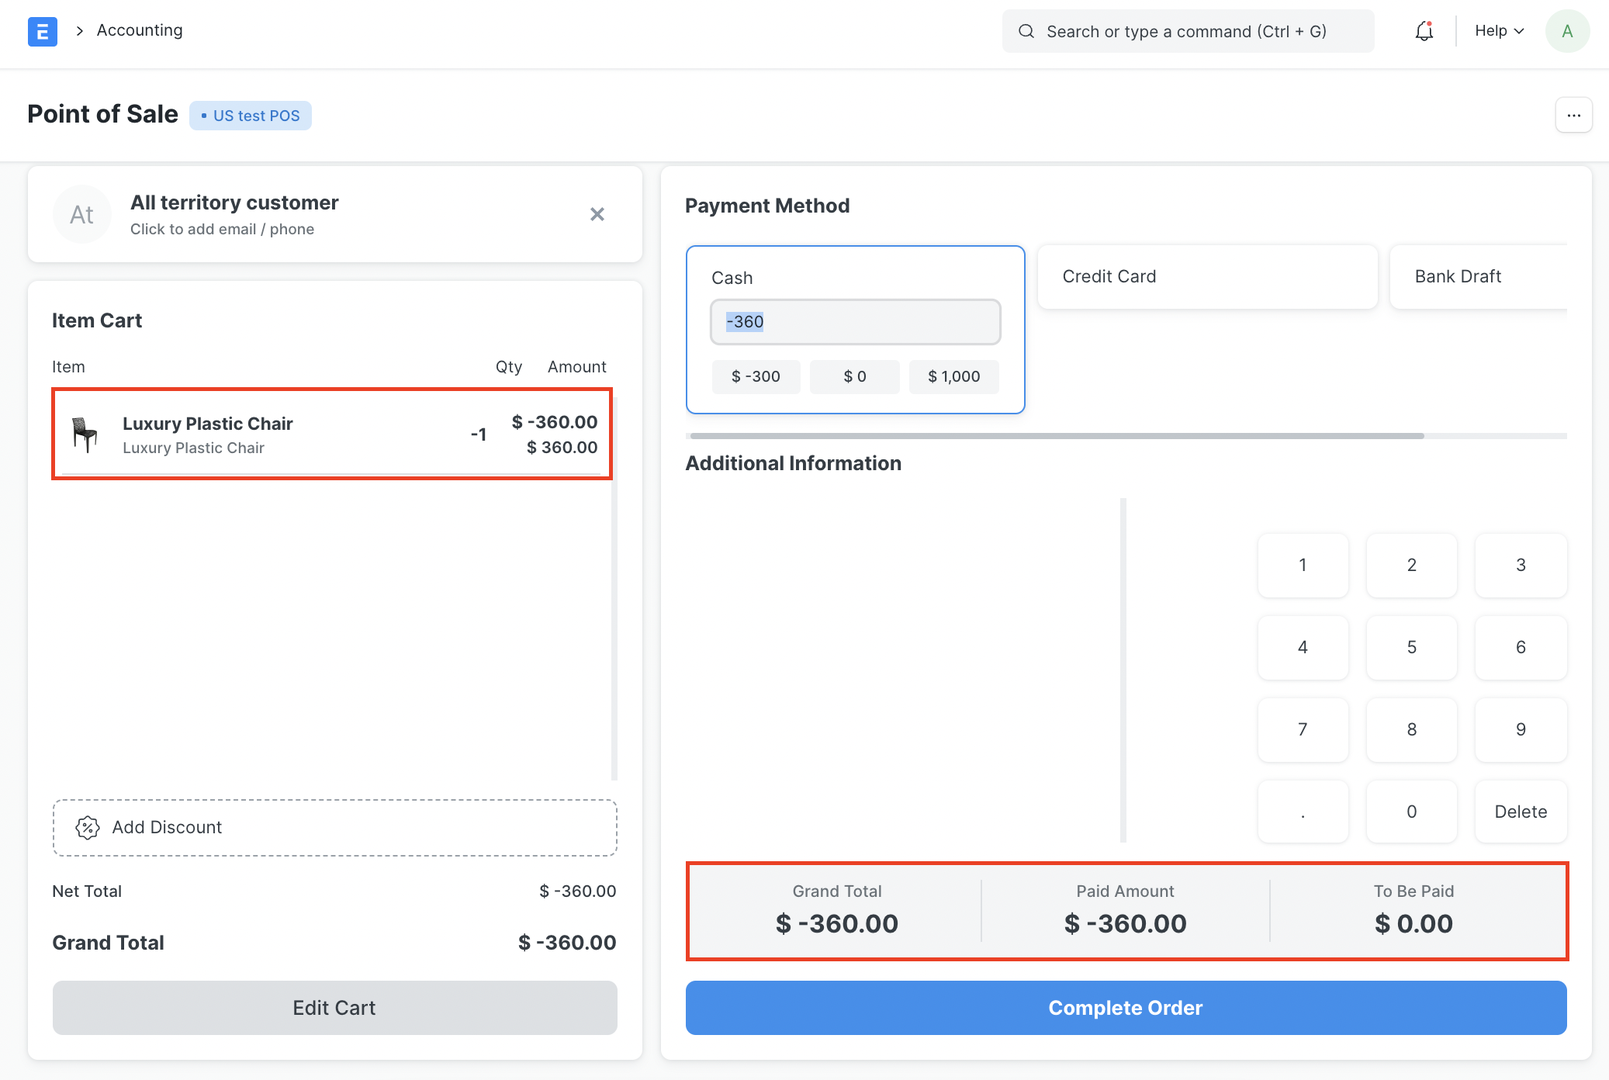
Once you checkout, you'll see the Grand Total, Paid Amount and Taxes too if applicable.
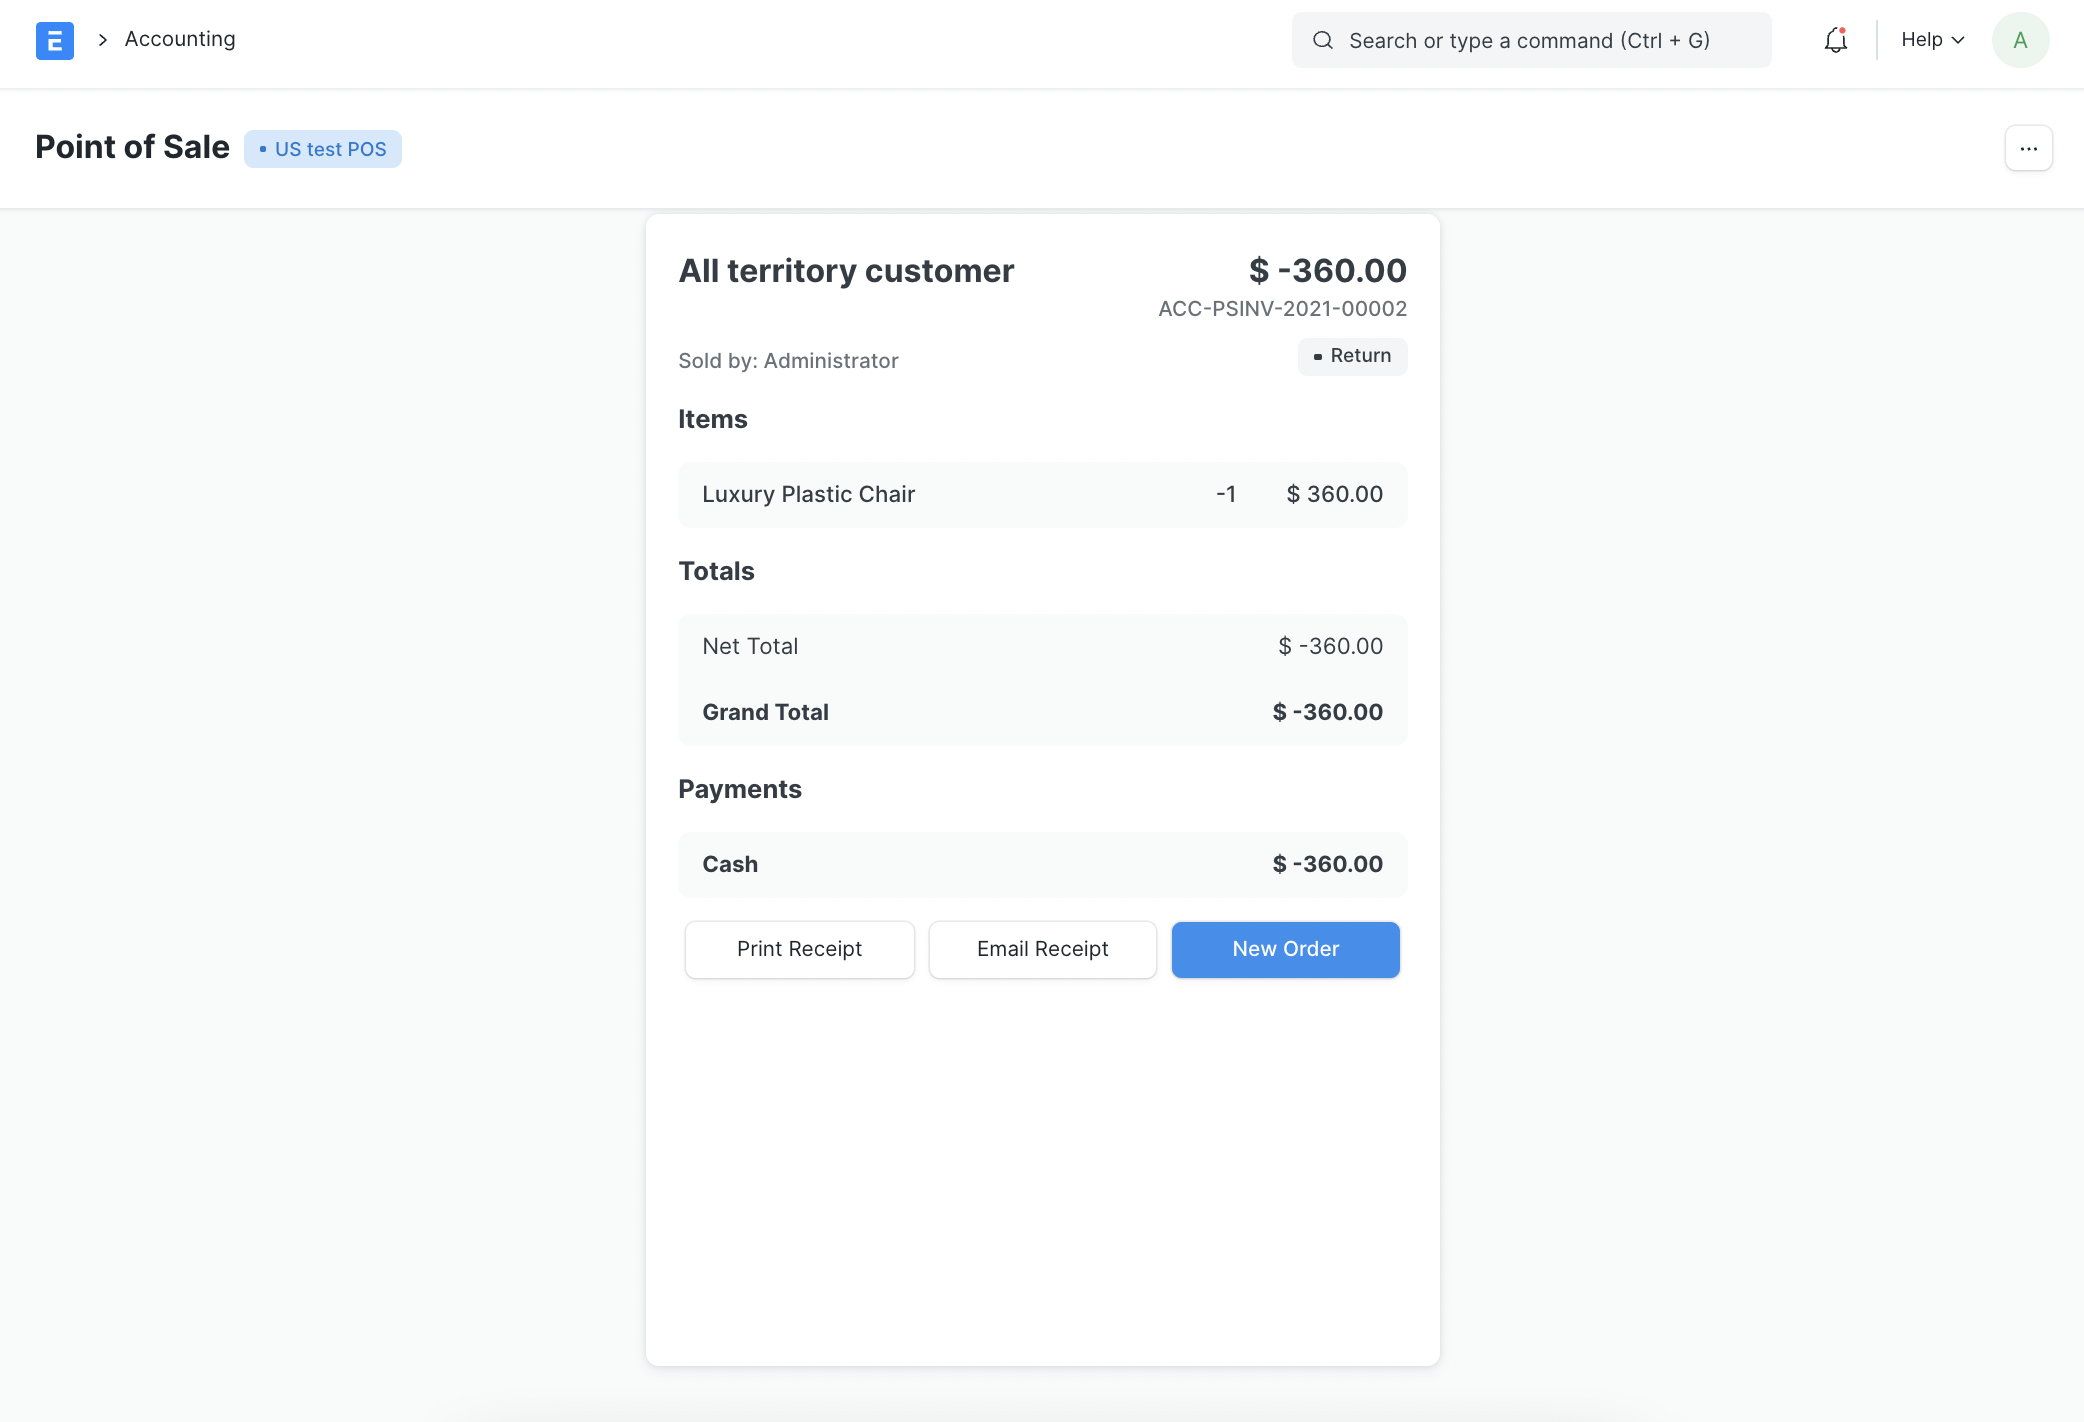
Clicking on Complete Order will complete the process and create the final return credit invoice and display the bill on the screen like a normal order
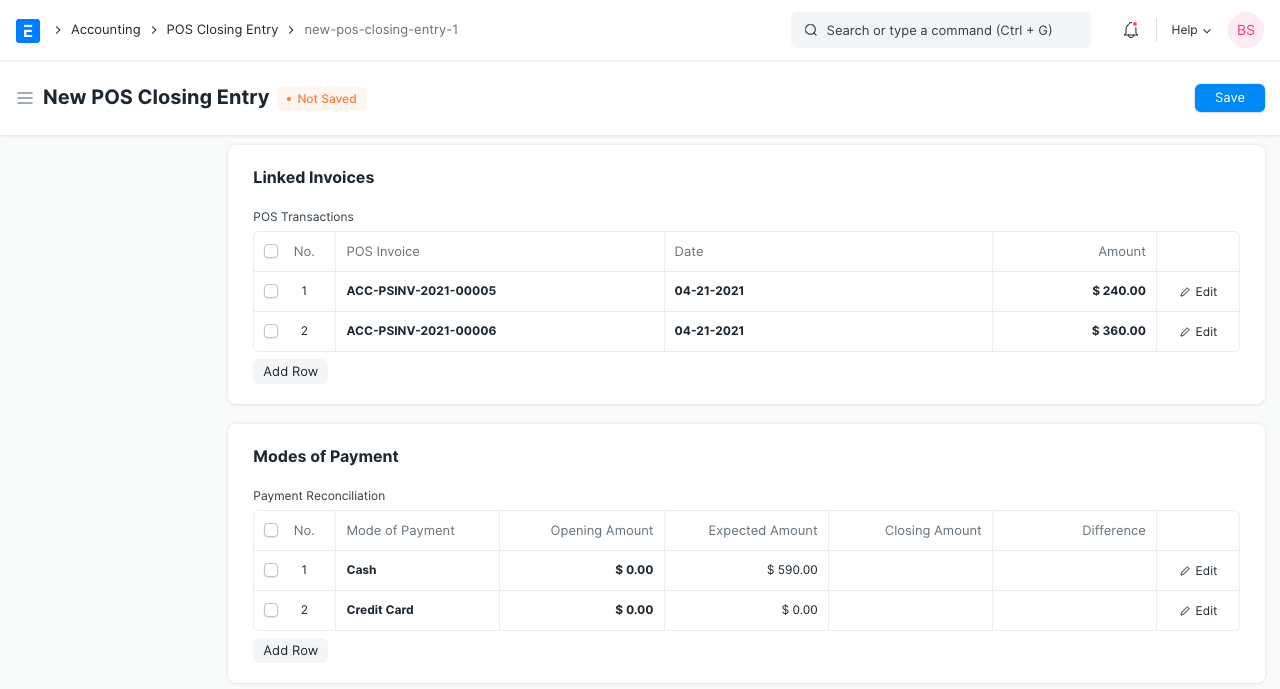
3.5 POS Closing Voucher
At the end of the day, the cashier can close his/her PoS by creating a POS Closing Voucher. Click on the Menu and select 'Close the POS'. Select the period, your POS Profile and your user to retrieve all sales registered. At the end of the day, the cashier can close his/her shift by creating a POS Closing Voucher.
Click on the Menu and select 'Close the POS'. Select the period, your POS Profile and your user to retrieve all sales registered.
On creating a POS Closing Voucher, all the POS invoices fetched for the selected period will be consolidated into one final Sales Invoice. The status of all the POS invoices will change from 'Paid' to 'Consolidated' once they are successfully consolidated into a sales invoice on closing.
If there are more than 10 invoices while closing a POS, consolidation of the invoices will take place in a background job and would be subitted after the background job gets completed. The Accounting Ledgers would be affected only after the Closing Voucher is submitted successfully and the consolidated sales invoices are created.