Unicommerce Integration
Unicommerce is aggregator for many e-commerce platforms that allows you to sell items through many supported marketplaces and process order via unified interface called Uniware. Learn more about Unicommerce at https://unicommerce.com/
ERPNext Integration with Unicommerce
ERPNext offers a full 2-way integration with Unicommerce using Uniware's REST APIs. This integration is provided using Frappe App officially supported by Frappe team. Broadly this integration covers:
- Item catalogue syncing with Unicommerce (2-way)
- Inventory Syncing (1-way from ERPNext to Unicommerce)
- New Sales Order syncing
- Sales Invoice syncing OR Sales Invoice generation (Any one option should be used)
App Installation
- If you are hosting your ERPNext site on Frappe Cloud, you can quickly install the app by going to your site Dashboard. The app is available in Frappe Cloud Marketplace
- If your site is hosted by Frappe, please raise a support ticket to get the app installed on your site.
- If you are self hosting ERPNext you can install the app using Frappe bench. Refer bench documentation for installing Frappe Apps.
bench get-app ecommerce_integrations --branch main
Authentication and basic setup
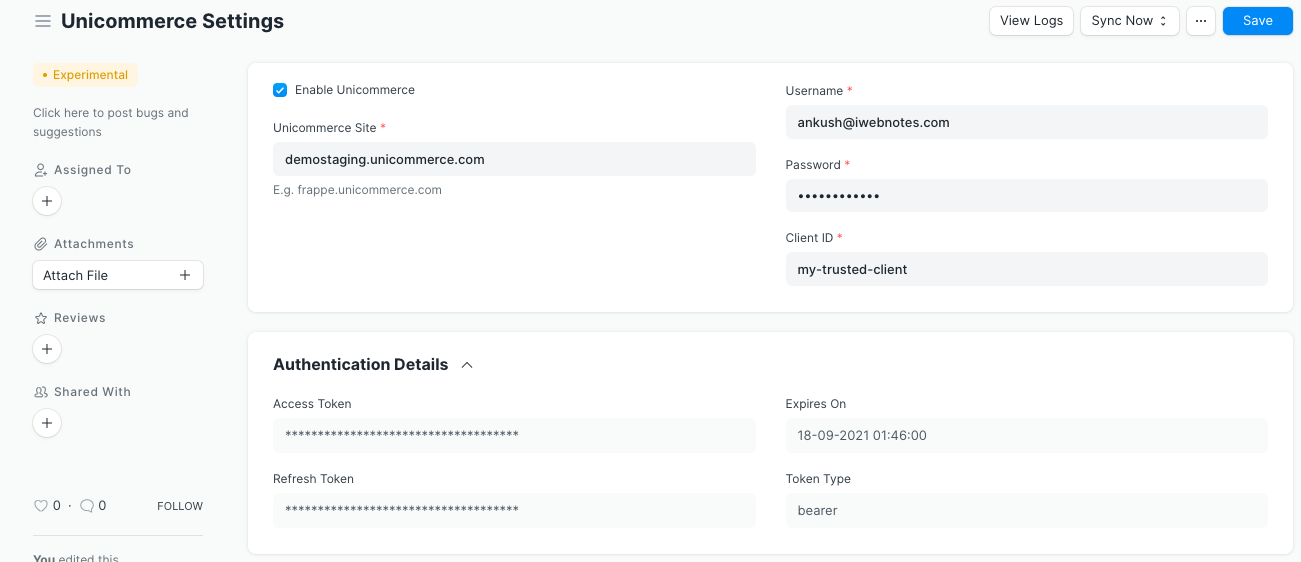
- Once app is installed go to "Unicommerce Settings" page.
- Click on "Enable Unicommerce" checkbox.
- Enter your Unicommerce site, username and password.
- Client ID is added by default, however if you've configured a separate client ID, you need to update it here. If you're unsure about your client ID, please get in touch with Unicommerce support team.
- Click "Save" this will initiate process of authenticating with Unicommerce and setting up custom fields for integration.
- Once this setup is finished you'll see access/refresh tokens in "Authentication Details" section. This implies that authentication was successful and you can now start working on further setup.
If authentication fails:
- Please recheck entered details.
- Your server might be getting blocklisted by firewall. Get in touch with Unicommerce support team to get your server's IP whitelisted.
Item Sync
This integration checks for newly created items and uploads them to Unicommerce on hourly basis. To enable this feature you need to setup following:
- Go to "Unicommerce Settings" and enable "Upload new items to Unicommerce".
- Set a Default Item Group. This is only used as fallback in case item group is missing.
- While creating a new item check "Sync with Unicommerce" checkbox, to upload that item to Unicommerce.
- This checkbox can also be enabled on existing items.
Unicommerce SKU code is immutable, hence you should not change Item Code after creation.
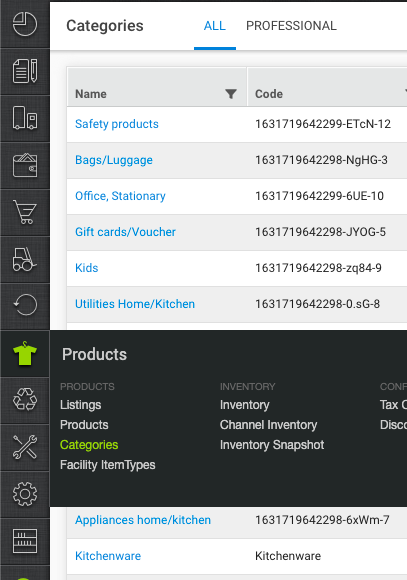
In order to correctly sync item group with product categories you need to map all item groups to their respective product categories on Unicommerce.
To map and item group to product category:
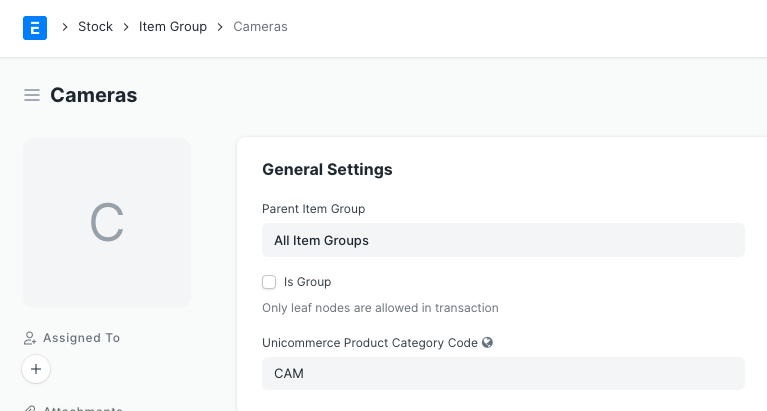
- First find product category code on Unicommerce.
- Open related Item Group on ERPNext and update Unicommerce product category code there.
Item sync field mapping is as follows:
| ERPNext field | Unicommerce Field | Comments |
|---|---|---|
| Item Code | SKU | Unicommerce SKU restrictions apply |
| Item Name | Item Name | |
| Description | Description | |
| Weight per unit | Weight | Only if set in Grams. |
| Shelf life in days | Shelf life | |
| HSN Code | HSN Code | |
| Image | Image | |
| Unicommerce item length | Length | |
| Unicommerce item width | Width | |
| Unicommerce item height | Height | |
| Disabled | Enabled | (opposite is mapped) |
| EAN barcode | EAN | |
| UPC Barcode | UPC-A | |
| Item group | Product category |
Inventory Sync
Once Item sync is setup Inventory Sync can be enabled. The integration checks for changes in ERPNext inventory and pushes them to Unicommerce on configured interval. ERPNext inventory levels are considered source of truth by the integration and Unicommerce inventory levels are overwritten by ERPNext's inventory values.
- Go to "Unicommerce Settings" and scroll down to "Inventory Sync" section.
- Check "Enable inventory Sync"
- Configure the sync frequency. Recommended frequency is 15 to 60 minutes.
- In Warehouse mapping table add all the facility codes you have in Unicommerce and map them with ERPNext warehouse.
- Check "Enabled" checkbox for all facilities you want to enable.
- Save the settings.
Note: All inventory is pushed to "DEFAULT" shelf. Unicommerce Shelves are not supported by this integration, make sure you only have one shelf on Unicommerce called "DEFAULT" to ensure correctness of inventory sync.
Note: Unicommerce, like other e-commerce intengrations does not support fractional inventory.
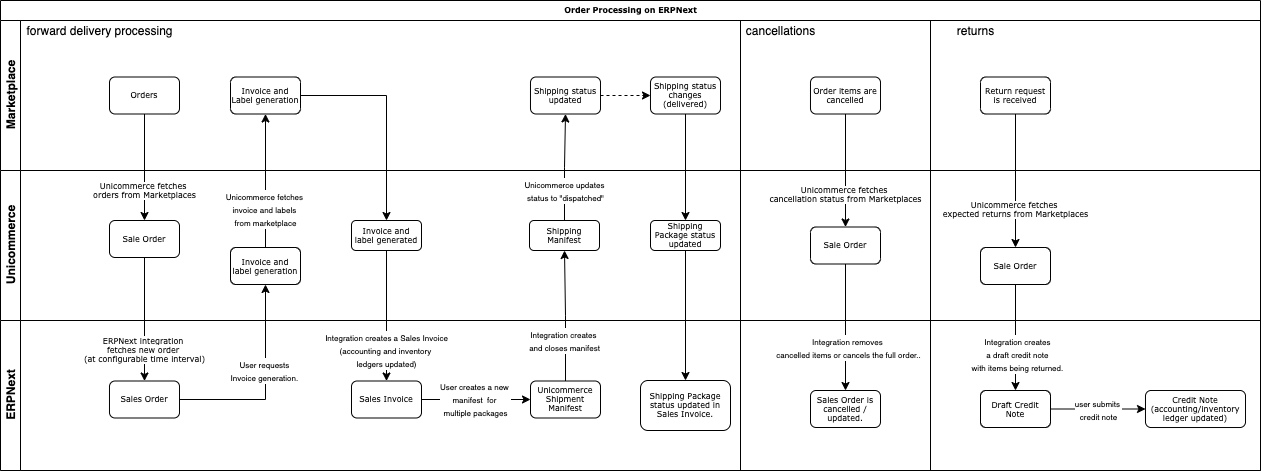
Sales Order Processing - Workflow
Following is workflow for processing orders on ERPNext. You can alternatively also process orders on Unicommerce and only sync finished order.
Sales Order Sync - Channel(s) Setup
Unicommerce Integration supports receiving and processing from multiple channel. To allow this, setup for Sales Order sync also has to be done in multiple stages.
Defaults for Sales Order Sync
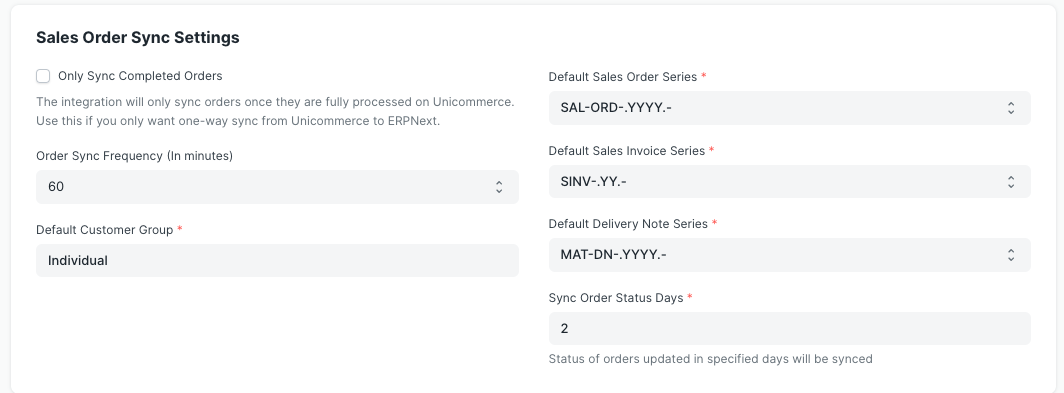
- Go to "Unicommerce Settings".
- Scroll to "Sales Order Sync" setting section.
- Setup order sync frequency. 30 to 60 minutes is recommended frequency.
- Setup default customer group and naming series for documents.
Channel specific Sales Order sync configurations

To allow for flexible configuration for each channel you need to create "Unicommerce Channel" document for each channel you want to enable for Sales Order sync.
- Go to "Unicommerce Channel" from searchbar or from Unicommerce settings page.
- Click "Add Unicommerce Channel"
- Fill in required details like channel ID, default warehouse, company, accounts and naming series.
- If Shipping for this channel is handled by marketplace then click "Shipping Handled by marketplace" or uncheck it.
- After fully configuring the channel click on "Enabled" checkbox.
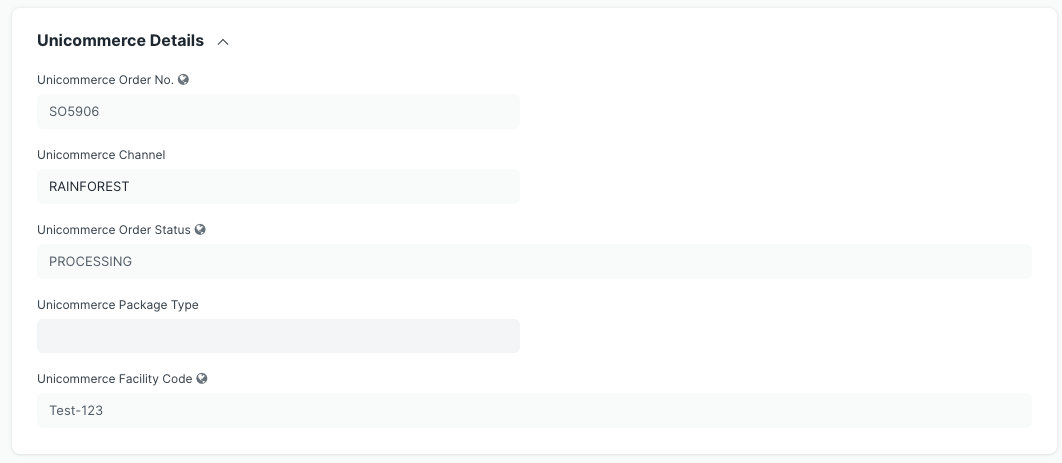
New Sales Order created in Unicommerce will now start syncing with ERPNext. During this process if new item is encountered then it's created in ERPNext using information from Unicommerce. Relevant information about Unicommerce order is mapped to ERPNext fields, additional information can be found in "Unicommerce Details" section on Sales ORder.
Sales Invoice Sync
Sales Invoice syncing can be handled in one of two ways. Please select the appropriate option as per your needs.
1. Processing invoice on Unicommerce (recommended)
If you want to process orders and invoices on Unicommerce and only sync fully processed orders in ERPNext then enable "Only Sync Completed Orders" in Unicommerce settings.
2. Processing invoice on ERPNext
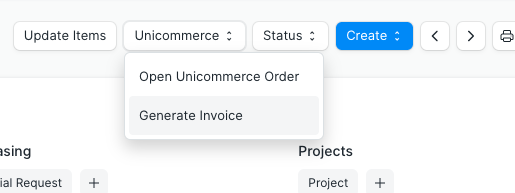
If you want to process orders from ERPNext only then you need to generate invoice from ERPNext's Sales Order.
In order to generate invoice, go to synced Unicommerce Sales Order, click on "Unicommerce > generate invoice". This will create a Sales Invoice and deduc the stock too.
Shipment Manifest
If you're processing orders on ERPNext using method #2 described above then you need to create and submit a shipping manifest to let Unicommerce know you've shipped the orders.
Pre-requisites is to setup following doctypes, you can find code on Unicommerce manifest creation page: 1. Create Unicommerce Shipping Provider 2. Create Unicommerce Shipping Method
Process of creating manifest:
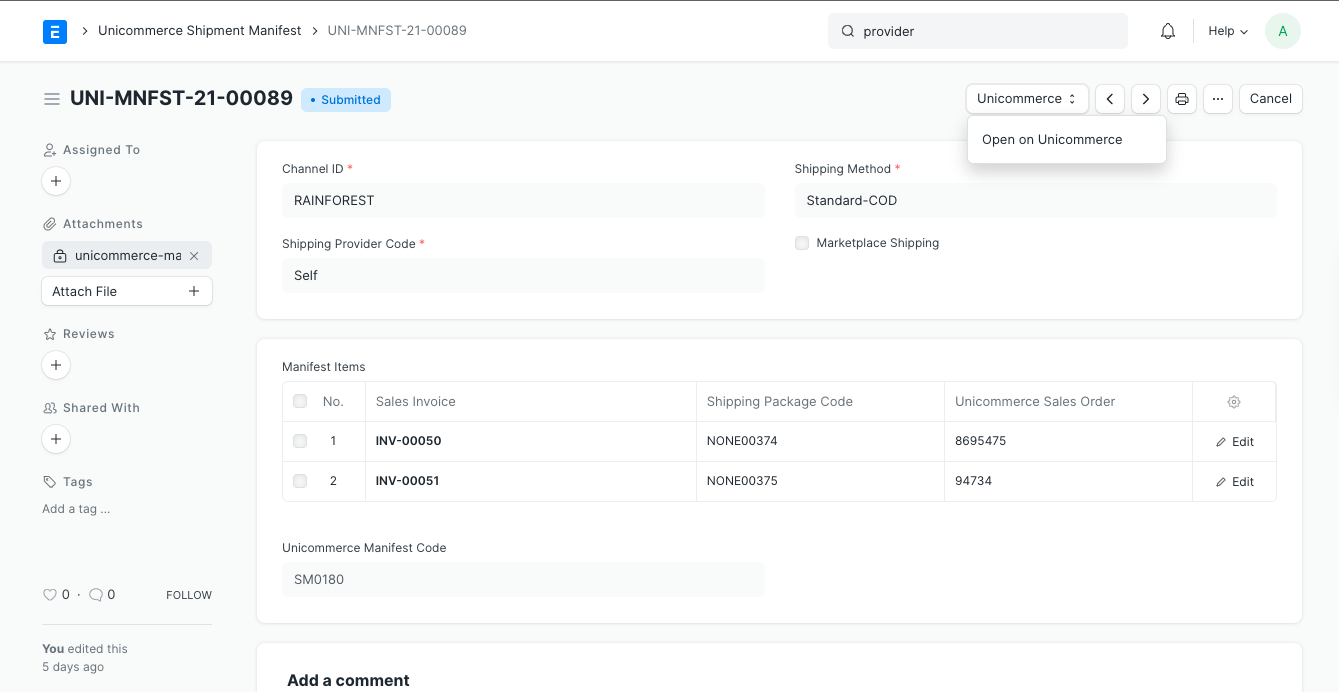
- Once you're ready to dispatch the packages to shipping provider, you should create "Unicommerce Shipment Manifest" document. Go to search bar > "Unicommerce Shipping Manifest" > + Add
- Select Channel ID, Shipping Method, and Shipping provider code.
- Now you can either use "Get Package" button to fetch open orders based on selected filters or use "Scan AWB Code" field to scan AWB of packages. Both will auto populate remaining details after saving.
- Once you're sure that all details look correct, save and submit the document.
- Upon submitting the manifest, same manifest is created and closed on Unicommerce and shipments are marked as "Dispatched". Unicommerce Manifest PDF is also fetched and attached to ERPNext manifest document.
Status Updates
Status of Unicommerce is periodically updated in ERPNext, you can see the current status in the "Unicommerce details" section.
Order Cancellations
When order gets cancelled on Unicommerce, the integration syncs this action and cancels the order on ERPNext as well. Partially cancelled orders are also synced and cancelled items are removed from the ERPNext Sales Order. Both full and partial cancellations are synced on hourly basis and right before generating invoices.
Order returns
When return is created on Unicommerce, the integration syncs this action and creates a Draft Credit Note in ERPNext.
Both return cases are handled by integration:
- RTO (return to origin) When shipment is returned to origin, shipment status changes and a Credit Note (with Update Stock) is created is created in ERPNext. Credit Note will be full return.
- CIR (Customer Initiated Return) When a customer returns shipment, it is reflected on Unicommerce's Sales Order section. Full or Partial Credit note is created depending upon the nature of customer initated return.
You can view all returns by going to "Sales Invoice" and filtering by "Is Return" set to Yes. Return tracking code is also captured on Credit Note.
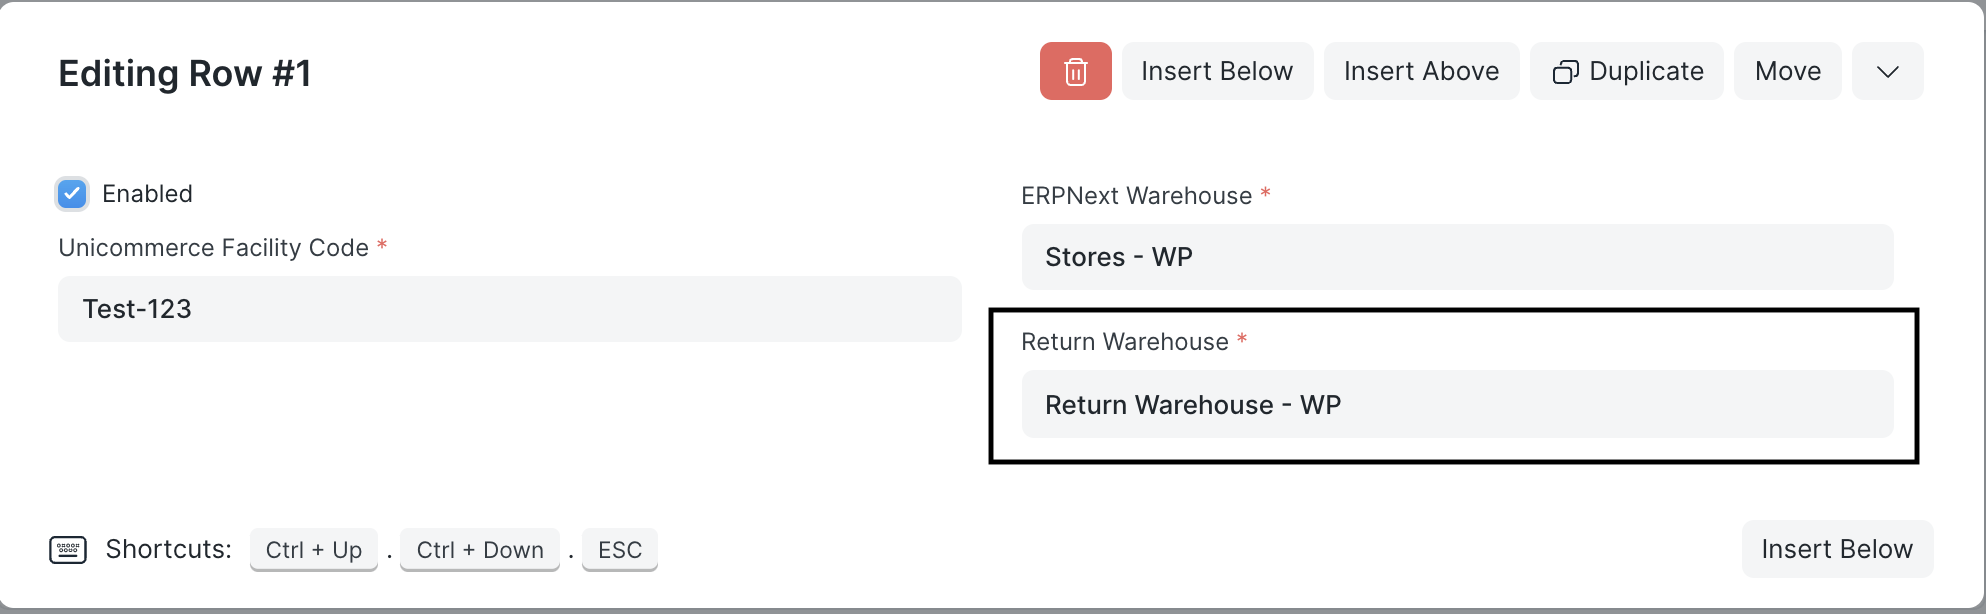
While creating returns, the return warehouse is picked based on configured Return Warehouse in Unicommerce settings. If it's not set, original warehouse will be used.