M-Pesa Integration
M-Pesa integration allows processing transactions with the payment gateway provider M-Pesa.
M-Pesa Integration facilitates the processing of payments between the M-Pesa application and ERPNext. M-Pesa Integration only works with the POS to facilitate the payments for the same. This feature doesn't work with the shopping cart.
To set up M-Pesa, go to:
Integrations > Payments > M-Pesa Settings
1.How to get your M-Pesa credentials?
- In order to activate your API credentials, you need to log in to your M-Pesa account.
- Then, open the Go Live section of the application and follow the steps to get the approval for the app.
- When all the test cases are satisfied and expected results match the final results, you need to submit the document and follow the steps to get the final credentials for your application.
- Details mentioned in the Production URL and Credentials section are the credentials that you are supposed to use in M-Pesa Settings.

2.Setting up M-Pesa
To enable M-Pesa Express, you need to configure all the mandatory parameters which you have received from M-Pesa. If you want to use the staging environment of the integration, you can select the staging option and use the staging credentials provided by M-Pesa by creating a separate application for the same.
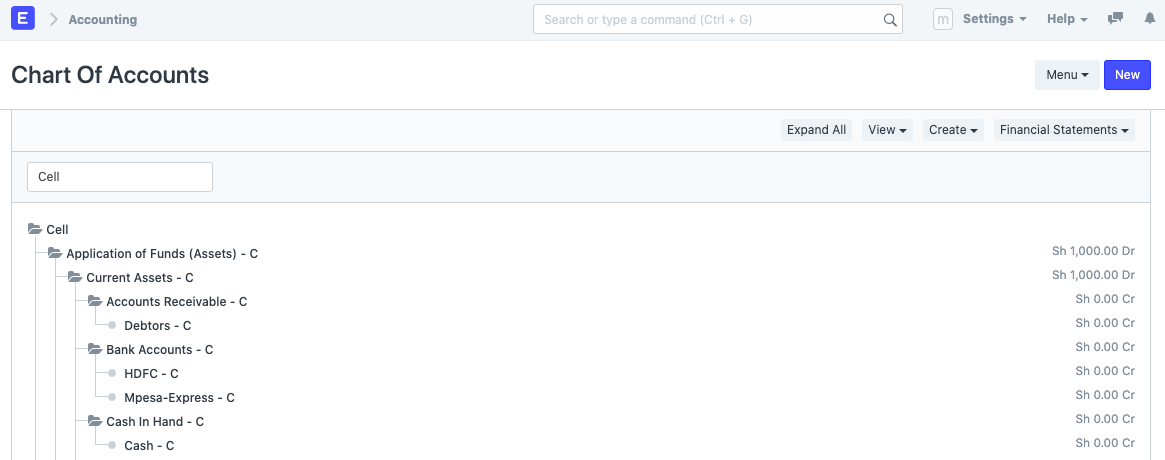
On enabling the M-Pesa integration in ERPNext, the system will create a Payment Gateway record and an Account head in the Chart of Accounts with the Account type as Bank as seen in the following screenshot.
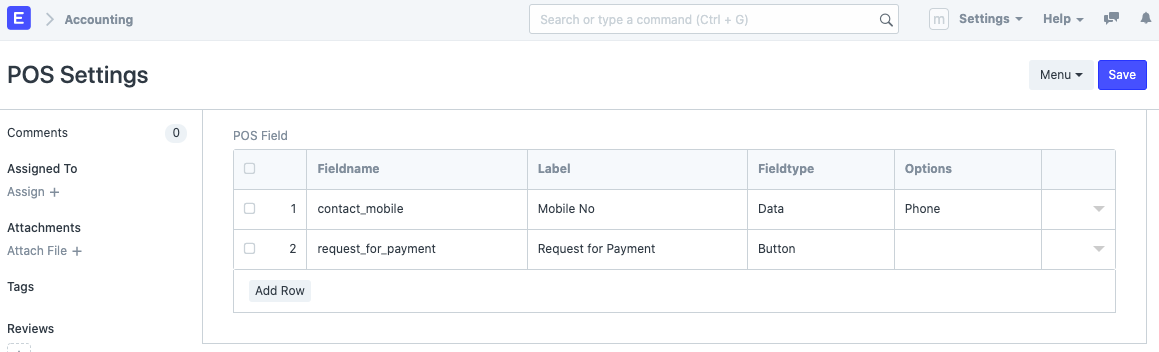
It will also create a Mode of Payment with the same name and account as the payment gateway's, along with certain custom fields in POS Settings to handle the POS payments.
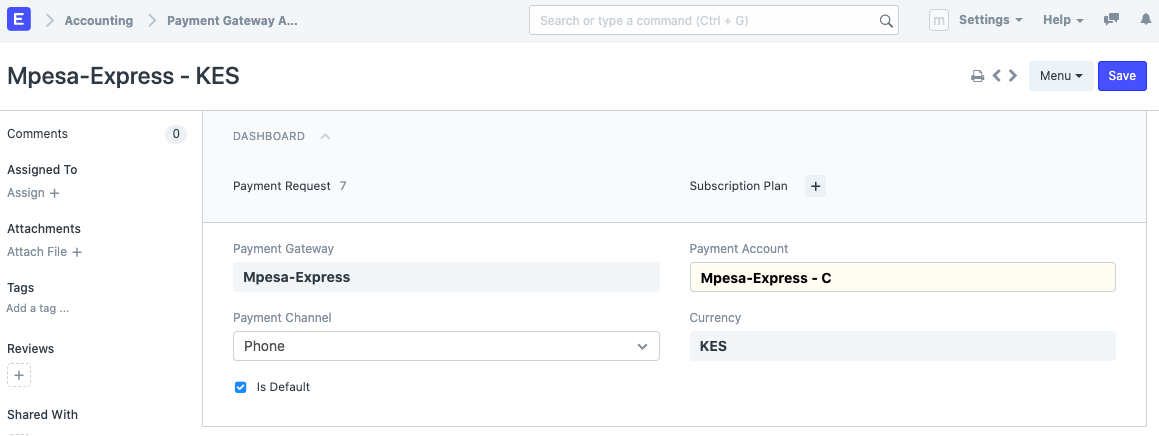
After configuring the Payment Gateway Account, you will be able to accept online payments via M-Pesa.
3. M-Pesa POS Payments
On setting up the POS profile with M-Pesa mode of payment, the POS checkout would show an additional information section. This section contains two fields that were automatically set-up on adding M-Pesa settings.
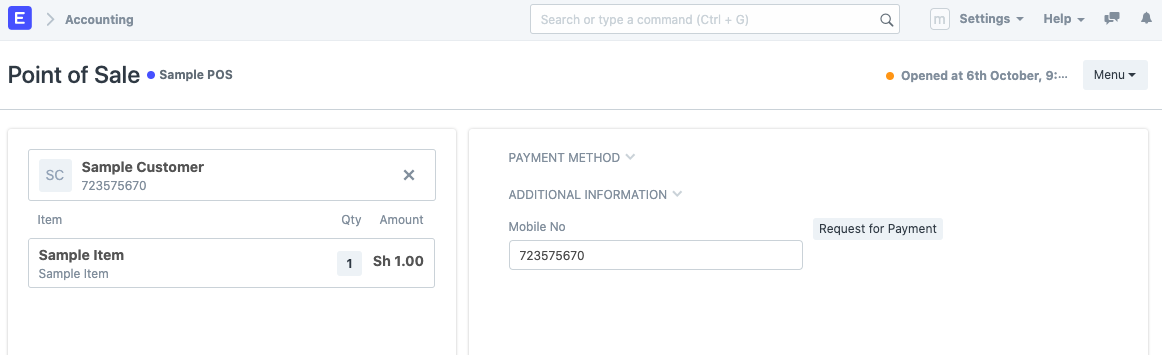
As soon as a POS user fills the mobile number of the customer, they can initiate a request for payment from the customer. A request is sent to the customer's M-Pesa mobile application linked with the specified mobile number. Once the payment is processed by the user, the user is prompted by a confirmation dialog to submit the payment.
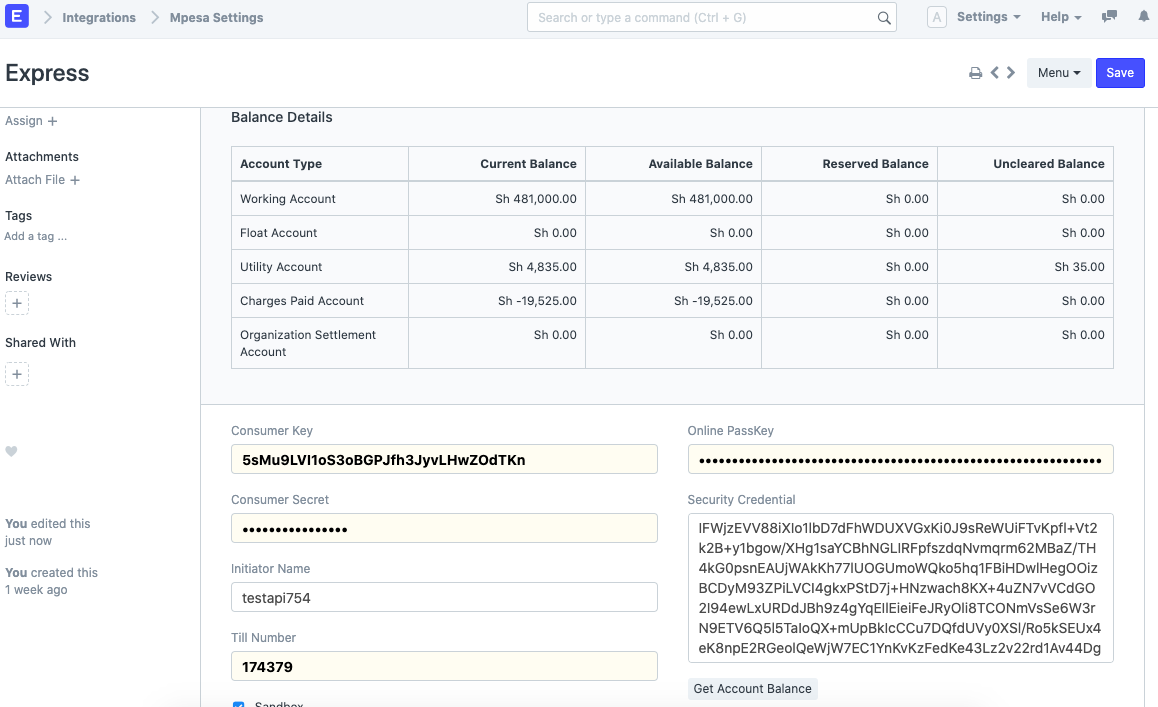
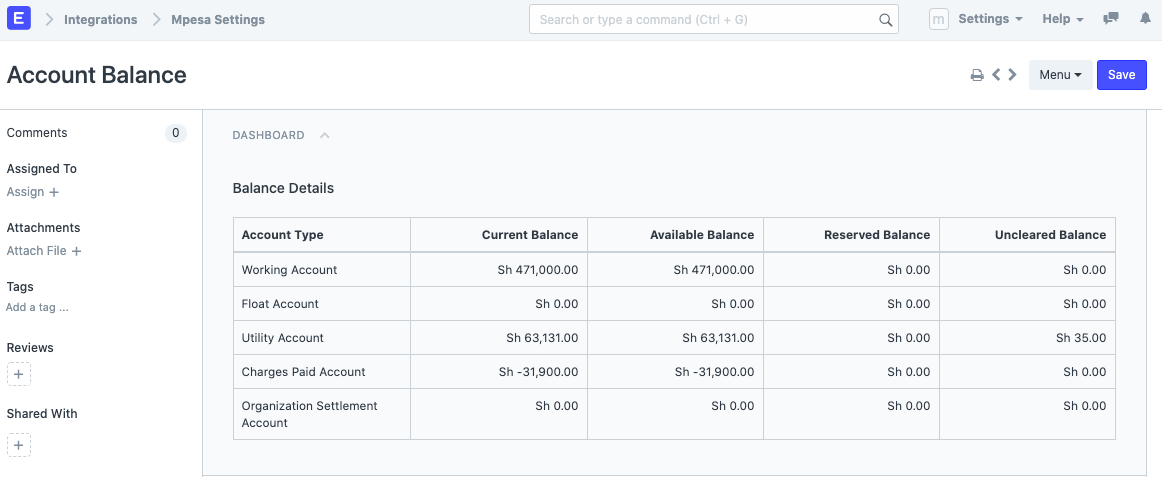
4. M-Pesa Account Balance
Account balance linked with an individual M-Pesa can be fetched via the Get Account Balance button. This will load the M-Pesa account balance details in the dashboard.
5. Supporting transaction currencies
M-Pesa will only work for the Company which has KSH (Kenyan Shilling) as the Company Currency.