Bank Reconciliation
A Bank Reconciliation entry is used to match ERPNext account statements with your bank account statements.
If you are receiving payments or making payments via cheques, the bank statements will not accurately match the dates of your entry, this is because the bank usually takes time to “clear” these payments. Also, you may have mailed a cheque to your Supplier and it may be a few days before it is received and deposited by the Supplier.
In ERPNext you can synchronise your bank statements and your Journal Entries using the transaction dates.
1. What is a Bank Reconciliation Statement?
The Bank Reconciliation Report provides the difference between the bank balance shown in an organization's bank statement, as provided by the bank against the amount shown in the companies Chart of Accounts.
This is what a Bank Reconciliation statement looks like: 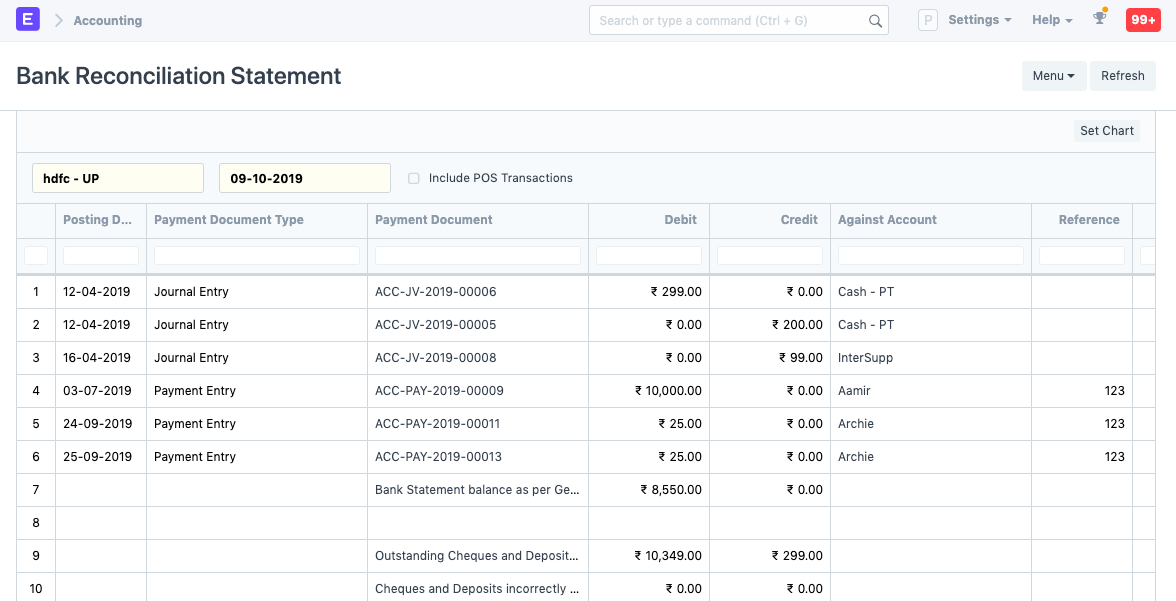
In the report, check whether the field 'Balance as per bank' matches the Bank Account Statement. If it is matching, it means that the Clearance Date is correctly updated for all the bank entries. If there is a mismatch, it's because of bank entries for which Clearance Date is not yet updated.
To access Bank Reconciliation, go to:
Home > Accounting > Banking and Payments > Update Bank Transaction Date
2. How to Update Bank Transaction Dates
- Go to Bank Clearance.
- Select your Bank Account.
- Select a from and to date.
- You can choose to include reconciled entries and POS transactions.
- Click on the Get Payment Entries button.
- Now you will get all the “Bank Voucher” type entries.
- In each of the entries, on the rightmost column, update the Clearance Date field and click on the Update Clearance Date button. By doing this you will be able to sync your bank statements and entries into the system.

3. Types of reconciliation tools
ERPNext has two reconciliation tools:
- A manual reconciliation tool allowing to set clearance dates against payment entries, sales invoice payments or journal entries
- A semi-automatic reconciliation tool allowing to clear bank transactions against payment entries, sales, and purchase invoices payments, journal entries or expense claims.
3.1 Manual Bank Reconciliation Tool
To view this report, go to:
Accounts > Banking and Payments > Bank Reconciliation Statement
In the report, check whether the field 'Balance as per bank' matches the Bank Account Statement. If it is matching, it means that the Clearance Date is correctly updated for all the bank entries. If there is a mismatch, it's because the Clearance Date is not yet updated for the bank entries.
3.2 Semi-automatic Bank Reconciliation Tool
It is a two-step process:
- Add Bank Transactions into ERPNext via Bank Statement Import or Bank Account Synchronization
- Reconcile the Bank Statement
3.2.1 Bank Statement Import
- Download a bank statement from your bank's website
 Make sure you have at least the date, the debit/credit and the currency on every row of your bank statement. To upload your Bank Statement, go to:
Accounting > Bank Statement > Bank Statement Import
Or simply search for Bank Statement Import in the awesomebar.
* Select your Company and Bank Account
* Click Save
* Attach the Bank Statement
* Click on Map Columns to enter the mapping between columns in the uploaded Bank Statement and the Bank Transaction DocType
* Click on Start Import to start the import process. The Bank Transactions will be created via a background job, although the progress will be shown here  * The mapping that is done is stored in the Bank document linked to the corresponding Bank Account. In the next upload, the mapping is taken from here but the system allows the user to change it if needed. The changed mapping is updated in the Bank document too.
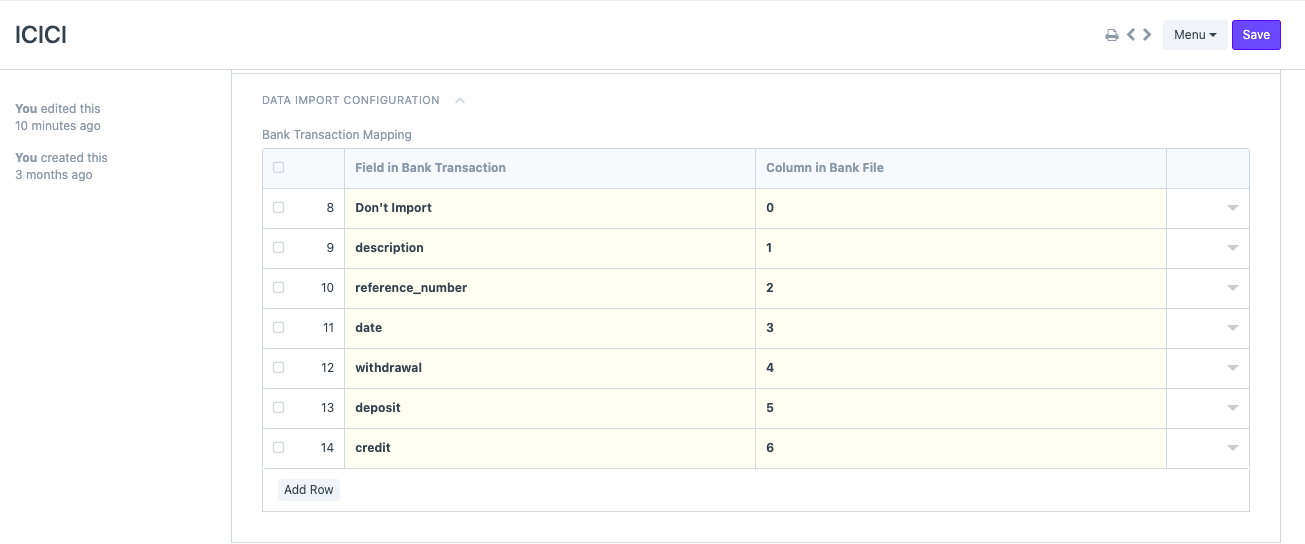
3.2.2 Bank Account Synchronisation
You can use Plaid (see Plaid Integrations page) to automatically synchronise your bank account with ERPNext. All your bank transactions will be automatically imported into ERPNext.
3.2.3 Automatic Party Matching for Bank Transactions
You can optionally enable automatic party matching so that a party is auto set (if matched) in the Bank Transaction. To enable this, go to:
Accounts Settings > Banking > Enable Automatic Party Matching

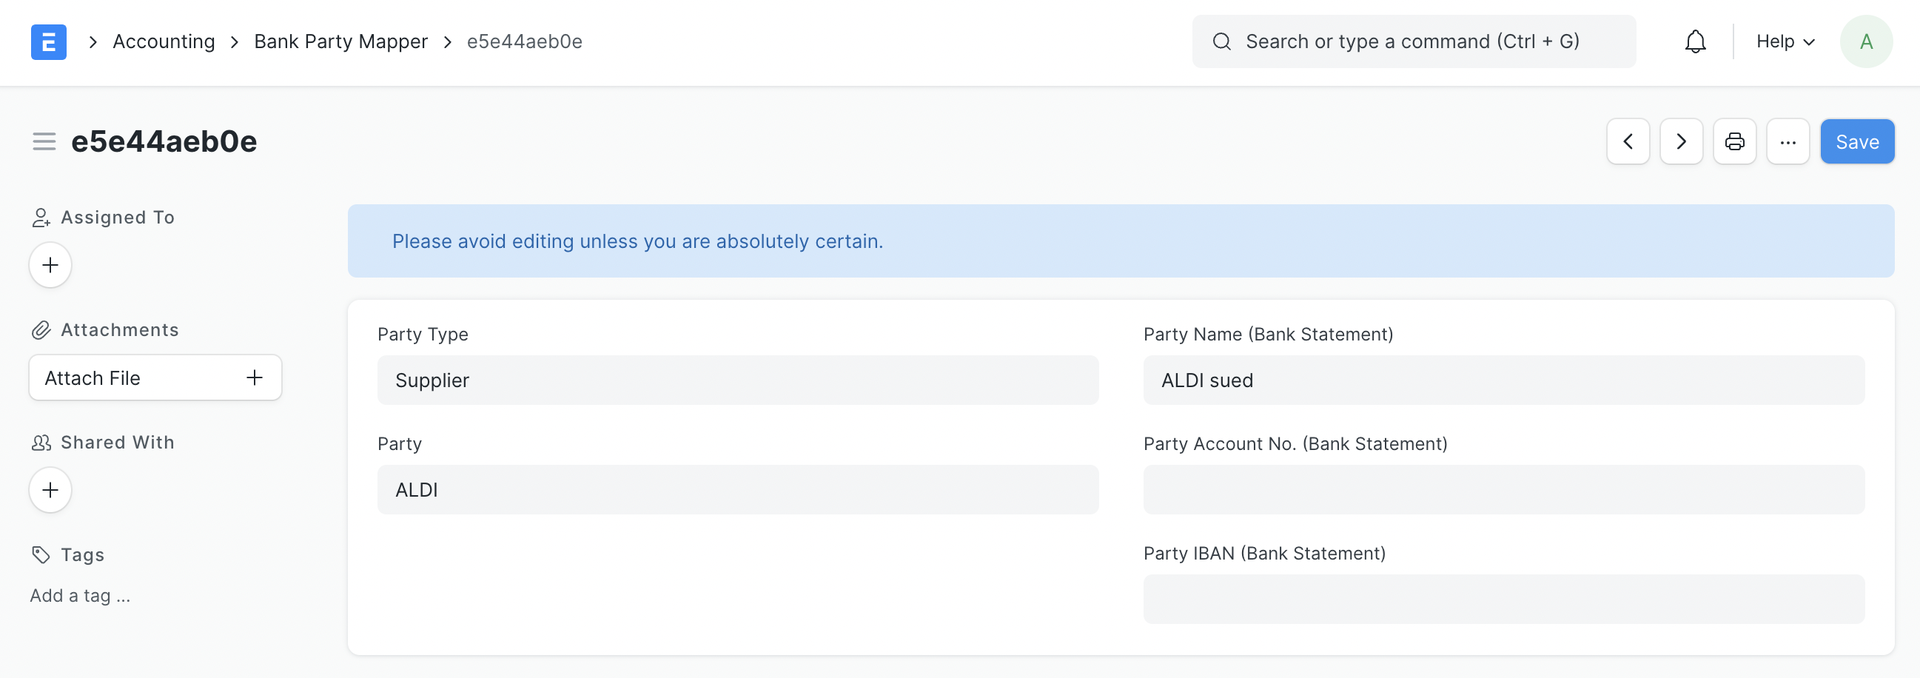
You can additionally check Enable Fuzzy Matching where, the Party Name/Description in the Bank Transaction is approximately matched with all the parties in the system. This is useful when the party's Bank Account is not registered in the system.
Once enabled, party matching will automatically happen on submitting the Bank Transaction.
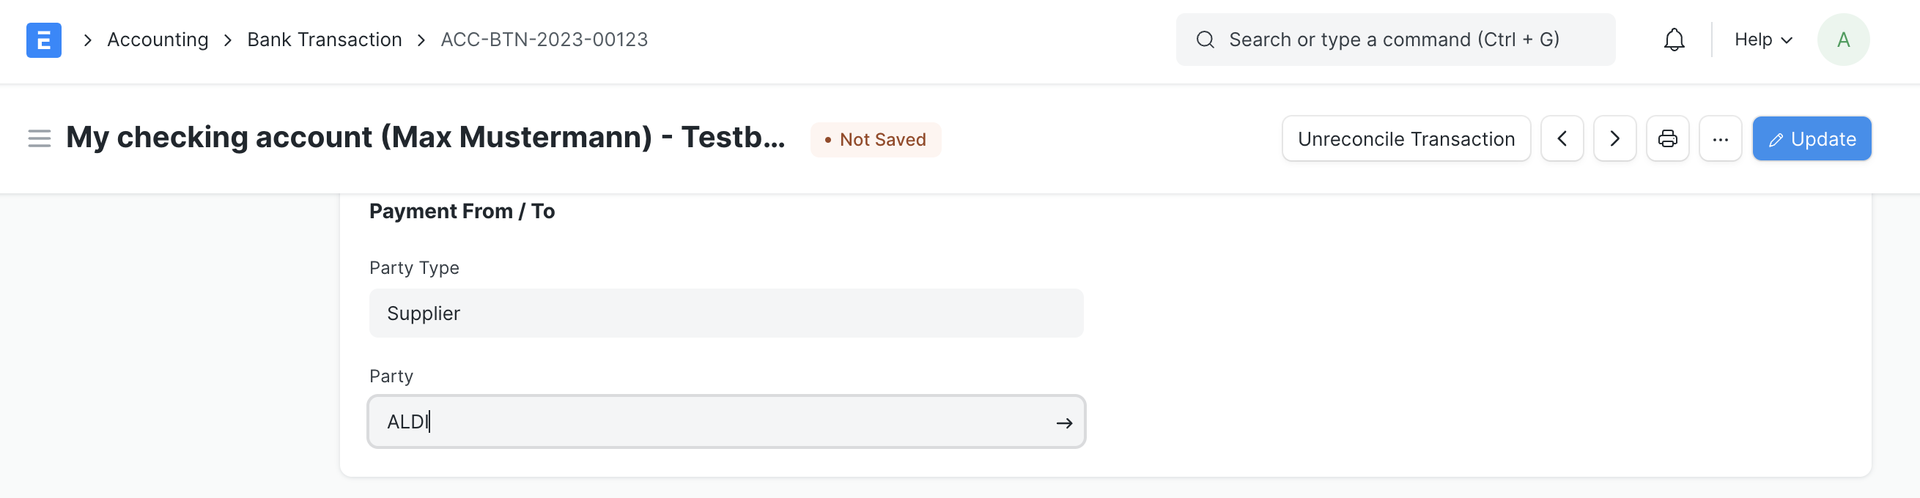
To aid the mapping, you can easily store Customer, Supplier and Employee bank data by creating a Bank Account against individual parties. After Submission, the Party Type and Party in the Bank Transaction will be automatically set and can be corrected/updated.
The fuzzy matching results depend on the nature of the party data there is in the system. It may fail to be accurate where multiple parties with extremely similar names exist.
It would be best to test this feature out first by:
1. Enabling the feature
2. Having some party records in the system
3. Creating a Bank Transaction where the party name/description contains a target party's name
4. Submitting the bank transaction after which the party should be automatically set in the Bank Transaction. Here you can determine if the results are acceptable.
3.2.4 Reconcile the Bank Statement
Once all your bank transactions are imported into ERPNext, you can reconcile them with your existing vouchers. Go to:
Accounting > Bank Statement > Bank Reconciliation Tool
Or simply search for Bank Reconciliation Tool in the awesomebar.
- Select your Company, Bank Account, Bank Statement Start and End Date.
- Make sure that the opening balance from ERPNext matches the opening balance of your Bank Statement.
- Enter the Closing Balance of the Bank Statement.
- Saving the document will show the matching bank transactions.
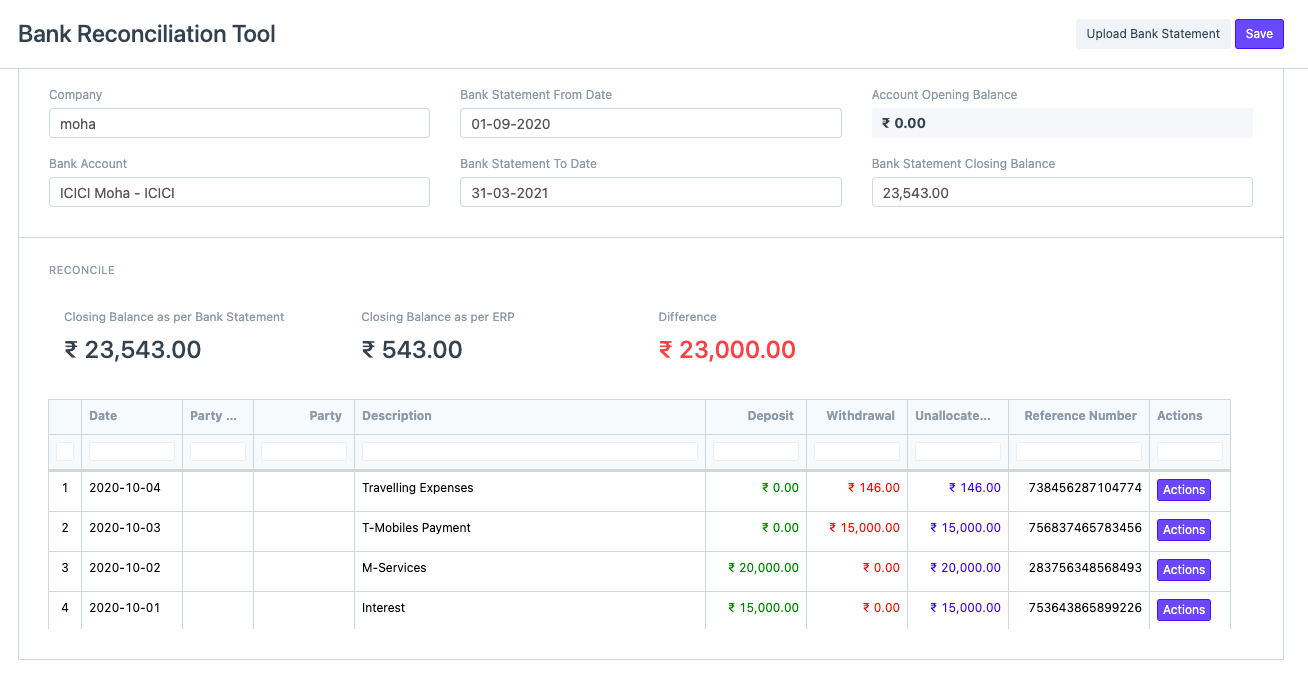
- The final goal of Bank Reconciliation is to make the difference amount zero (green) by either matching to an existing voucher or creating a new voucher.
- For all the bank transactions which are present in the Bank Statement but do not have a clearance date, click on the Actions Button to Match/ Create Vouchers
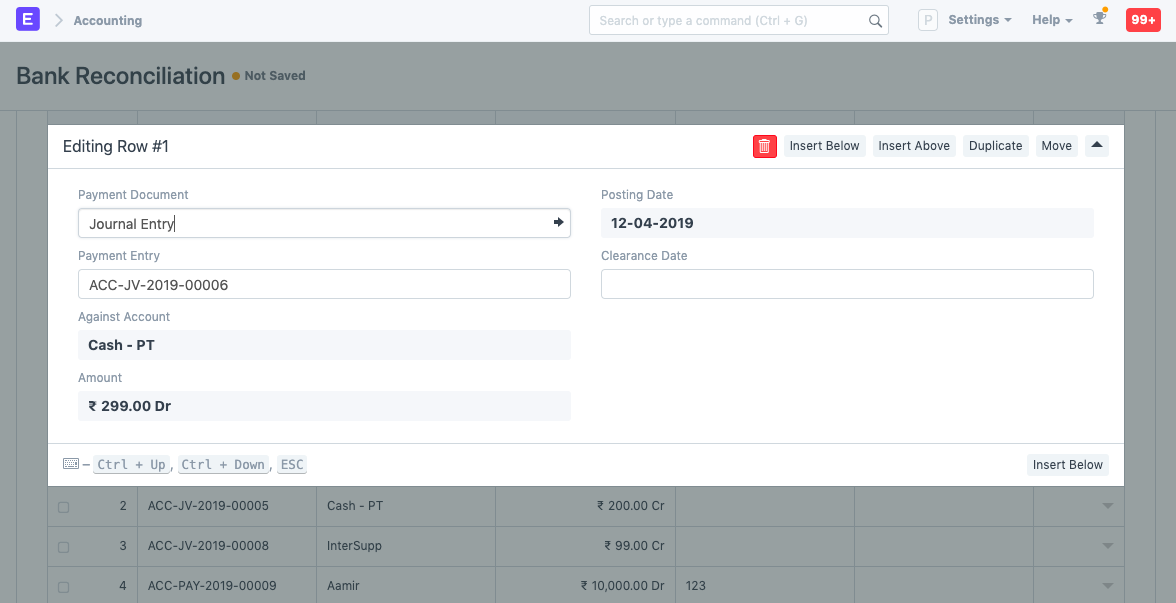
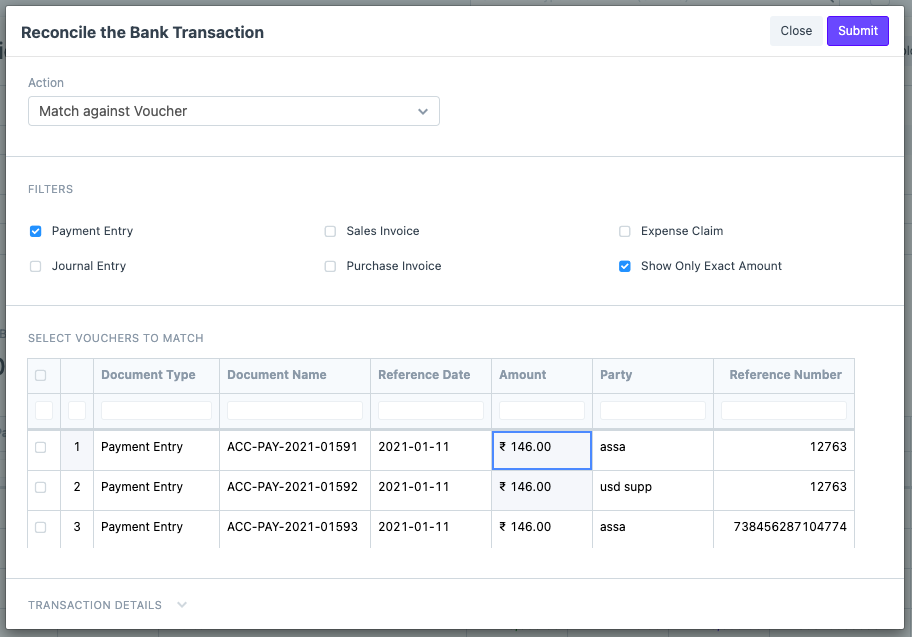
- For matching, choose 'Match Against Voucher' in 'Action'. The vouchers that are related to this transaction will be displayed. They will be ranked on the basis of the maximum number of fields matched. You can match one or multiple vouchers against the same Bank Transaction using the checkboxes.
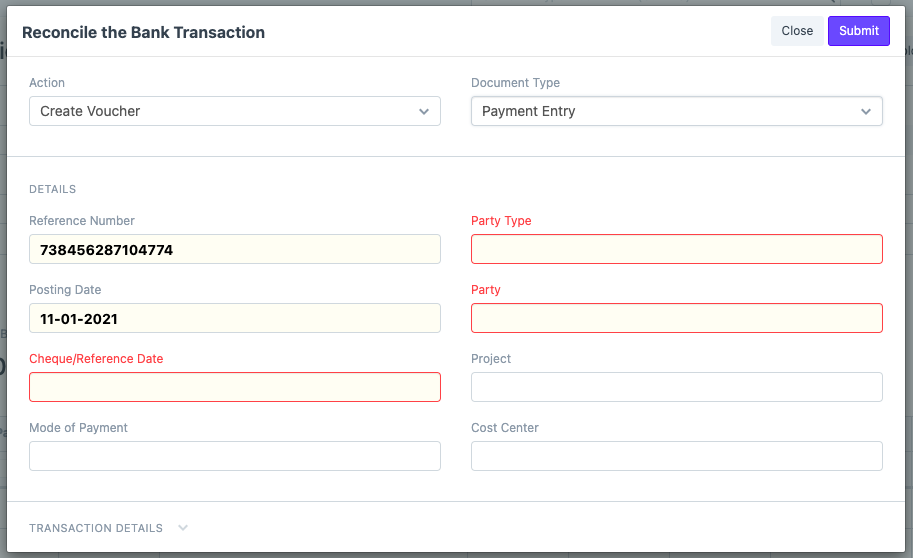
- To create a new voucher, choose 'Create Voucher' in the 'Action' and then choose the document type. Fill in the details that were not available in the Bank Transaction. Clicking on Submit will create the corresponding voucher and update its clearance date.
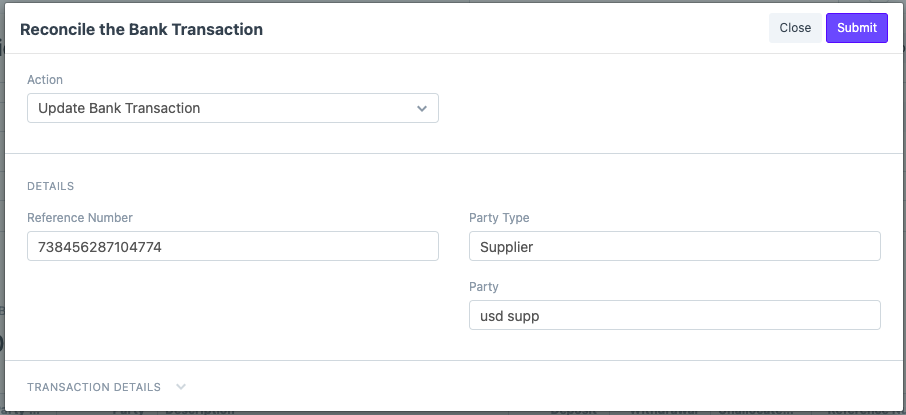
- It is also possible to update the Bank Transactions. Updating the Bank Transaction might help ERPNext in finding better matches. To Update a Bank transaction, choose 'Update Bank Transaction' in 'Action', fill in the required details, and click on Submit to save the Bank Transaction.