Company Setup
A company is a legal entity made up of an association of people for carrying on a commercial or industrial enterprise.
In ERPNext, the first Company is created when an ERPNext account is set up. For each Company, you can set a domain as manufacturing, retail, or services depending on the nature of your business activity.
If you have more than one company, you can add them from:
Home > Accounting > Company
1. How to create a new Company
- Go to the Company list, click on New.
- Enter the name, abbreviation, and default currency for the company.
- Save.
The abbreviation for your company is created by default. For example, FT for Frappe Technologies. The abbreviation helps in differentiating assets of one company from another.
The abbreviation also appears in various accounts, cost centers, taxes templates, warehouse, etc, of your company.
You can also attach a company logo and add a description for the company.
1.1 Multi Company Structure
Let's assume you run a group of companies, some may be larger companies and some may be smaller that are a part of the larger company(s).
In ERPNext, you can set up multiple companies. The company structure can be parallel, i.e., sister companies, parent-child companies, or a combination of both.
A parent company is a larger organization which consists of one or more child companies. A child company is a subsidiary of a parent company.
The company tree view displays the overall structure of your companies.
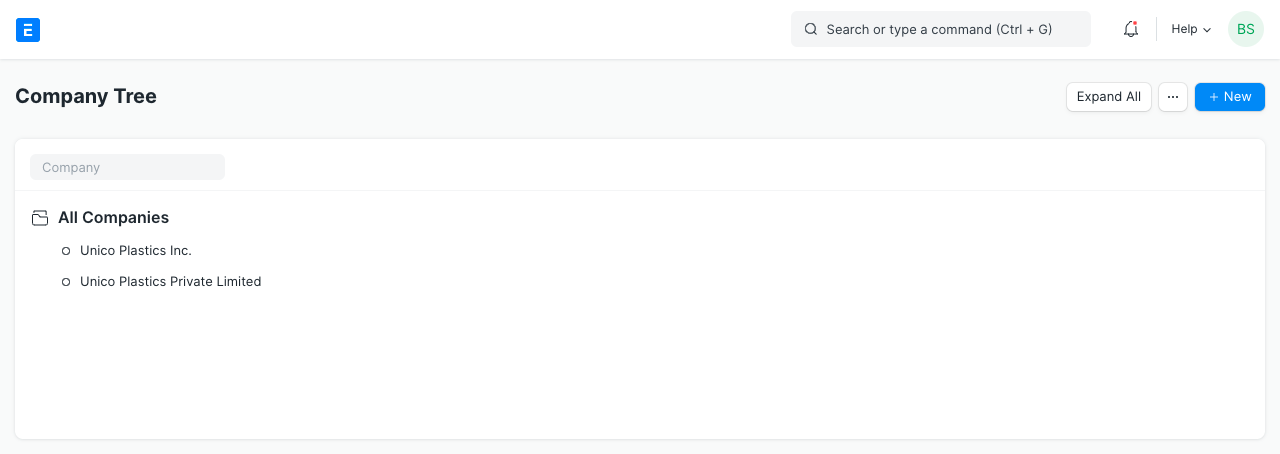
Once you build a company tree, ERPNext will validate if the accounts of the child companies match the accounts in the parent company. All the accounts can be combined in a consolidated chart of accounts statement.
1.2 Other Options when Creating a Company
- Domain: The domain of work the company is into. Eg: manufacturing, services, etc. Choose one when setting up your account.
- Is Group: If checked, this becomes a parent company.
- Parent Company: If this is a child company, set the parent from this field i.e., select a group company this company belongs to. If a parent company is set, the chart of accounts for the new company you're creating will be created based on the selected parent company.
1.3 Chart of Accounts
For each Company, the master for Chart of Accounts is maintained separately. This allows you to maintain separate accounting for each company as per the legal requirements. You can also import chart of accounts using the Charts Of Accounts Importer.
ERPNext has localized Chart of Accounts readily available for some countries. When creating a new Company, you can choose to set up the Chart of Account for it from one of the following options.
- Standard Chart of Accounts
- Based on Existing Company's Chart of Account
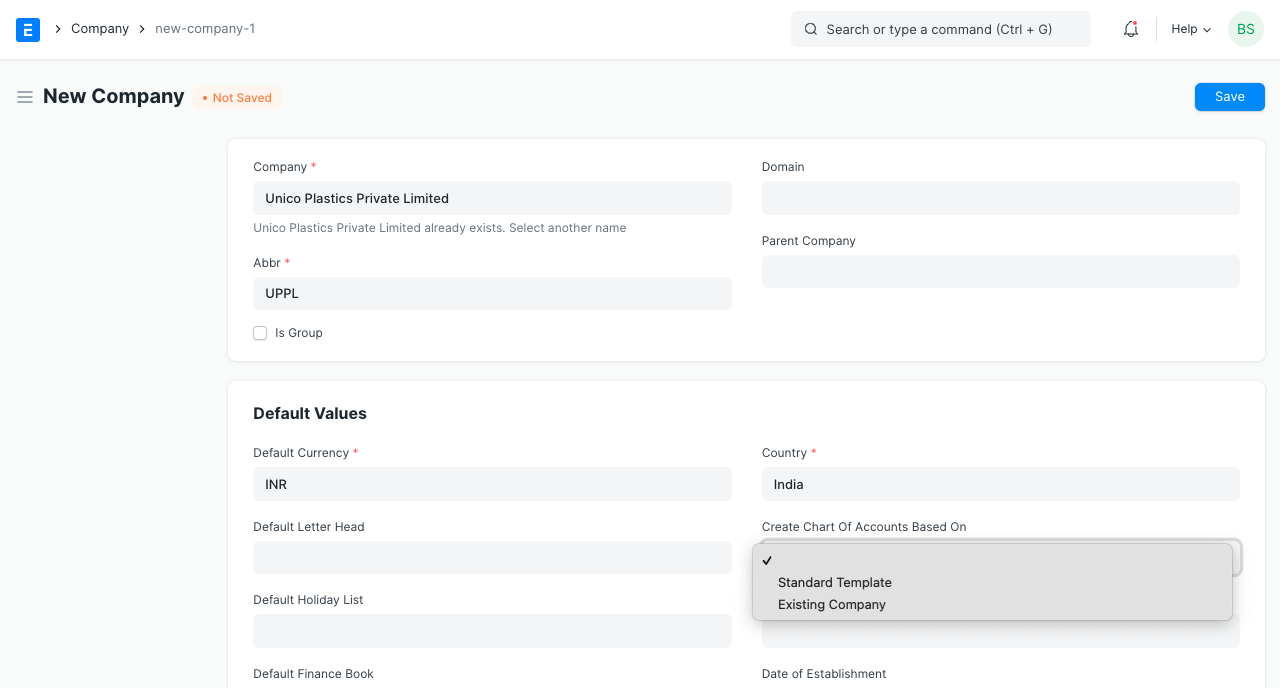
Note that, if the Parent Company is selected when creating a new Company, the Chart of Accounts will be created based on the existing Parent Company.
1.4 Defaults
Within the Company master, you can set many of the default values for masters and accounts. These default accounts will help you in the quick posting of accounting transactions, where the value for the account will be fetched from the Company master if provided. As soon as the company is created, a default Chart Of Accounts and Cost Center is automatically created.
The following defaults can be set for a company:
- Default Letter Head
- Default Holiday List
- Standard Working Hours
- Default Terms and Conditions
- Country
- Tax ID
- Date of Establishment
2. Features
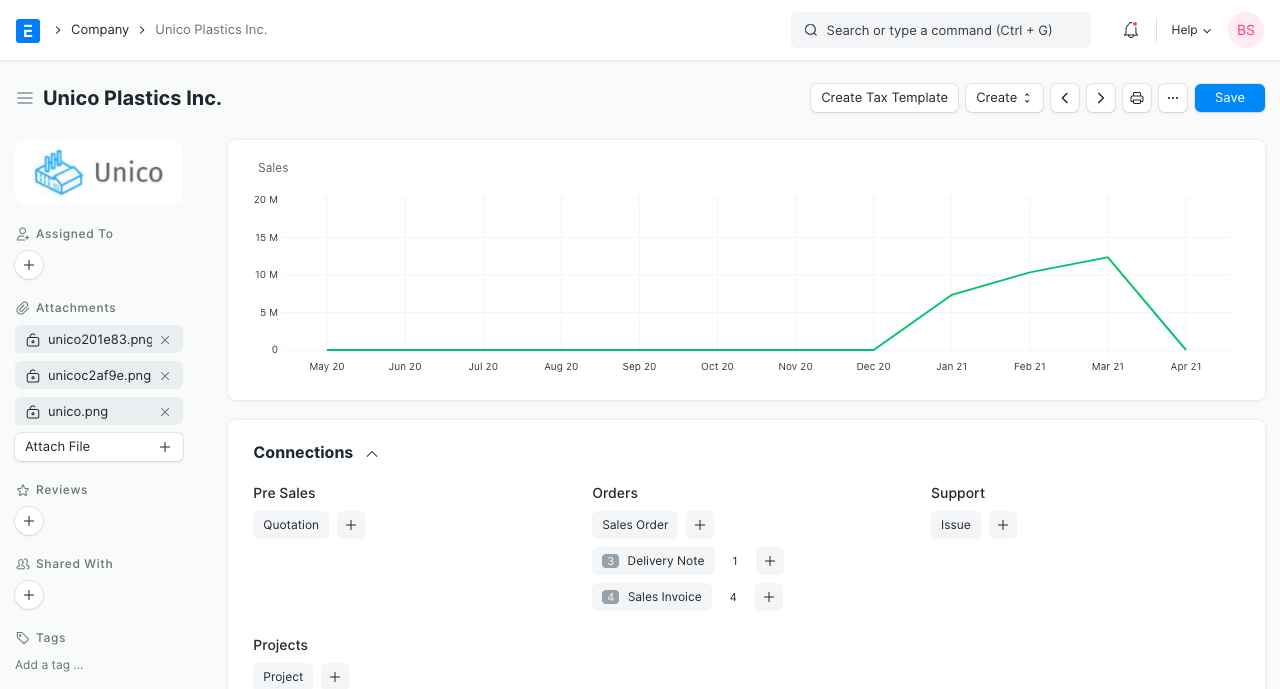
2.1 Monthly Sales Target
Set the monthly sales target number in the company currency, for example, $10,000. Total monthly sales will be visible once transactions are made. To know more click here.
2.2 Account Settings
Some of the following accounts will be set by default when you create a new company, others can be created. The accounts can be seen in the Chart of Accounts. These values can be changed later on if needed.
- Default Bank Account
- Default Cash Account
- Default Receivable Account
- Round Off Account
- Round Off Cost Center
- Write Off Account
- Discount Allowed Account
- Discount Received Account
- Exchange Gain / Loss Account
- Unrealized Exchange Gain/Loss Account
- Default Payable Account
- Default Employee Advance Account
- Default Cost of Goods Sold Account
- Default Income Account
- Default Deferred Revenue Account
- Default Deferred Expense Account
- Default Payroll Payable Account
- Default Expense Claim Payable Account
- Default Cost Center
- Credit Limit
- Default Payment Terms Template
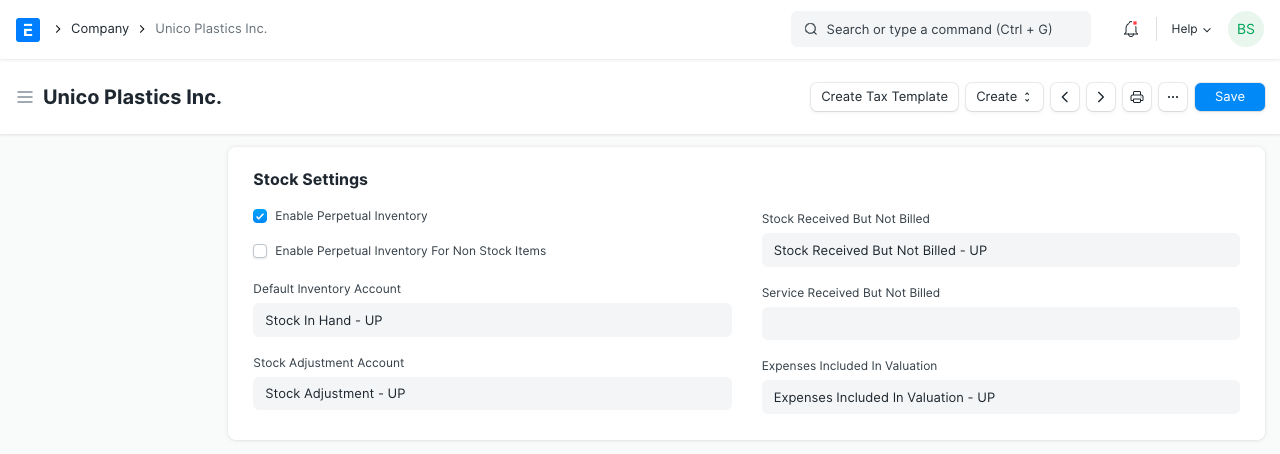
2.3 Stock and Manufacturing Settings
Perpetual Inventory feature would lead to Stock transactions impacting the company's books of accounts. Know more here. It is enabled by default.
- Default Inventory Account
- Stock Adjustment Account
- Stock Received But Not Billed
- Expenses Included In Valuation
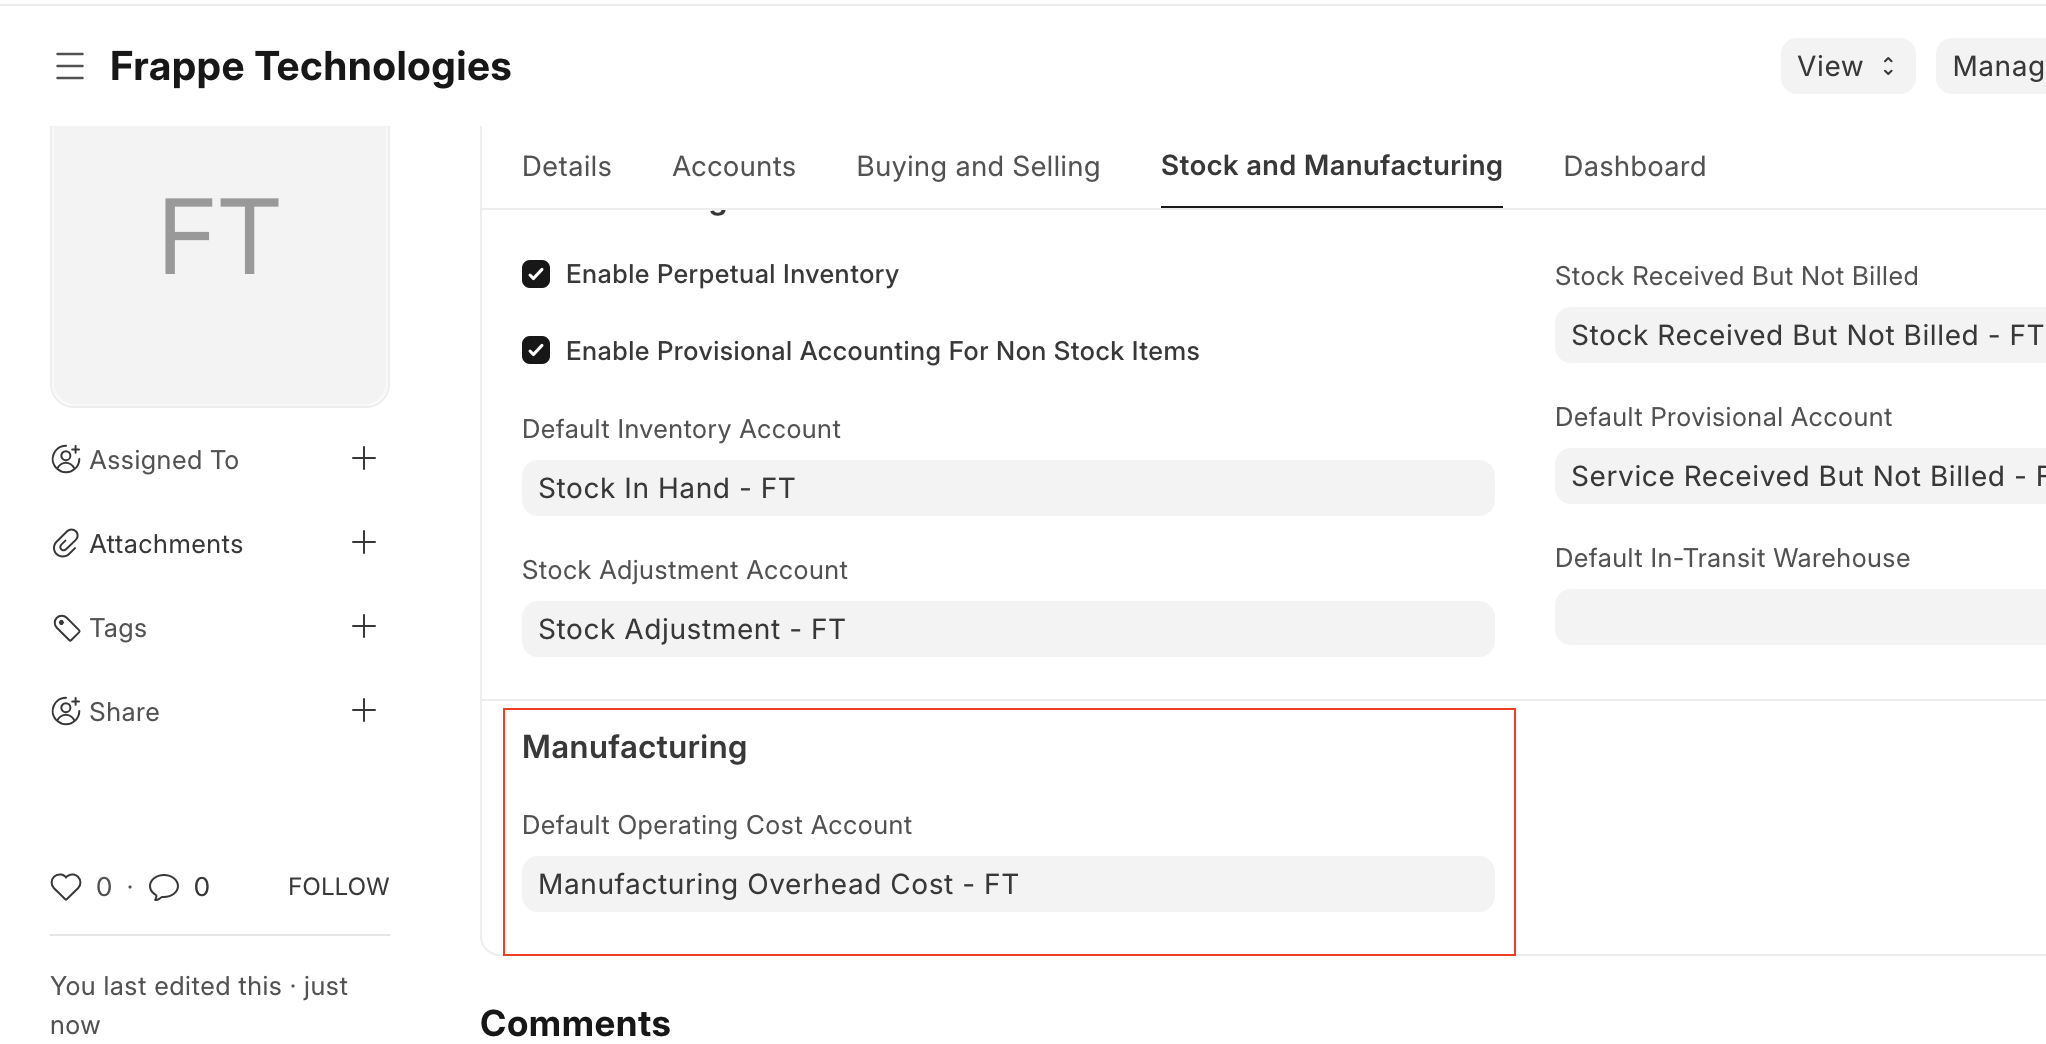
 * Default Operating Cost Account
+ User can set the manufacturing overhead cost account in the company master under this field.
+ Once the user created the stock entry with type Manufacture against the work order, system will fetch respective account with the operating cost in the additional cost section of the stock entry
+ On submission of the stock entry, system book the operational cost under this account
+ User has to create the Purchase Invoice to knock off the accounting effect against the Operating Cost Account
+ 
2.4 Fixed Asset Defaults
For managing fixed assets in a company, the following accounts are needed. Most of them will be created by default. They can be seen in the Chart of Accounts.
- Accumulated Depreciation Account
- Depreciation Expense Account
- Series for Asset Depreciation Entry (Journal Entry)
- Expenses Included In Asset Valuation
- Gain/Loss Account on Asset Disposal
- Asset Depreciation Cost Center
- Capital Work In Progress Account
- Asset Received But Not Billed
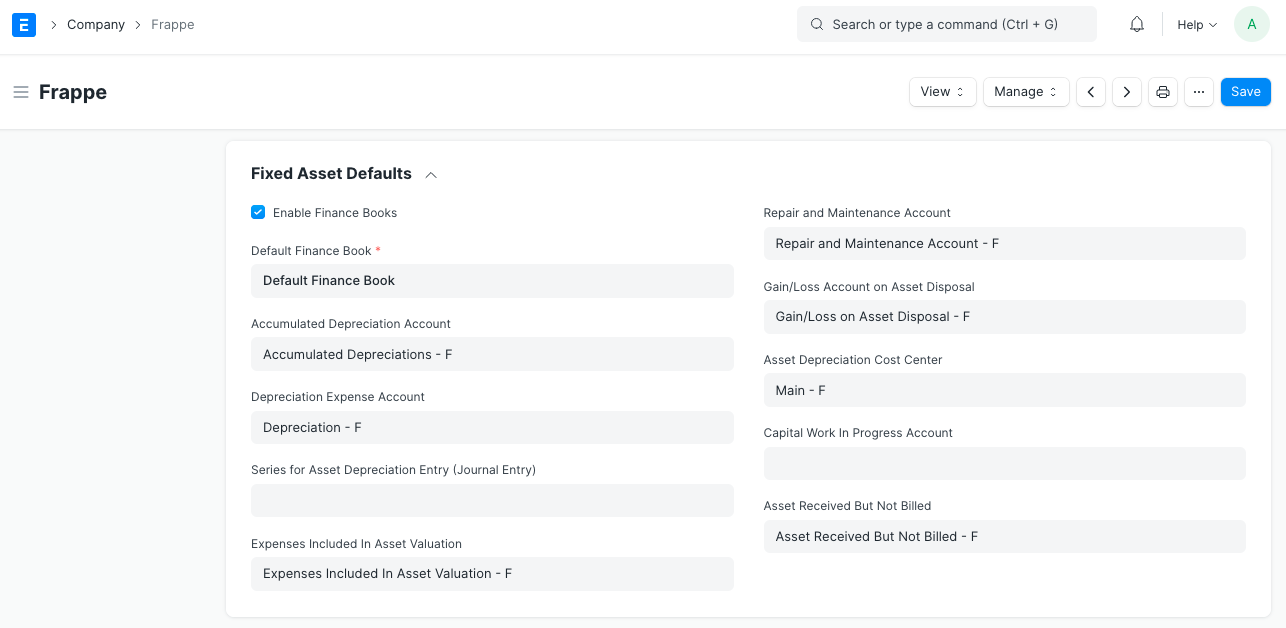
If you wish to book your accounting entries against different Finance Books, check the Enable Finance Books box and set a Default Finance Book.
2.5 HRA Settings
Set the default Component for the following Salary Components.
For the Indian user, setting the default value in this section will help in Employee Tax Declaration calculations, especially for HRA exemption amount.
- Basic Component
- HRA Component
- Arrear Component
2.6 Bank Remittance Settings
Only for India.
Using the Payment Order feature (in Accounts), you can give a single document of transfer for multiple bank transfers. Updating value in the following fields will help you generate Bank Remittance in a format which can be accepted and can be also uploaded on the bank's portal.
Payment order allows a user to combine several payment entries/payment requests into a single document. Bank Remittance allows a user to send that single document to the bank as text format, this text format can be manually uploaded to Kotak bank payments platform.
Client Code and Product Code are codes given by the bank to you. This is required to be added in the text file as per the format specified by Kotak bank.
2.7 Budget
Exception Budget Approver Role: The role selected here can bypass the set budget to approve expenses.
2.8 Company Info
For reference, the following details of your company can be saved in ERPNext:
- Date of Incorporation
- Phone No
- Fax
- Website
- Address
- Registration Details
Note: When setting the address here, it is important to tick the 'Is Your Company Address' checkbox.
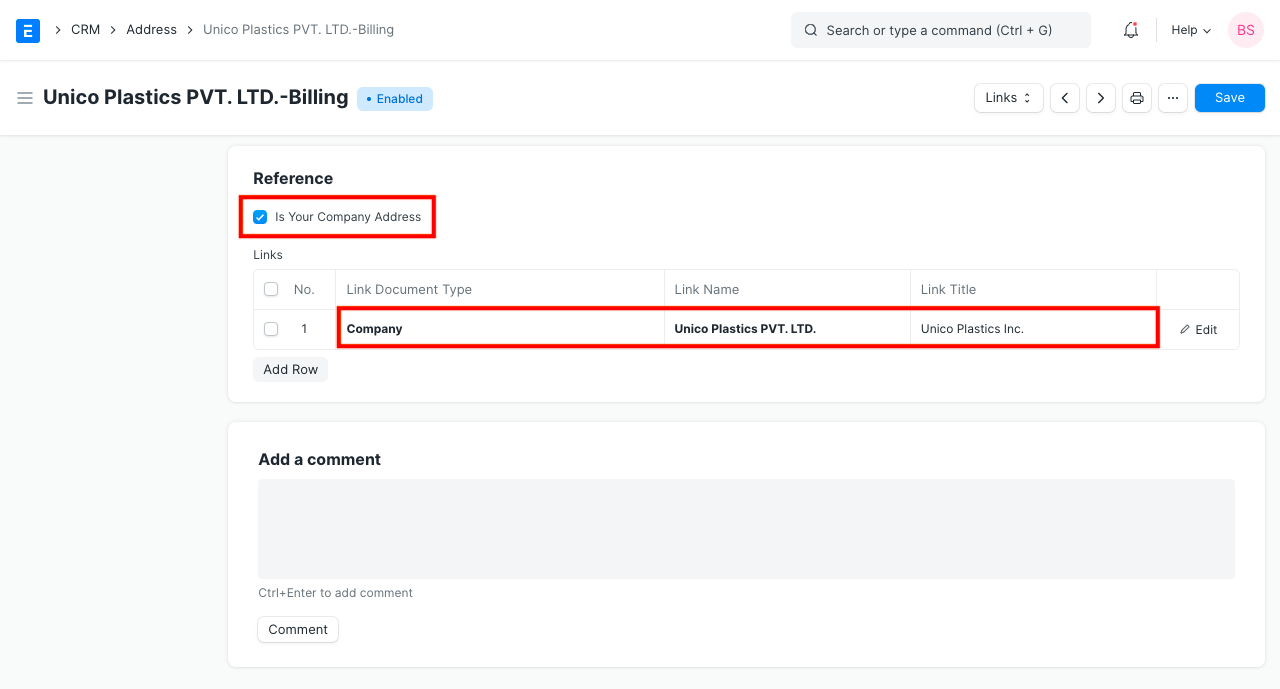
For India, different addresses can be added with different GSTIN numbers if the company has multiple locations. For example, if your company has offices in Mumbai, Delhi, and Bangalore, you'll have to add different addresses with different GSTIN numbers.
Registration Details: Here you can save various tax/cheque/bank number for reference.
2.9 Deleting all Company Transactions
You can delete all transactions (Orders, Invoices) of a Company. Use with caution, transactions once deleted cannot be recovered.
Requirements
- The User has to be a System Manager
- The User has to be the creator of the Company
Steps
- Click on the Delete Transactions button under Manage
- Verify your password
- Enter Company name for confirmation
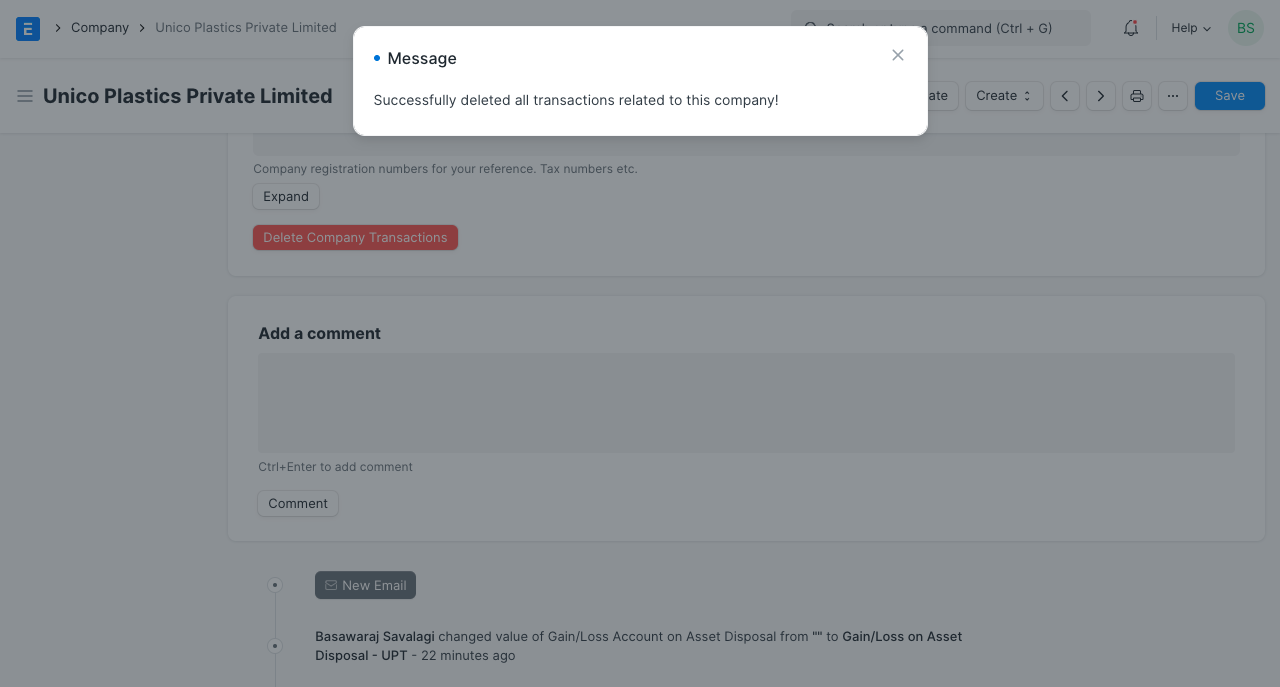
And you're done. The master data like Item, Account, Employee, BOM etc. will remain as it is.
What is affected?
- Sales/Purchase Orders/Invoices Receipts/Notes will be deleted
- The monthly sales and sales history will be cleared
- All notifications will be cleared
- Lead Addresses to which the Company is linked will be deleted
- All communications linked to the Company will be deleted
- All naming series will be reset
- Stock Entries linked to a Warehouse of this Company will be deleted
Introduced in Version 13.
2.10 Change Parent Company
You can change the Parent Company of an existing company. Go to the Parent Company field, select the Company from the list, and save the form.