Pick List
A Pick List is a document that indicates which items should be taken from your inventory to fulfill orders.
This is particularly useful for shippers with a large amount of inventory, volume of orders, or customers ordering many Stock Keeping Unit(SKU). Pick list selects Warehouse where an Item is available on FIFO (First-In-First-Out) basis. Selection of Warehouse for a batched item is different. In case of batched items, Warehouse where the batch is nearer to its expiry will be selected.
To access Pick List, go to:
Home > Stock > Stock Transactions > Pick List
1. Prerequisites
Before creating and using a Pick List, it is advised that you create the following first:
2. How to create Pick List
- Go to the Pick List list, click on New.
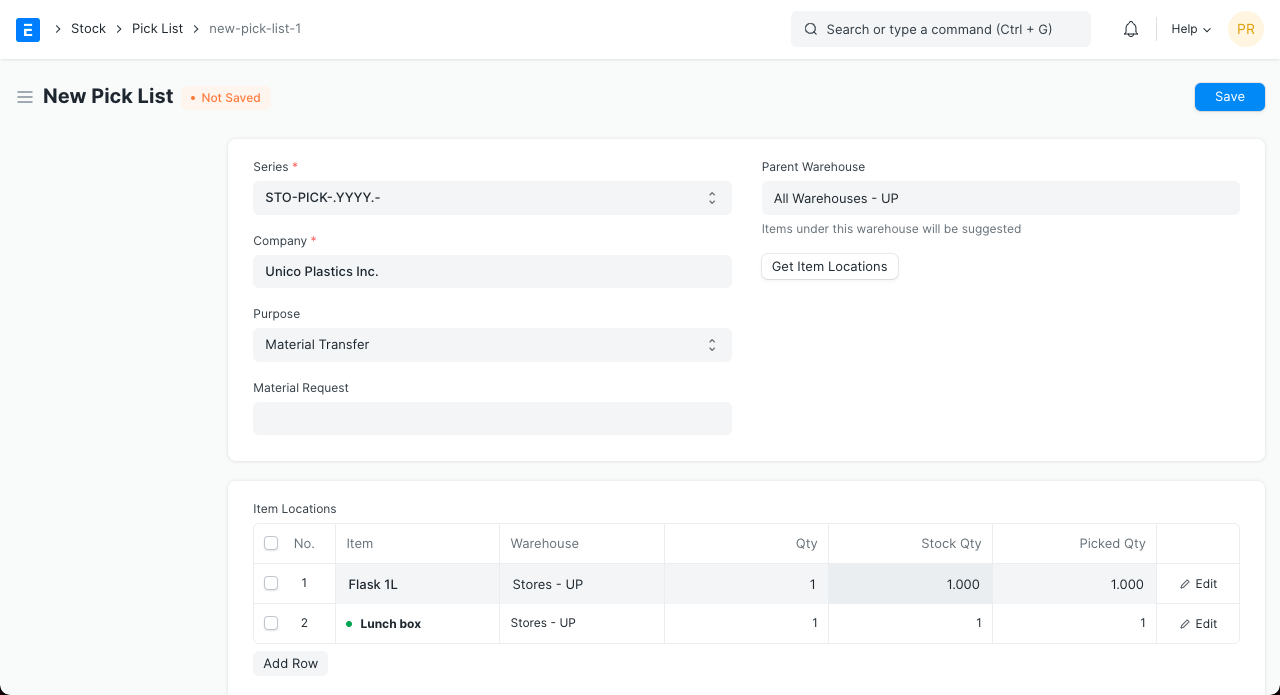
- Set the Company.
Select the Purpose of Pick List. These are the options under Purpose:
- Delivery: This option will let you add Items from a Sales Order, to deliver. After submitting Pick List a new Delivery Note can be created based on the Warehouse from which items were picked.
- Material Transfer for Manufacture: This will let you select a Work Order from which raw materials will be pulled for picking. You will be presented with an option to select the number of finished goods for which you want to pick raw materials. After picking the stock you can create Stock Entry for the picked items i.e., raw materials.
- Material Transfer: This will let you select a Material Request for which you want to pick items. After picking the stock you can create a Stock Entry for the picked items.
- Add Item and the quantity you want to pick in the Item Locations table. Click on Get Item Locations to get the Warehouse and other details for each Item.
- Parent Warehouse: If a parent Warehouse is selected, Warehouses only under that parent Warehouse will be suggested.
- Get Item Locations: Once items to be picked is finalized you can click on the Get Item Locations button to get Warehouse selection for each item. Since Warehouse will be automatically fetched if you get an Item from any reference document, this button can be useful to manually add additional Items or change the quantity of existing Items in the Item Locations table.
- Item Locations: This will have the information of the item location (Warehouse), Serial Number for serialized items and batch no for batched items.
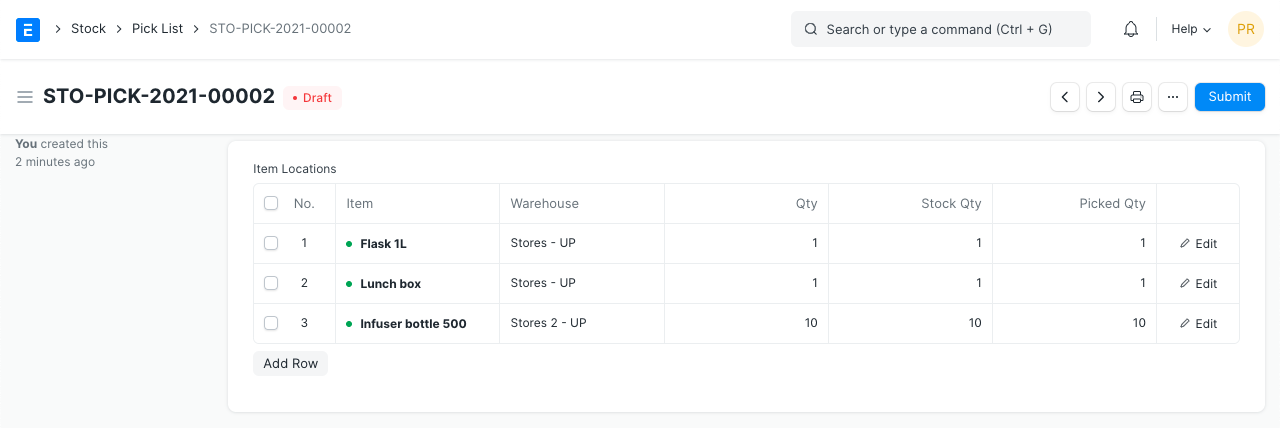
If Serial Numbers are involved, the Item row will look like this: 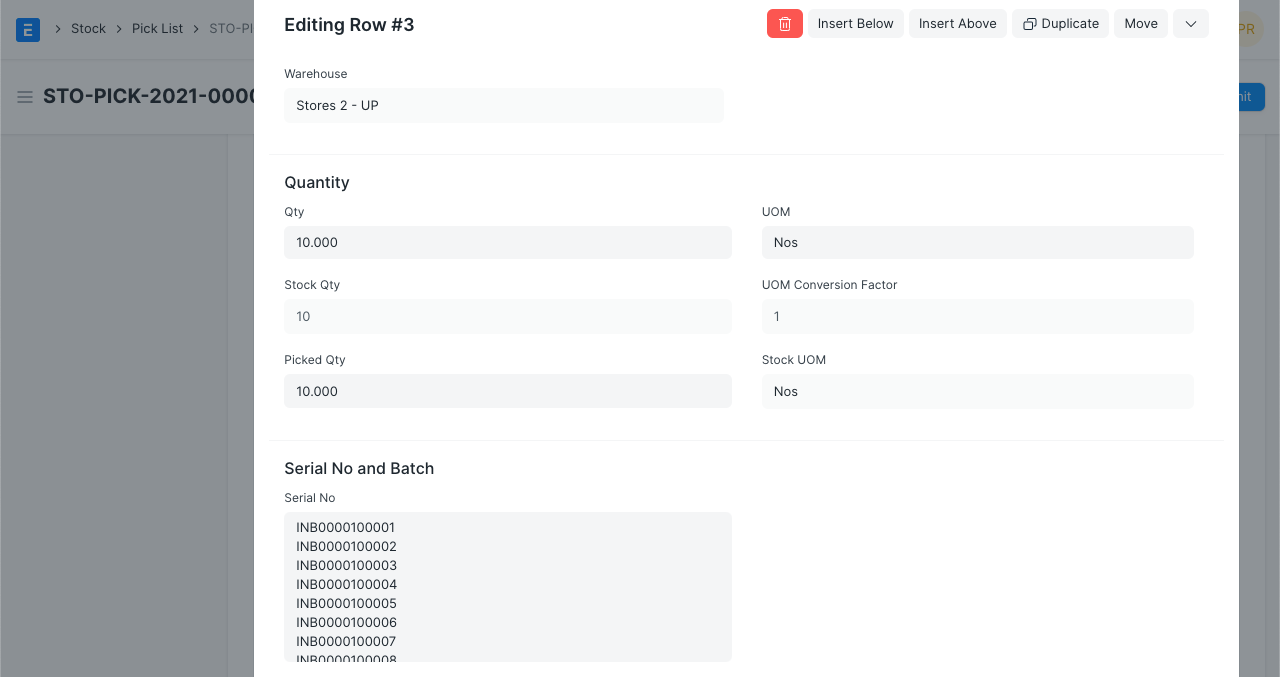 8. Save and Submit.
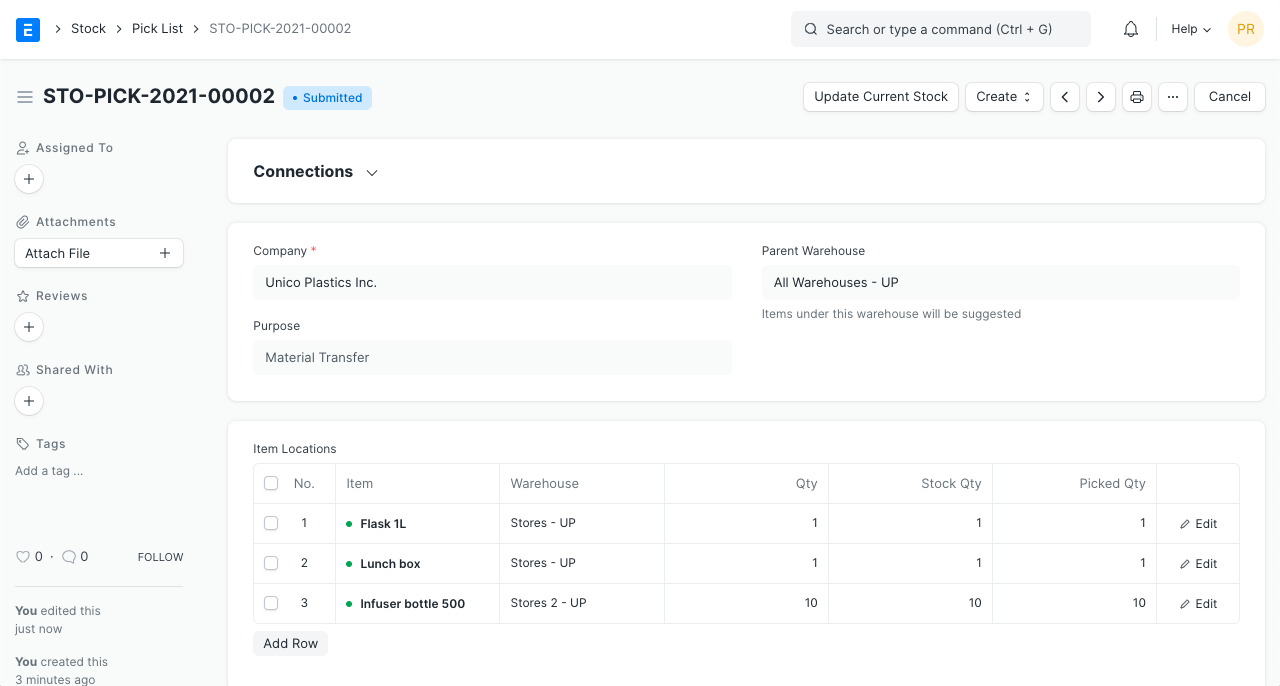
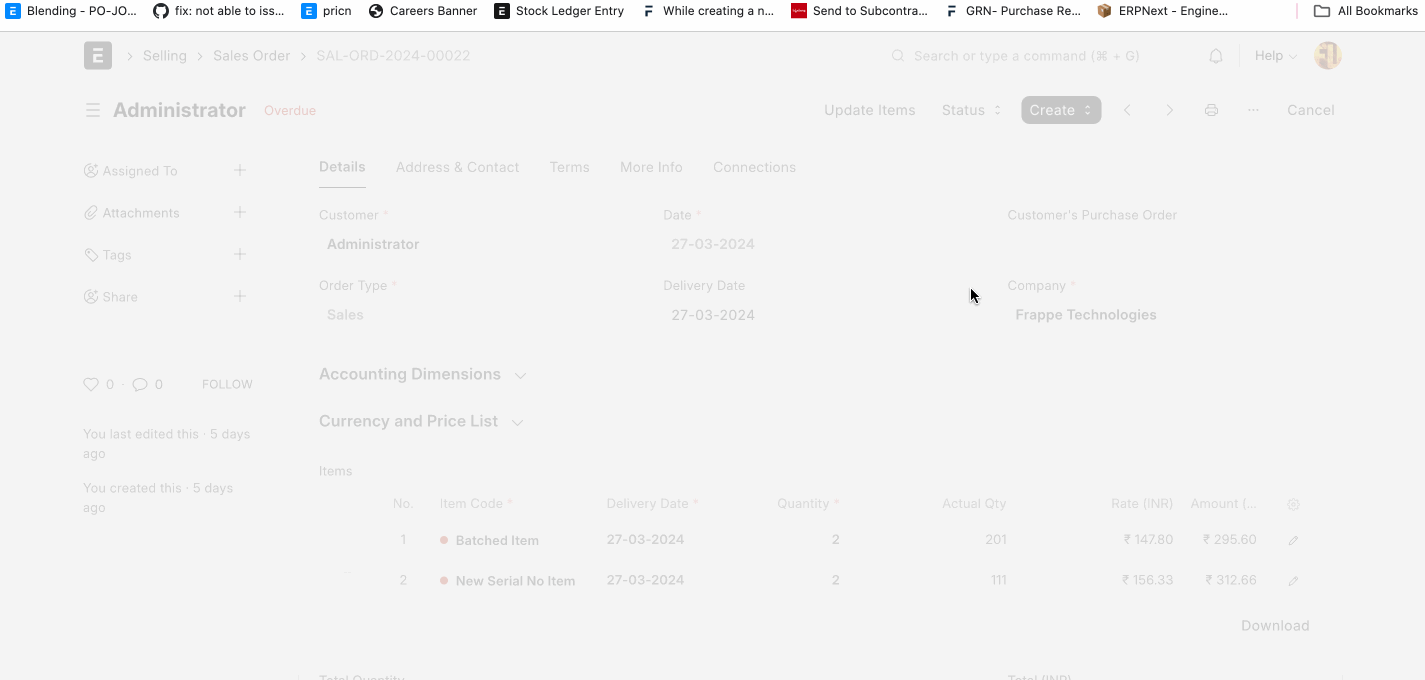
2.1 Create Pick List from a Sales Order
- Go to a Sales Order.
- Click on the Create button on the top right of the form and then click the Pick List option.
- Once you click Pick List, all the data required for Pick List will be fetched from the Sales Order.
- Alternatively, you can create a new Pick List and click on "Get Items". This would show a popup of all pending Sales Orders.
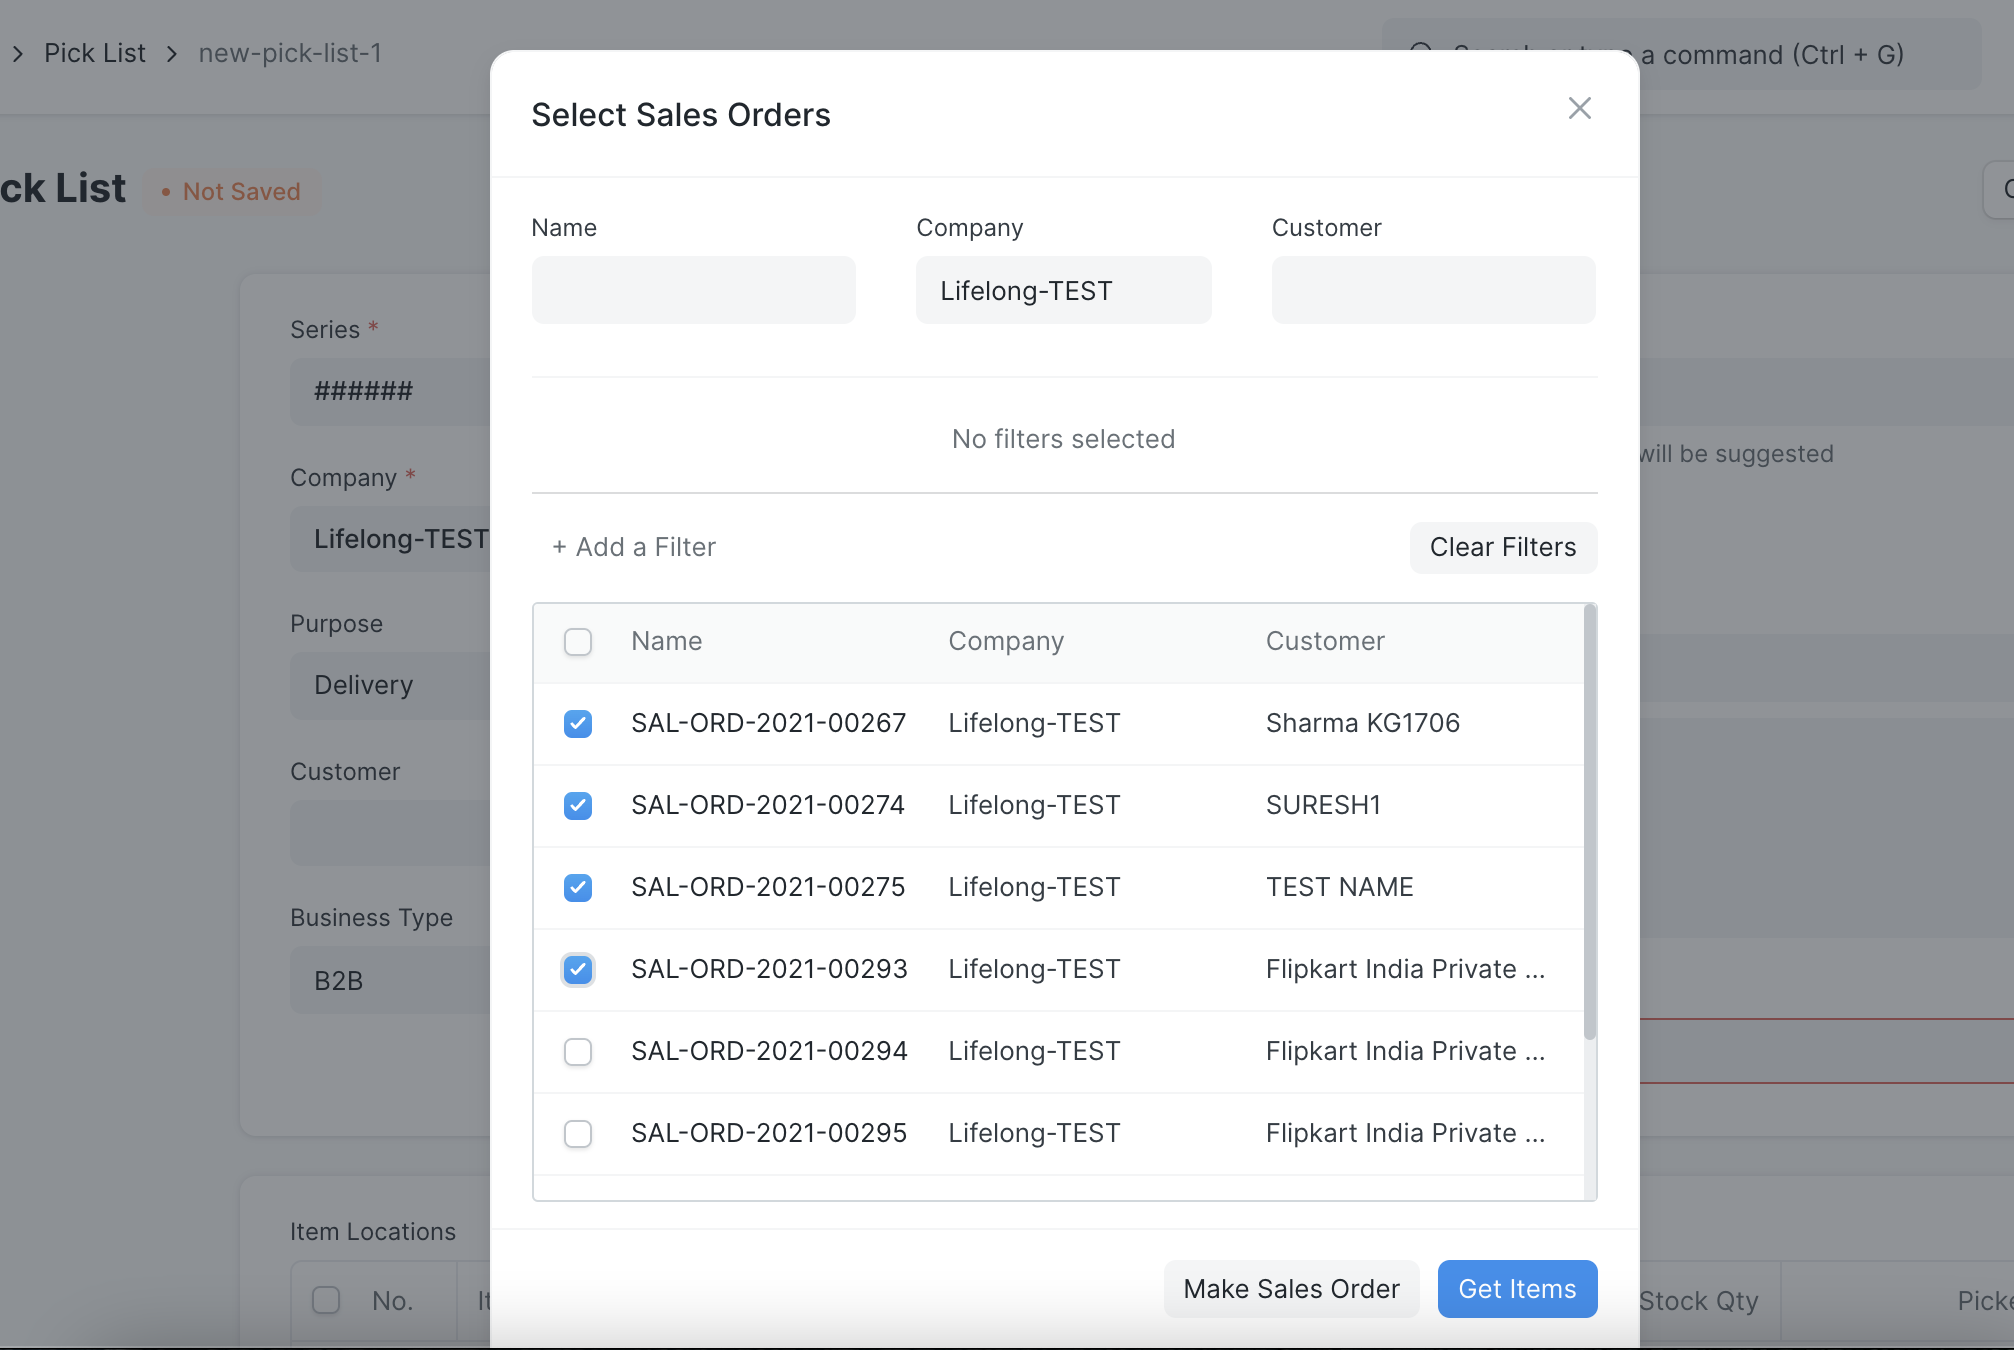
- You should be able to see the Item Locations Table with the Warehouse selected for each item.
- Save this document and it can be used for stock picking by the person performing this activity.
- Submit the document once the stock picking is done and picked item quantities are updated in the document.
Note: > > - Pick list can only be created for Sales Orders which has '% picked' < 100 > - A Delivery Note can be created only if the Pick List is submitted.
2.2 Create Pick List from a Work Order
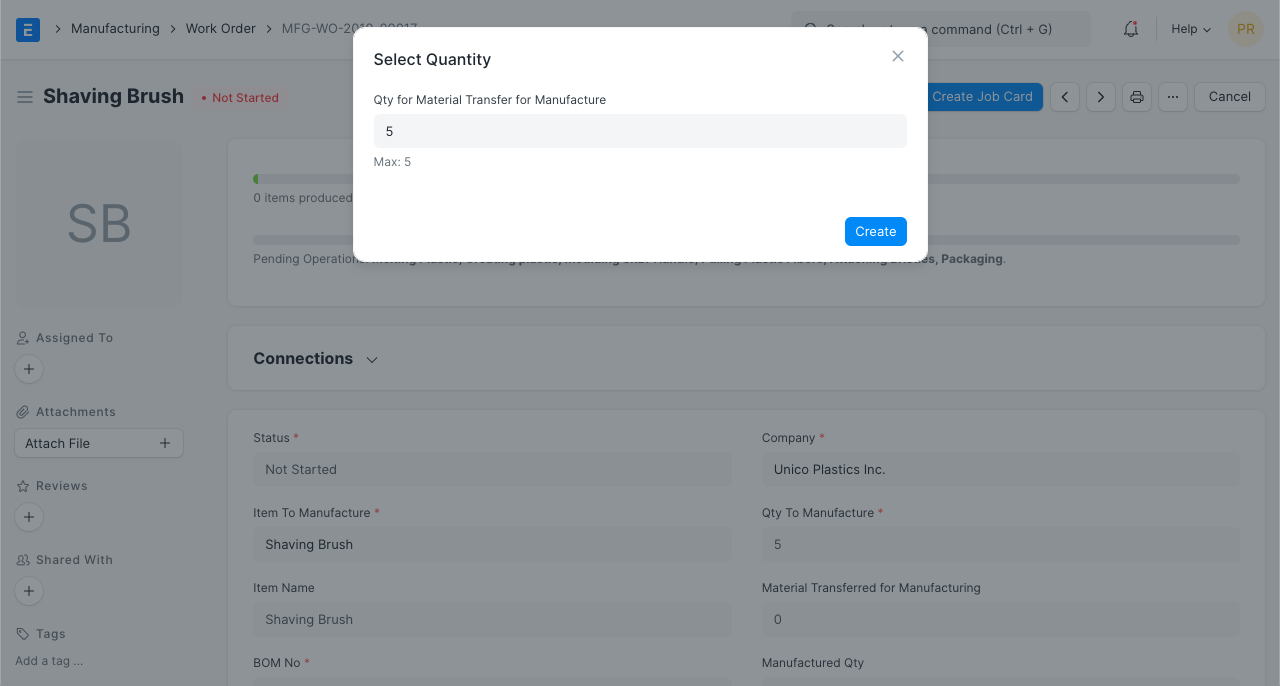
- Go to a Work Order.
- Click Create Pick List button.
- You'll see the dialog box asking for the quantity of Finished Goods Item. This is required to calculate the number of raw material items required to manufacture the entered quantity of Finished Goods Item.
- You should be able to see the Item locations table with the Warehouse selected for each raw material item.
- Save this document and then this document can be forwarded to the person who is picking the stock.
- Submit the document once the stock picking is done and the picked item is updated in the document accordingly.
Note: > > - Pick list can only be created for Work Orders that are still in the state of 'Not Started' or 'In Progress'. > - A Stock Entry can be created only after the Pick List is submitted.
2.3 Create Pick List from Material Request
- Go to a Material Request.
- Click on Create button and then click Pick List option.
- You should be able to see the Item Locations table with the Warehouse selected for each item in Material Request.
- Save this document and then this document can be forwarded to the person picking the stock.
- Submit the document once the stock picking is done and the picked item is updated in the document accordingly.
Note: > > - Only Material Requests with type 'Material Transfer' can be used for Pick List creation. > - A Stock Entry of type 'Material Transfer' can be created after the Pick List is submitted.
3. Features
3.1. Update Current Stock
If a Pick List is outdated, there could be a shift in stock availability by the time a Delivery Note or Stock Entry is created against it. Clicking Update Current Stock will update the quantities and warehouses in the Item Locations table.
Note: This button is visible as long as there are no Delivery Notes or Stock Entries against the Pick List.
3.2 Barcode Scanning
Pick list supports barcode scanning, introducing two check boxes. Scan Mode, and Prompt Qty.
Scan Mode: Scan Mode in ERPNext's Pick List feature is designed to streamline and verify the item-picking process in a warehouse or store environment. When using Scan Mode, users can scan barcodes on items to confirm that they are picking the correct products according to the Picklist. This mode is particularly useful for ensuring accuracy and efficiency during the picking process.
Prompt Qty: When enabled, instead of incrementing the scanned items qty by 1, a dialog will prompt the user to enter a qty to increment by.
4. Pick Manually
In the pick list, if a user manually selects batches, the system overrides the changes upon saving the pick list. To solve this issue added a checkbox 'Pick Manually' in the pick list. If this checkbox is enabled, the system will not override the user's changes in the pick list.