Website Item
The Website information about an Item has been moved to a new DocType called Website Item. Publishing an Item is as simple as a button click. Once an Item has a Website Item created against it, it is successfully published.
The Prerequisites here are Items.
Publishing an Item
The Publish in Website button is visible on every unpublished item under Actions. This button will create a Website Item and thus publish the Item on the website.
If you visit your-site-name/all-products , you will see the newly created Website Item listed here.
To view the Website Item page on the website click on the See on Website link on the top left just above the item image in the Website Item document.
Updating the Website Item
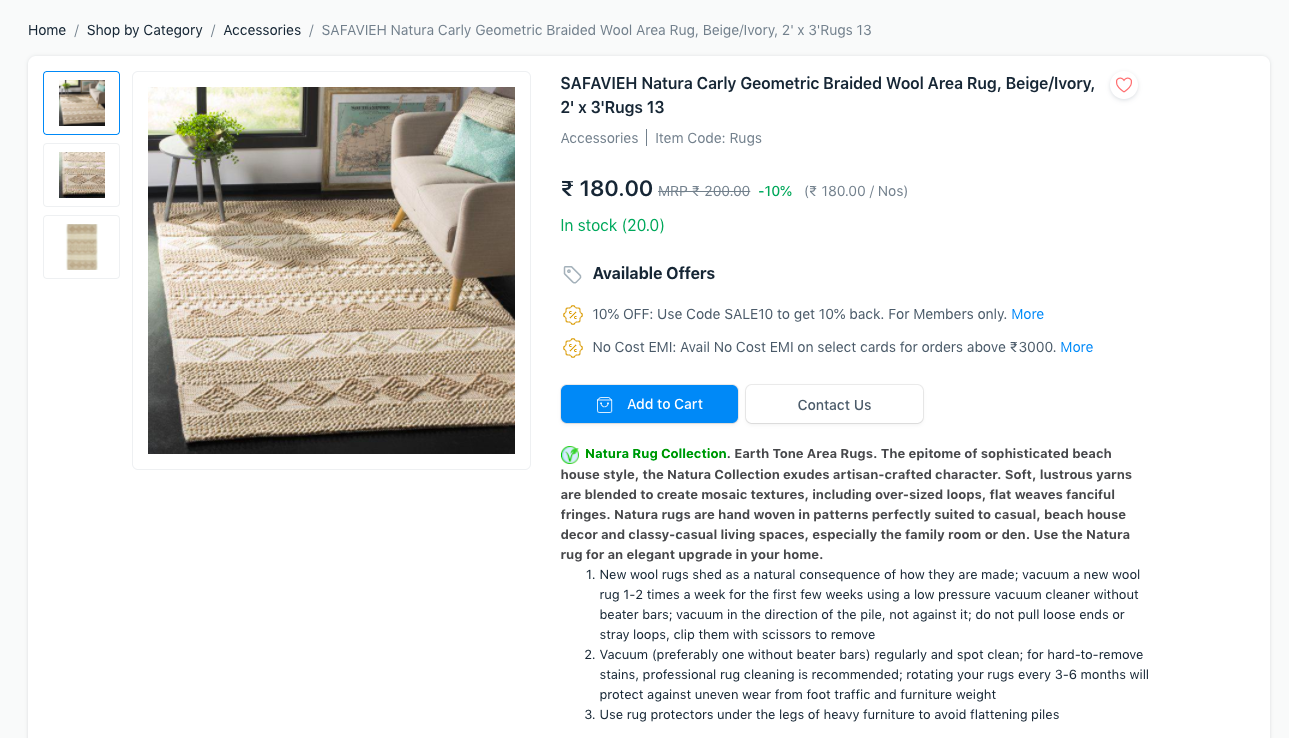
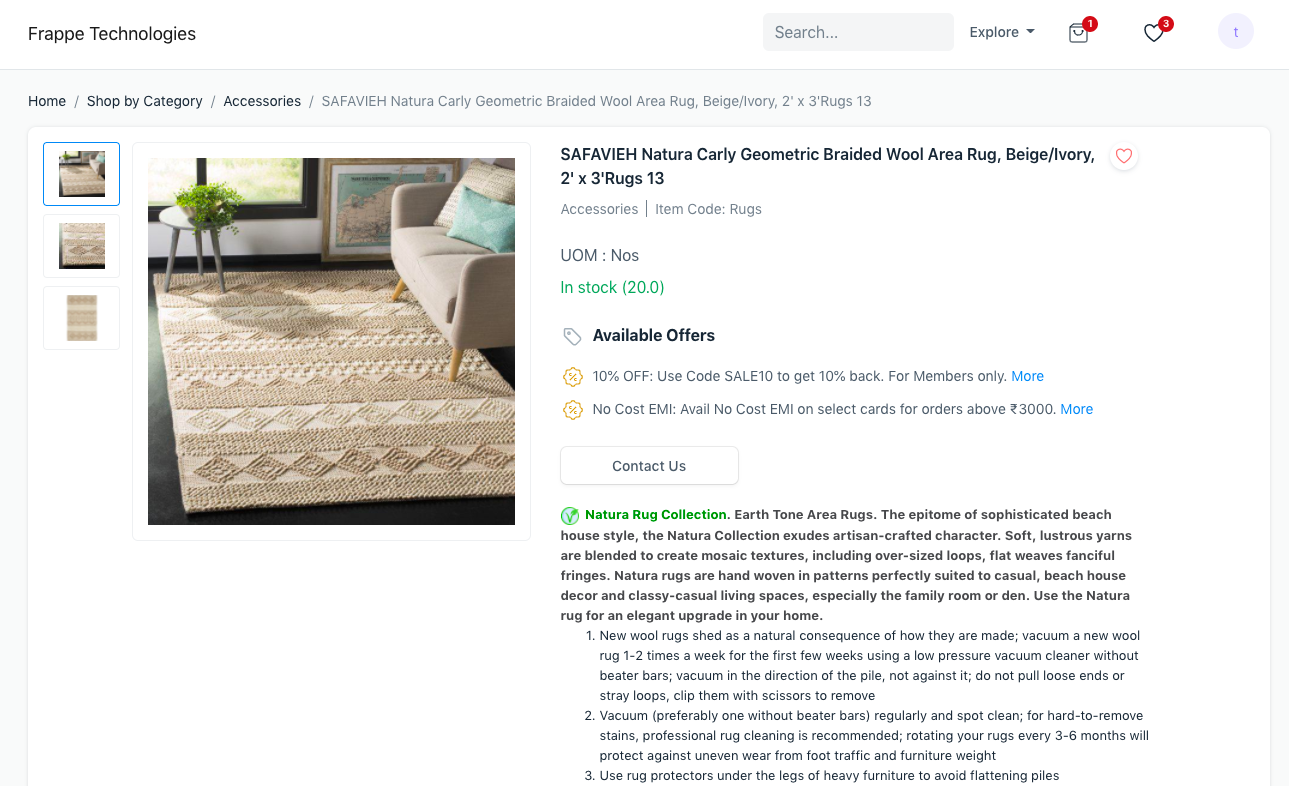
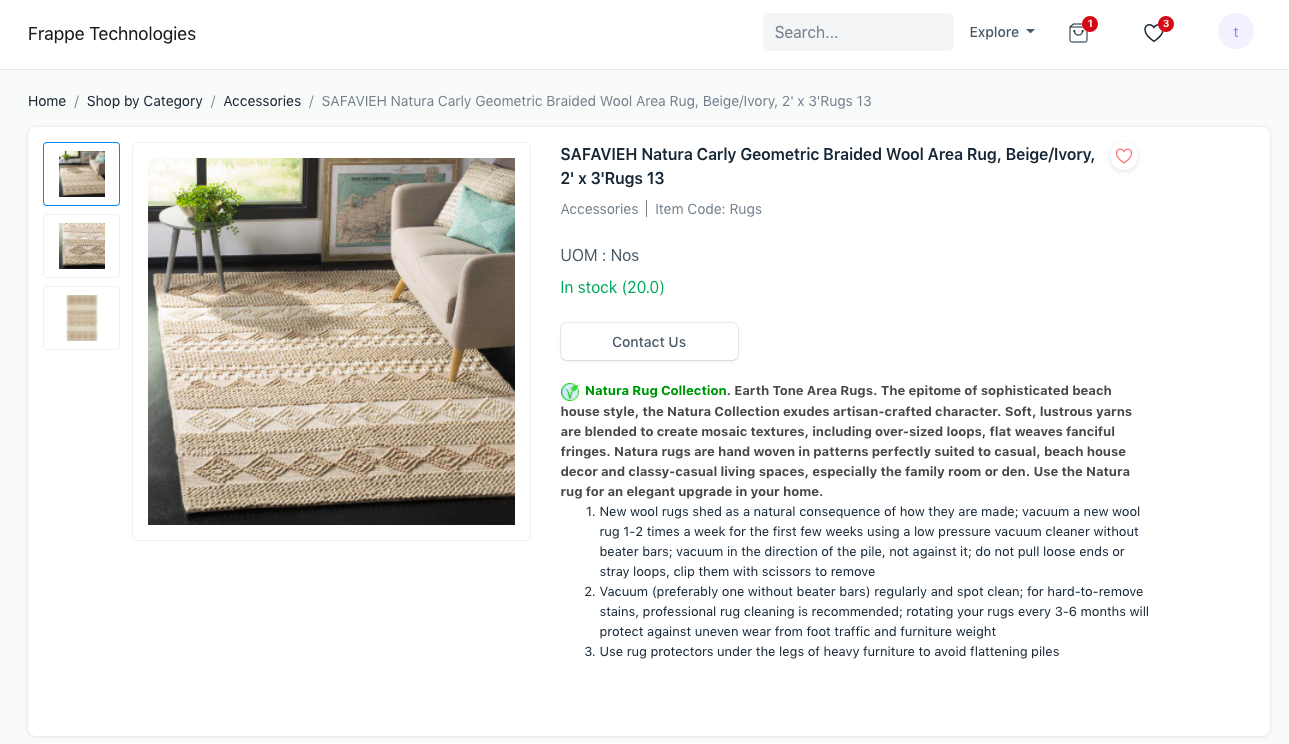 Website Item Page
Once a Website Item has been created, you can update information in it that will be displayed on the website. Here are the fields:
General
- Website Item Name: The title of the Website Item on the website is picked from this field.
- Route: This is auto-generated and just mentions the route your Item’s full page view will be available at.
- Published: If you want to hide or take down your published Item, you can uncheck this checkbox.
Display Images
- Website Image: It is automatically populated with the Image from the Item master. You can change it as well.
- Slideshow: If you add a Slideshow, that will be shown in the Website Item’s page. If a slideshow is absent, it will default to showing the website image (if present).
- Image Description: It is an alternative text in case the image fails to appear.
Stock Information
- Website Warehouse: Select the Warehouse that will hold the stock for this Website Item. The Website Item’s availability will be shown depending on the balance stock in this selected Warehouse.
- On Backorder: If enabled then it will be indicated that the Website Item is available on backorder and not usually pre-stocked. Available on Backorder will be visible instead of Out of Stock or In Stock.
Note: If the Website Warehouse isn't set and 'Maintain Stock' for an Item is ticked, the product page will list the Item as 'Not in Stock'.
Display Information
- Short Website Description: This is a text field where you can mention a short summary like description, for the List View. You can also add some HTML here that will show up in the List View. e.g
This item is <b>100%</b> pure! - Website Description: This is a rich text editor field, where you can format your website item description to make it attractive and informative. The Item Description is used as a fallback if a Website Description is not mentioned.
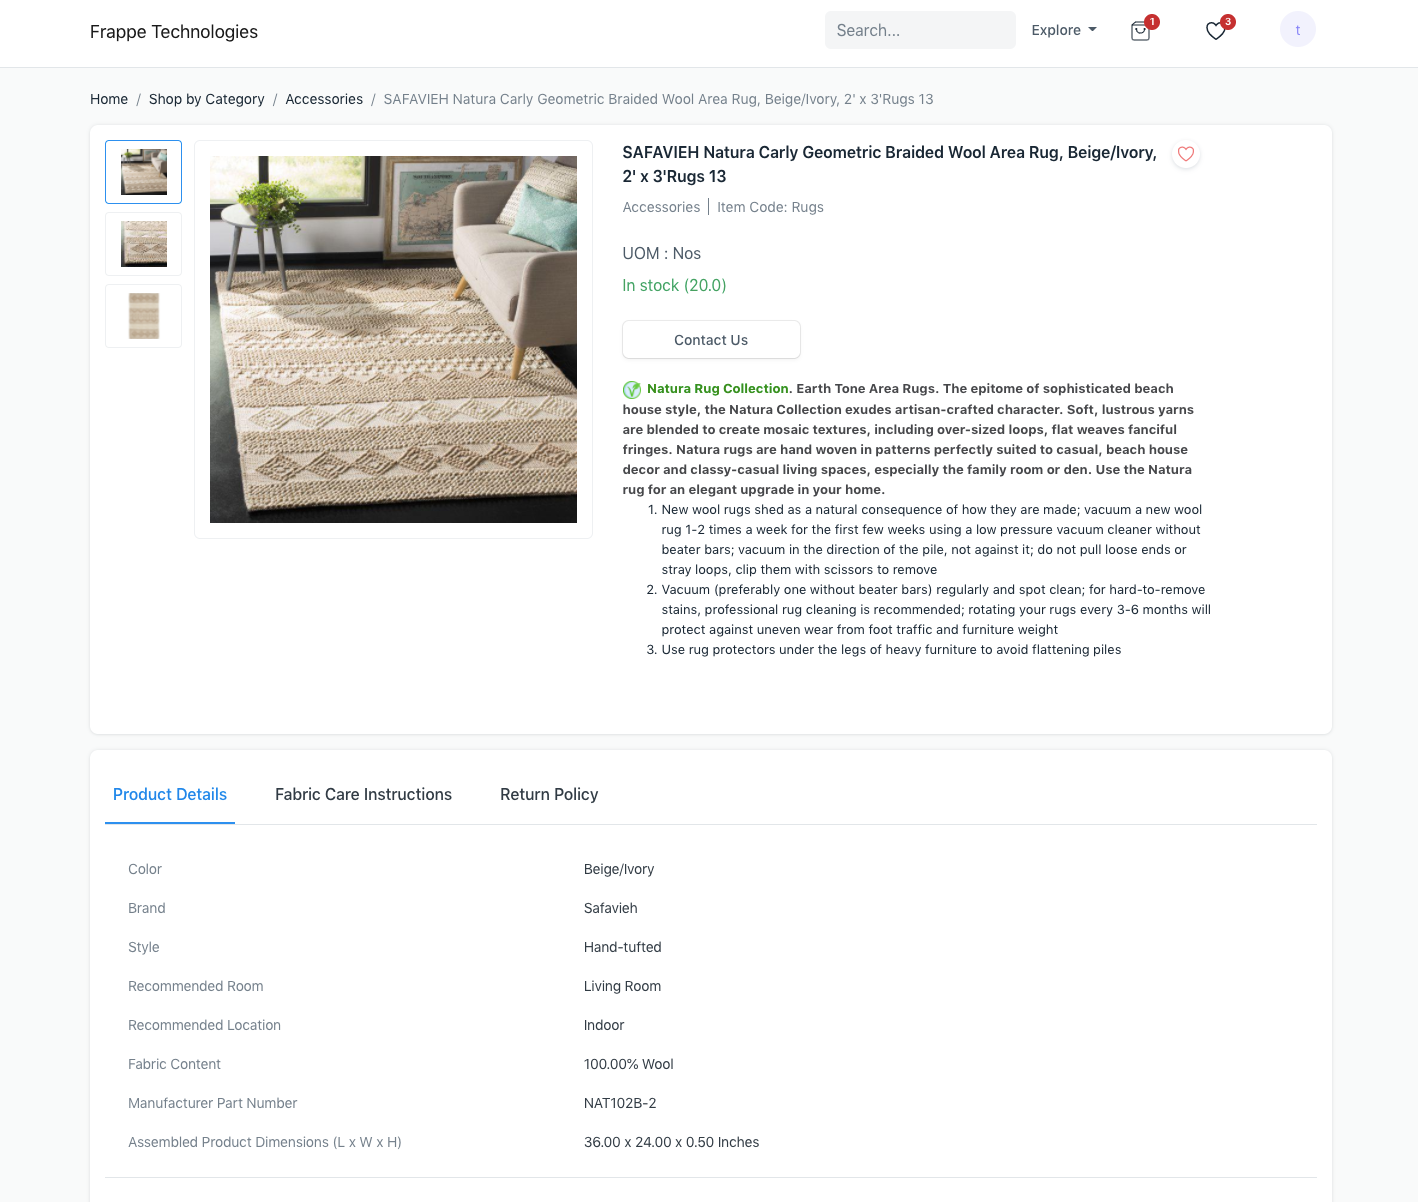
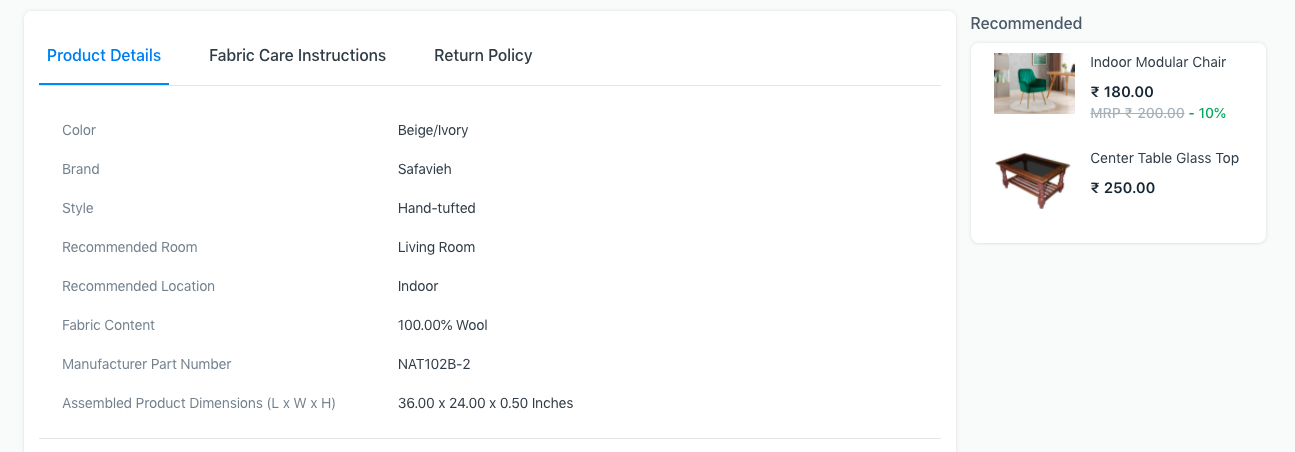
- Website Specifications: You can mention the Website Item's specifications such as weight, manufacturer, dimensions, material, etc. You can also add common specifications in the Item Group that this Website Item belongs to and copy it here by clicking on Copy From Item Group. This information will be visible on the Product Details section in the Website Item’s page.
Display Additional Information
The Product Details section can be viewed in a tabbed section along with other information too. For this:
- In the Display Additional Information section, and enable Add Section with Tabs.
- You can now add tabs in the Tabs table by adding a label and content for it. The content field is an HTML editor where you can add advanced HTML, to beautify your tab, or a simple paragraph.
- This tabbed section will set Product Details as the first tab which will contain the Website Specifications stated above (if present).
- This will be followed by tabs from the Tabs table
Recommended Items
You can show Recommended Items against Website Items to knudge users to pay attention to a closely related item. This can be enabled by going to E Commerce Settings > Add-ons > Enable Recommendations.
You can then add Recommended Items against a Website Item in the Recommended Items section, and add the items to recommend. These will show up in the Website Item Page.
Offers
Coupon Codes can be added at checkout , but customers must know about these codes. For this, Offers can be added to the Website Item for display.
- Go to the Offers section in the Website Item.
- Add a short offer title that is one/two words, in the Offer Title.
- Add a slightly longer subtitle, a sentence in the Offer Subtitle.
- Add lengthy details about the offer in the Offer Description. Save.
Search and SEO
- Ranking: Assign a rank to the Website Item to have control over it's position in the Product Listing. Website Items with higher ranking will be shown higher.
- Set Meta Tags: Meta tags help with SEO. See Web Page to know how to add them.
- Website Item Groups: In this table you can select existing or create new Item Groups to classify items on your website. The Website Item will be visible under Item Group Pages of the Item Groups mentioned in this table.
Advanced Display Content
You can add an additional styled section using Bootstrap 4 markup for the Website Item page. 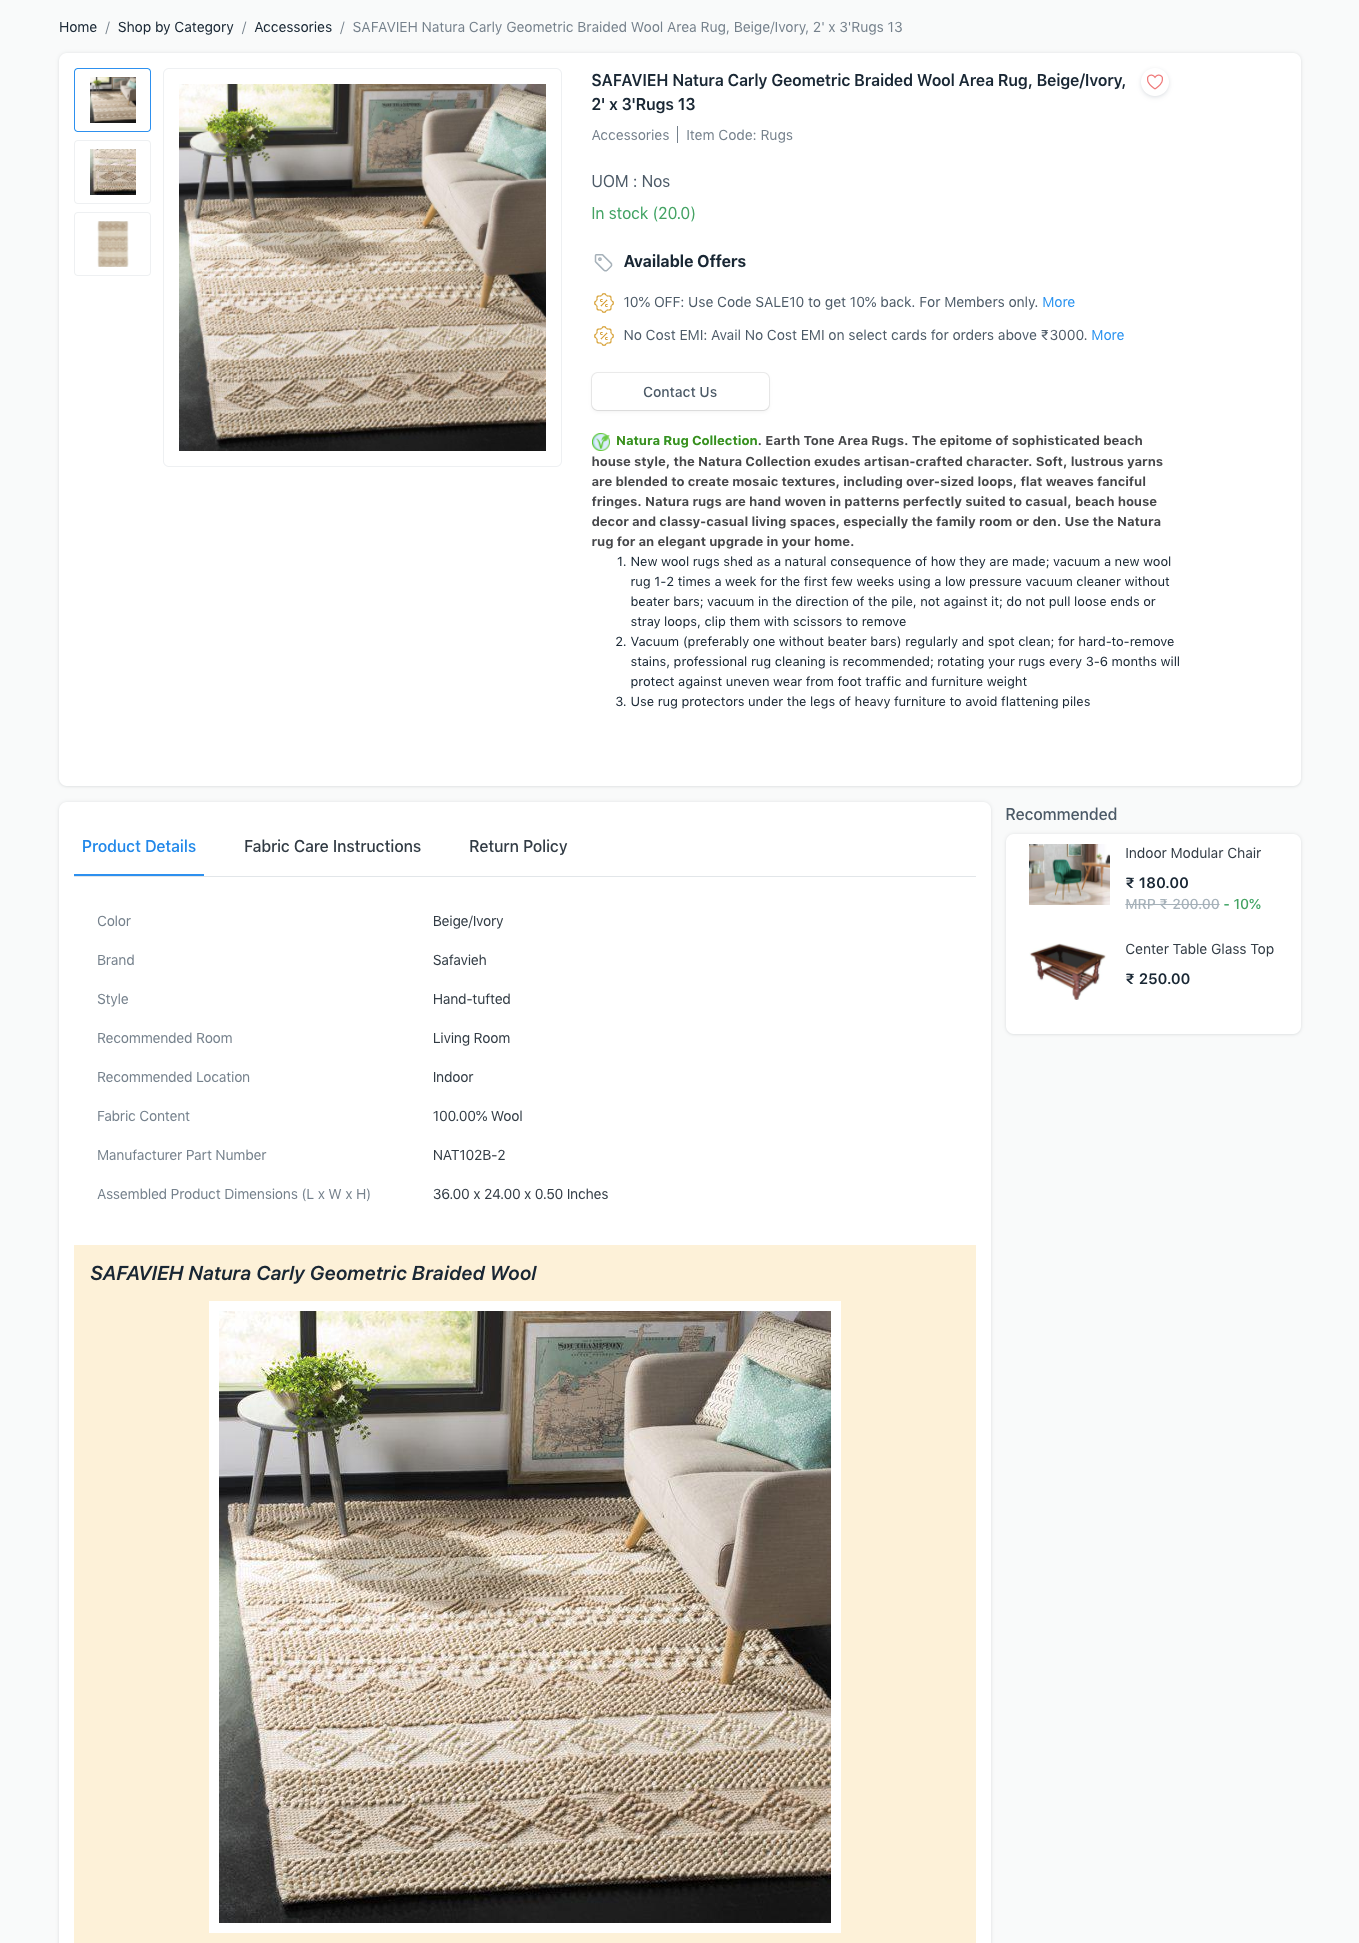
Adding Price Details
Prices can be added against Website Items via Item Price. Before adding an Item Price, go to E Commerce Settings and make sure Company, Price List , Default Customer Group are set.
Now you can go ahead and create an Item Price for the Website Item, and select the Price List as the one in the E Commerce Settings.
You can also add a Pricing Rule with a Discount Percentage or Discount Amount on the existing item price, to show striked prices.