Payment Entry
A Payment Entry is a record indicating that payment has been made for an invoice.
Payment Entry can be made against the following transactions.
- Sales Invoice
- Purchase Invoice
- Sales Order (Advance Payment)
- Purchase Order (Advance Payment)
- Expense Claim
- Internal Transfer
In ERPNext, there are two options through which User can capture the payment:
- Payment Entry (Default)
- Journal Entry
Here are diagrams to understand the flow:
In Sales: 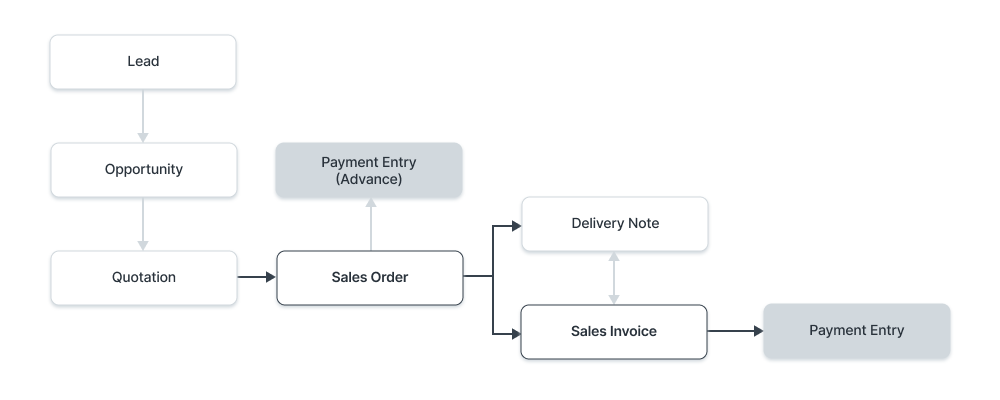
In Purchase: 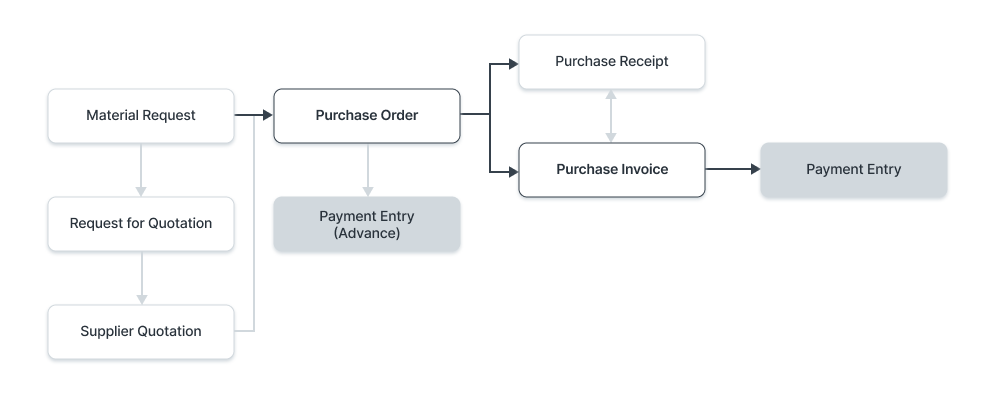
To access the Payment Entry list, go to:
Home > Accounting > Accounts Receivable/Payable > Payment Entry
1. Prerequisites
A Payment Entry can also be created directly then linked to an order/invoice later. Before creating and using Payment Entry, it is advised to create the following first:
If you're following the Sales/Purchase Cycle, you'd need the following:
- Sales Order (Advance Payment)
- Purchase Order (Advance Payment)
- Sales Invoice
- Purchase Invoice
Set up:
- Chart Of Accounts
- Company (for default accounts)
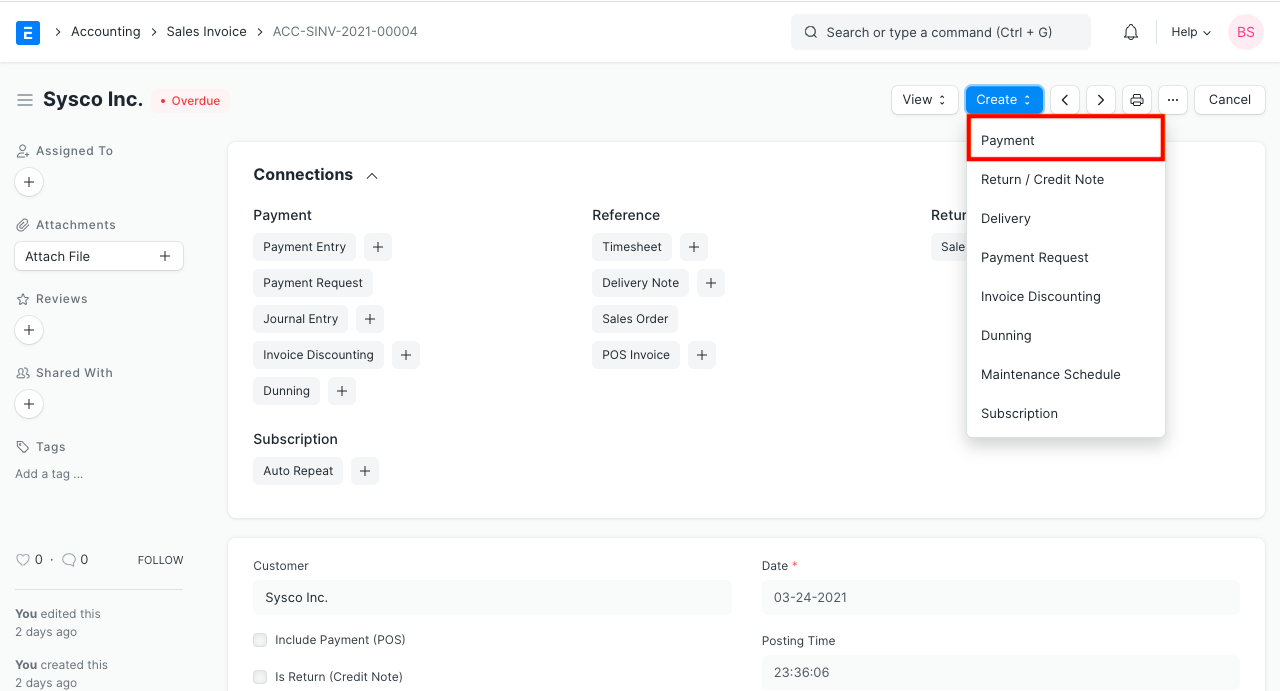
2. How to create a Payment Entry
On submitting a document against which Payment Entry can be made, you will find the Payment option under the Create button.
- Change the posting date.
- The Payment Type will be set based on the transaction you're coming from. The types are 'Receive', 'Pay', and 'Internal Transfer'.
- The Party Type, Party, Party Name will be fetched automatically.
- The Account Paid To and Account Paid From will be fetched as set in the Company form.
- The Amount Paid will be fetched from the Invoice.
- Save and Submit.
2.1 Creating a Payment Manually
A Payment Entry created manually will have no order/invoice linked to it. Payments made this will be recorded in the Customer's/Supplier's account and can be reconciled later using the Payment Reconciliation Tool.
- Go to the Payment Entry list and click on New.
- Select the Party Type and the respective Customer/Supplier.
- Select the Bank Account/Cash Account Paid To and Paid From. Enter the Cheque Number and date if bank transfer.
- Enter the Amount Paid.
- Save and Submit.
3. Features
3.1 Setting Mode of Payment
Mode of Payment: Entering this helps classify Payment Entries based on the payment mode used. Modes of Payment can be Bank, Cash, Wire Transfer, etc.
Tip: In the Mode of Payment master, default Account can be set. This default payment Account will be fetched into Payment Entries.
3.2 Payment From/To
- Party Type: Whether Customer, Supplier, Employee, Shareholder, Student, or NGO Member.
- Party: The specific party for which the Payment Entry is made.
- Party Name: The name of the party, this is fetched automatically.
- Company Bank Account: Your Company's Bank Account.
- Party Bank Account: The Party's Bank Account.
- Contact: If the Party is an organization, a Contact person can be stored here.
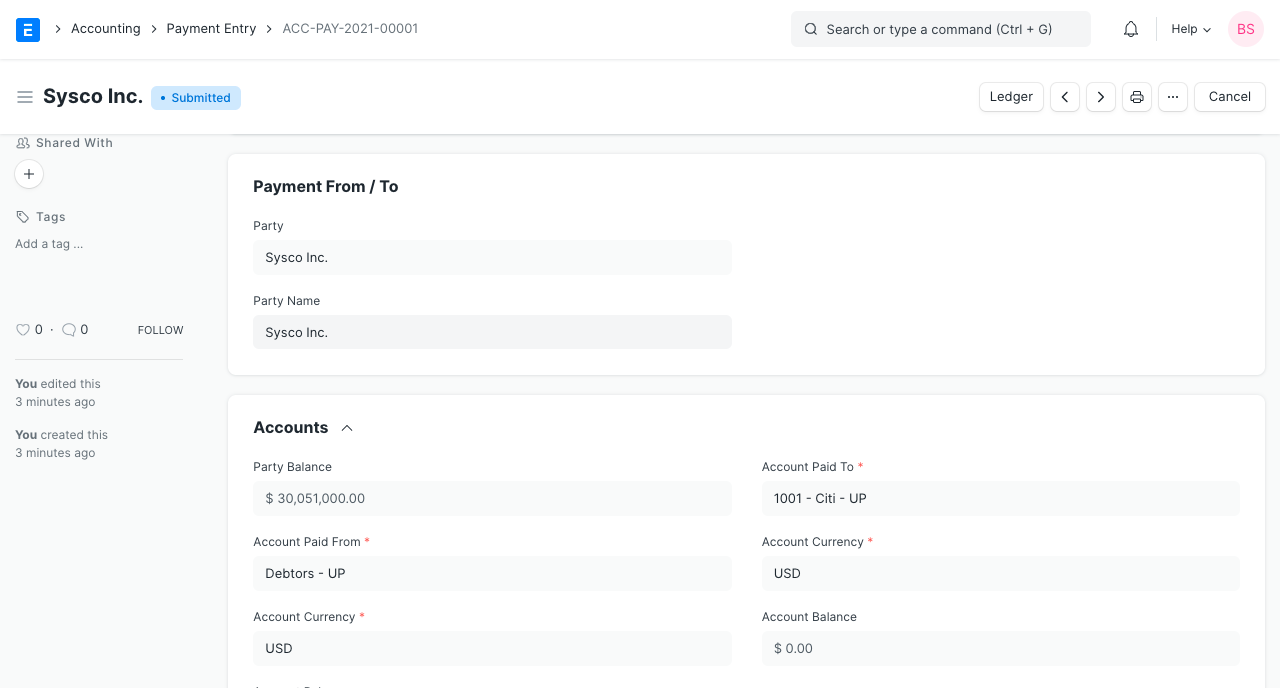
3.3 Accounts
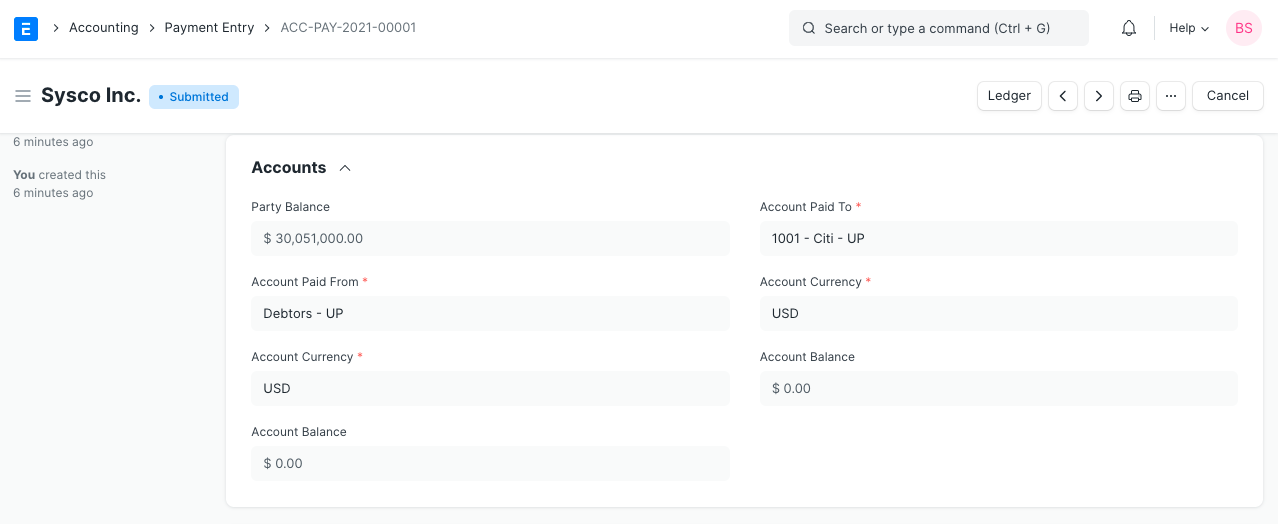
- Party Balance: The overall amount receivable or payable from Customer or Supplier from Invoices set in the current Payment Entry. Paid amounts will be positive and if advance payments are made, they will be negative.
- Account Paid From: The Account from which the amount will be deducted when Payment is submitted.
- Account Paid To: The CoA account from which the amount will be added when Payment Entry is submitted.
- Account Currency: The Currencies of these accounts will be fetched as set in the Account and cannot be edited here. To know about more about transactions in multiple currencies, visit this page.
- Account Balance: The total amount balance from all the invoices of the selected accounts.
Paid Amount: The total amount paid for the current Payment Entry is shown in this field.
Note: When making Payment Entries, the default bank account will be fetched in the following order if set:
- Company form
- Mode of Payment default account
- Customer/Supplier default bank account
- Select manually in Payment Entry
3.4 Reference
Fetching outstanding Invoices
This can be used to make payments to multiple Sales Invoices using one Payment Entry. When creating a new Payment Entry, on clicking the Get Outstanding Invoices button or the Get Outstanding Orders button, all the outstanding Invoices and open Orders respectively will be fetched for the party. You need to enter the 'Paid Amount' to see this button. From here a date range and invoices to be fetched can be selected.
If the Party has not made full payment, enter the amount paid in the 'Allocated' field.
If creating Payment Entry for a Customer, the Payment Amount will be allocated against a Sales Invoice. On the same lines, when creating Payment Entry for a Supplier, Payment Amount will be allocated against a Purchase Invoice.
Payment References table
- Type: Whether the payment is being made against a Sales Order, Sales Invoice, or a Journal Entry.
- Name: The particular transaction ID is fetched/selected here.
- Total Amount: The total amount of one Invoice/Journal Entry in the row.
- Outstanding: The amount to receive/to pay for this invoice.
- Allocated: If the Paid Amount is less than the invoice amount only the paid amount will be allocated to the invoice(s) fetched in the Payment Entry. The payment may be made in parts, for example, if there are three invoices of amounts 20, 20, 20, the Paid Amount is 60 then this Paid Amount will be distributed equally. Payment Terms may also be involved.

What is Unallocated Amount?
When a Payment Entry is made in ERPNext and the Paid Amount is more than the total invoice amount, it is stored in the Customer's/Supplier's account. This amount is hence currently 'Unallocated'. Unallocated amount can be used against future invoices.
For example, you create a Sales Invoice totaling 1,000 and the Customer paid 1,500. When another invoice is created for this Customer in the future for 1,000 again, the previously paid 500 can be used.
3.5 Deductions or Loss
When a Payment Entry is created against an invoice, there could be some difference in the actual Paid Amount and the invoice outstanding amount. This difference could be due to rounding errors or changes in the currency exchange rate. You can set an Account here where this difference amount will be booked.
The loss/deductions can be written off. Let's see an example here where the paid amount is 25 but the allocated amount is 30 since 30 is the amount to be collected as per the invoice. The 'Difference Amount' will be 5 in this case. This difference amount can occur due to discounts or Currency Exchange. The Difference Amount needs to be 0 in order to submit the Payment Entry. This can be adjusted using the Make Difference Entry button. The amount will be adjusted in the Write Off account.
3.6 Write Off
Write off happens when the paid amount is less than the allocated amount. I.e. the remaining amount is considered as lost in miscellaneous charges or that amount isn't going to be paid. This is considered as loss.
3.5 After Submitting
Save and Submit Payment Entry. On submission, outstanding will be updated in the Invoices.
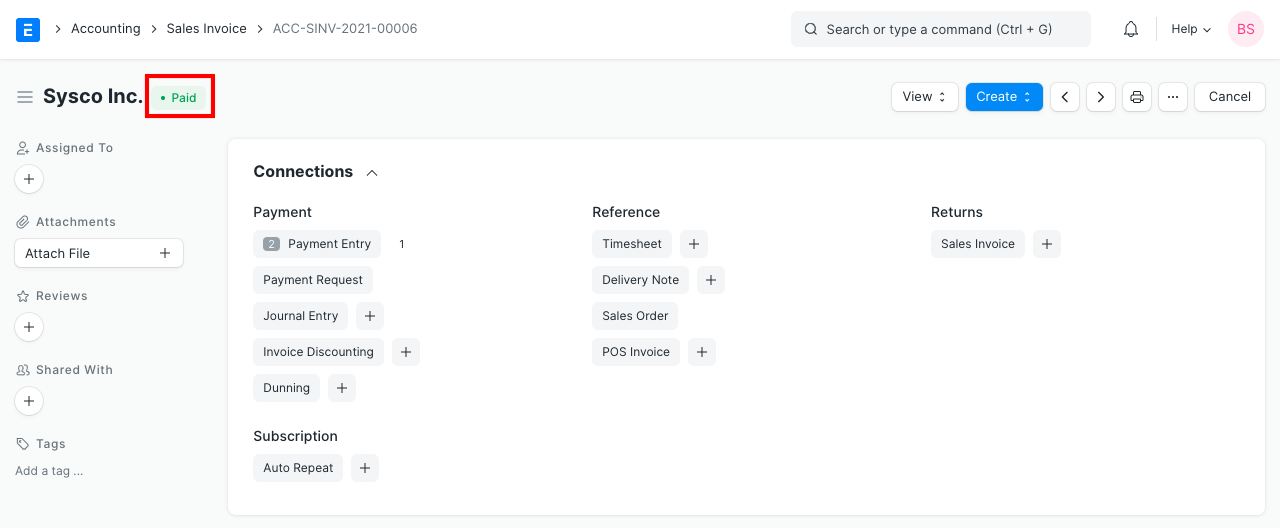
If payment entry was created against Sales Order or Purchase Order, the field 'Advance Paid' will be updated in them. When creating Invoice against those transactions, Payment Entry will be auto-updated in that Invoice so that you can allocate invoice amount against advance payment entry.
For incoming payment, the accounts posting will be done as follows.
- Debit: Bank or Cash Account
- Credit: Customer (Debtor)
For outgoing payment:
- Debit: Supplier (Creditor)
- Credit: Bank or Cash Account
4. Other cases
4.1 Multi Currency Payment Entry
If you want to maintain a receivable/payable account in foreign currency, then create accounts with foreign currency (different from Company currency) and link it in the party account. For example:
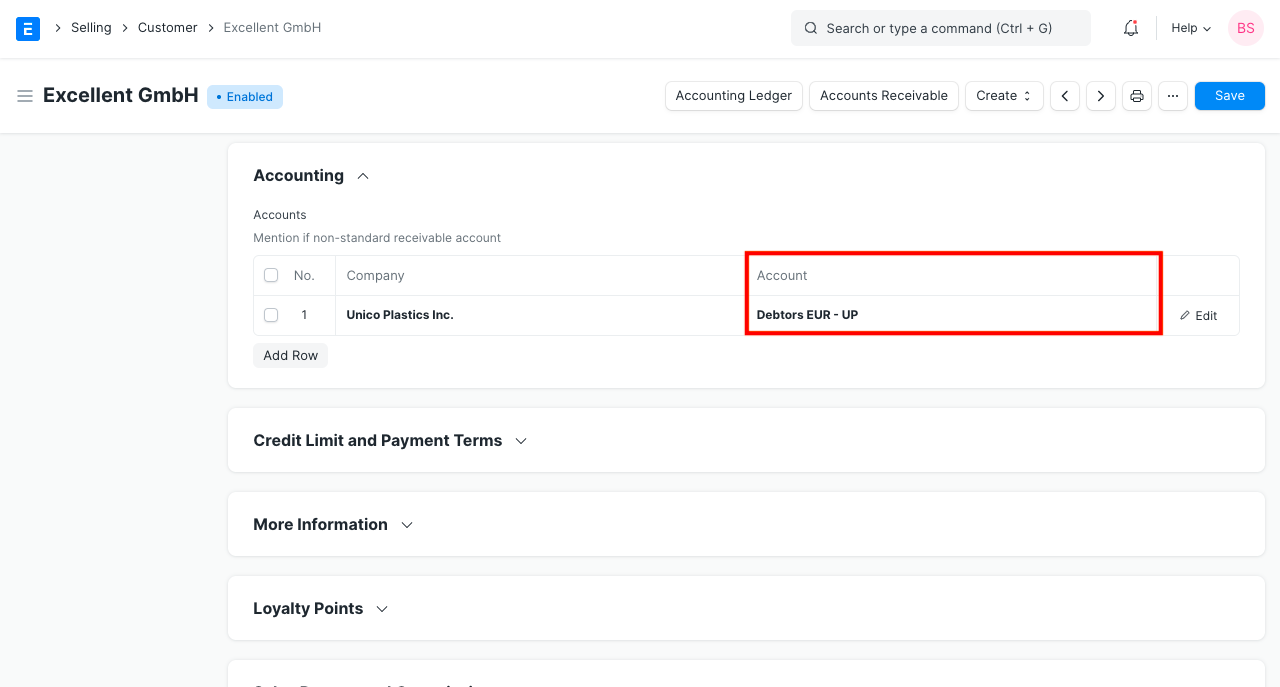
ERPNext allows you maintain accounts and invoicing in multiple currency. If an invoice is made in the party currency, Currency Exchange Rate between the Company's base currency and party currency is also entered in the invoice.
Note: A separate Debtor/Creditor account needs to be created and selected in the Sales Invoice/Order for currency exchange to work correctly. For example, if the Customer is from the US, create a receivable account called 'Debtors US'.
When creating Payment Entry against that invoice, the current exchange rate will be fetched, but you can set the Currency Exchange Rate at the time of payment to match your records.
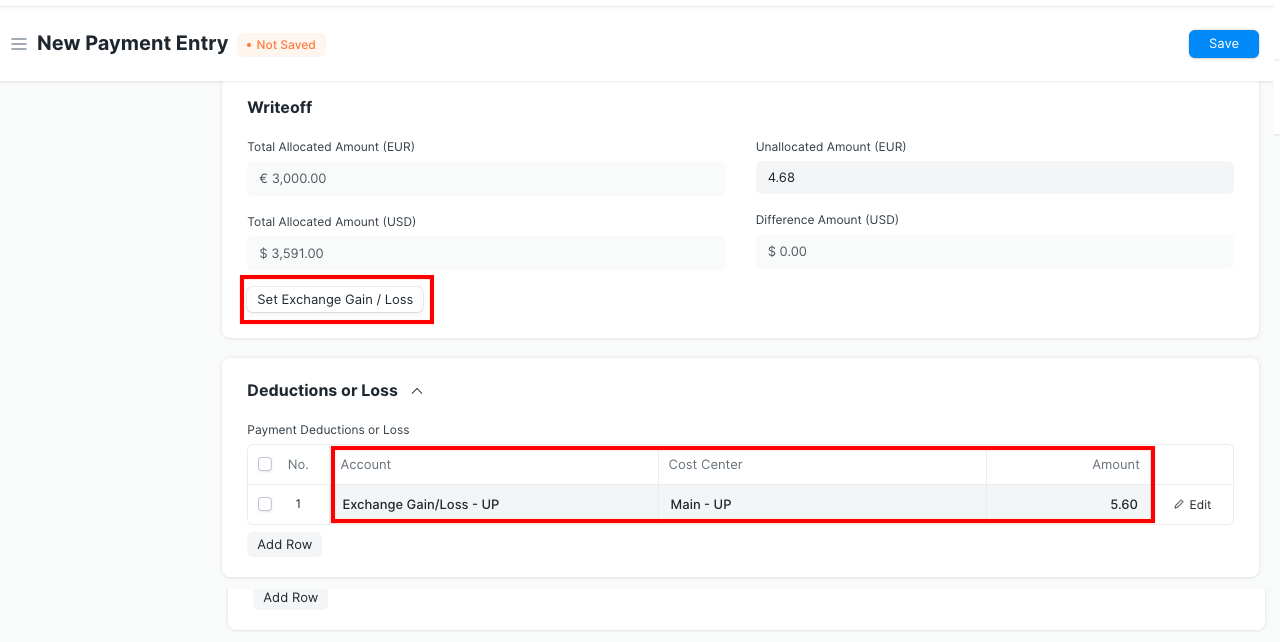
Click on the Set Exchange Gain/Loss button to automatically add a row to write off the difference amount.
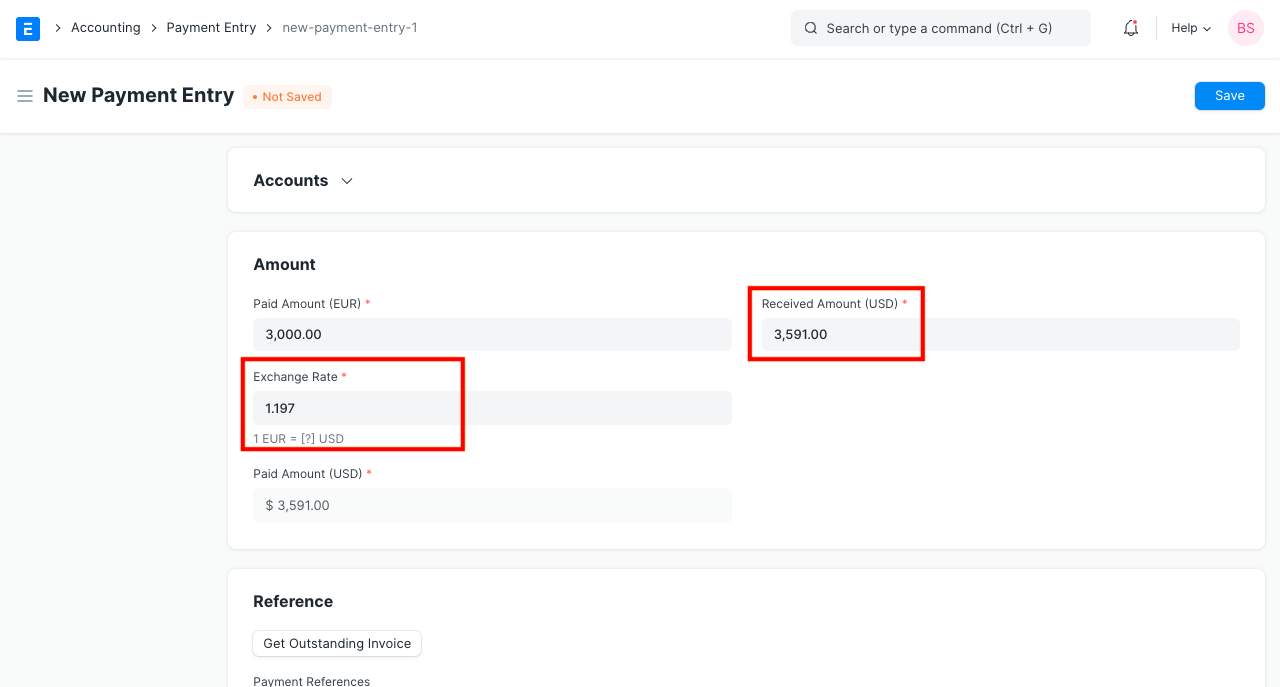
Since Currency Exchange Rate fluctuates all the time, it can lead to a difference in the payment amount against invoice total. This difference amount can be booked in the Currency Exchange Gain/Loss Amount.
Payments can also be made independent of invoices by creating a new Payment Entry.
To know more about managing transactions in multiple currencies visit this page.
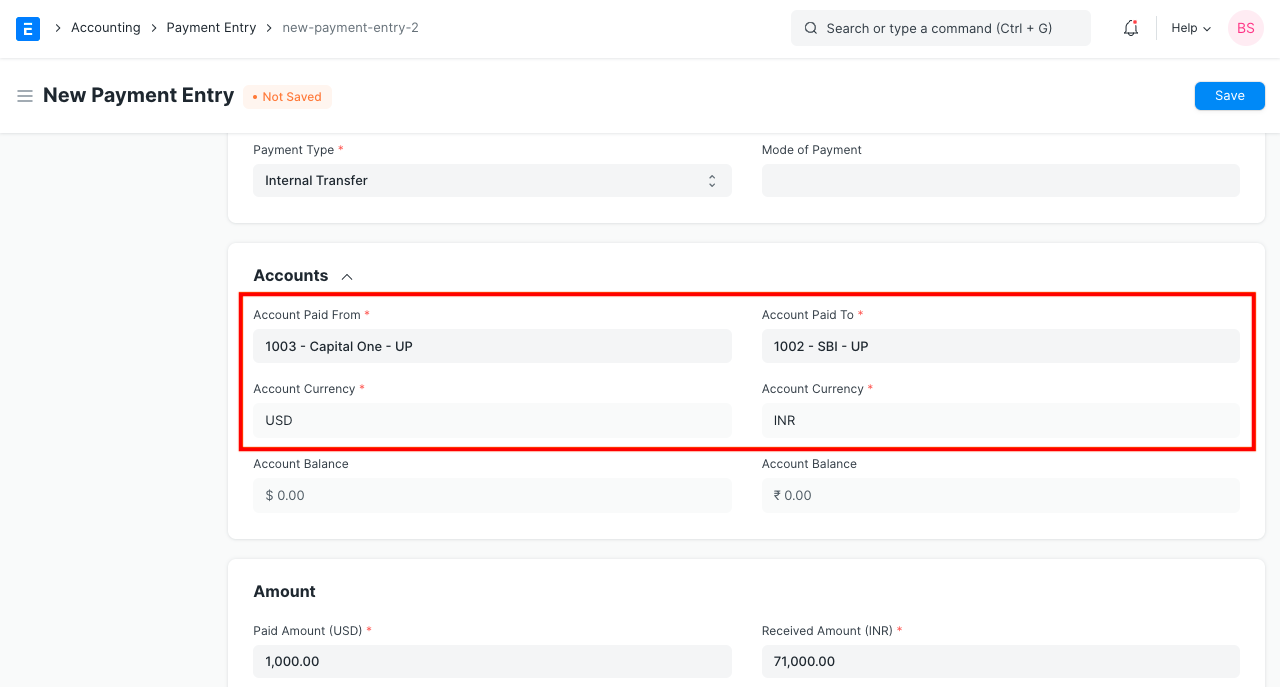
4.2 Internal Transfer
Internal Transfer is used in cases where the money is transferred between the same Company's accounts. For example, if a customer from the US using PayPal, transferring money from PayPal to a bank account can be considered as Internal Transfer.
Following internal transfers can be managed from the Payment Entry.
- Bank - Cash
- Bank - Bank
- Cash - Cash
- Cash - Bank
4.3 Managing Different Payment Scenarios
For an unpaid invoice, outstanding amount = grand total. When creating Payment Entries, the value in the outstanding amount will reduce.
In most cases, apart from retail sales, billing and payments are separate activities. There are several combinations in which these payments are done. These cases apply to both Sales and Purchases.
- They can be upfront (100% in advance).
- Post shipment. Either on delivery or within a few days of delivery.
- Part in advance and part on or post delivery.
- Payments can be made together for a bunch of invoices.
- Advances can be given together for a bunch of invoices (and can be split across invoices).
ERPNext allows you to manage all these scenarios. All accounting entries (GL Entry) can be made against a Sales Invoice, Purchase Invoice or Payment Entry of advance payment (in special cases, an invoice can be made via a Sales Invoice too).
The total outstanding amount against an invoice is the sum of all the accounting entries that are made “against” (or are linked to) that invoice. This way you can combine or split payments in Payment Entry to manage the scenarios.
4.4 Difference between Payment Entry and Journal Entry
- Using Journal Entry requires an understanding of which Account will get Debited or Credited. In the Payment Entry, it is managed in the backend, hence simpler for the User.
- Payment Entry is more efficient in managing payments in foreign currencies.
- Cheques can be printed from Payment Entries using the Cheque Print Format.
Journal Entry can still be used for:
- Updating opening balance in Accounts.
- Fixed Asset Depreciation entry.
- For adjusting Credit Note against Sales Invoice and Debit Note against Purchase Invoice, in case there is no payment happening at all.
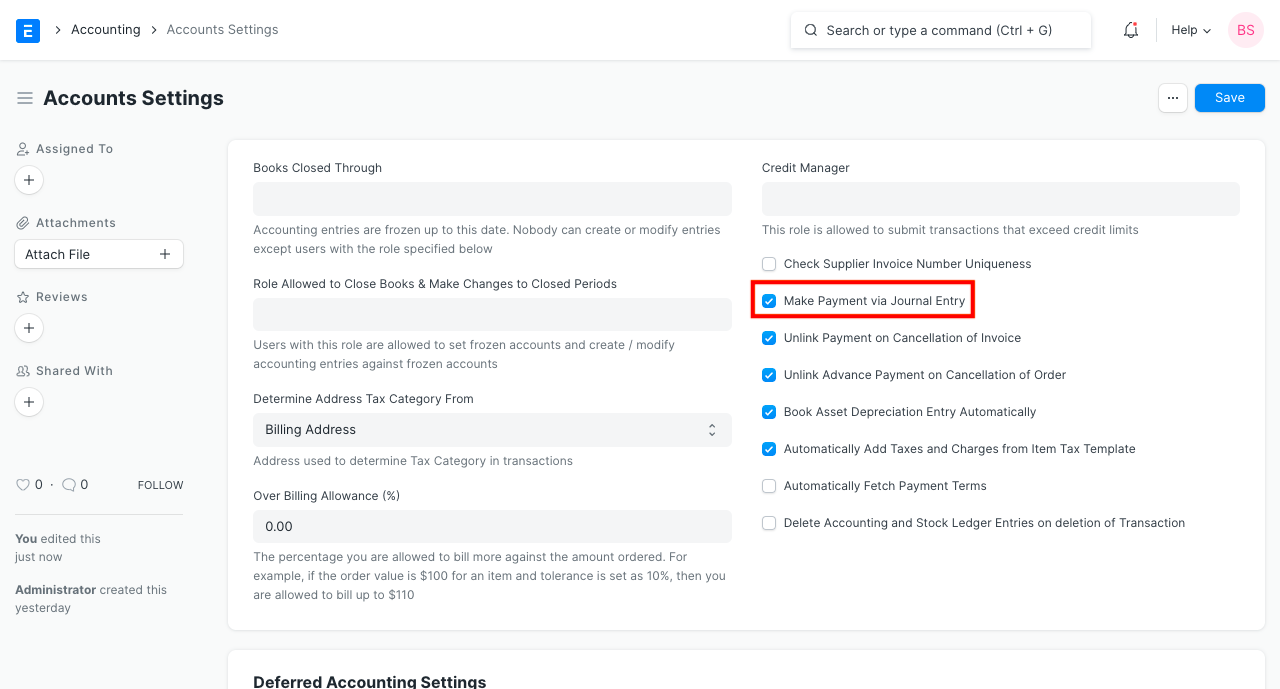
4.5 Payments Using Journal Entry
To make payment using Journal Entry follow these steps:
- Activate Payment via Journal Entry. Go to Accounting > Accounting Masters > Accounts Settings, check the box 'Make Payment via Journal Entry'.
- On submitting a document against which Journal Entry can be made, you will find the Payment under the Create button.
- Save and submit the journal entry to record the payment against the invoice