Journal Entry
A Journal Entry is an entry made in the general ledger and it indicates the affected accounts.
A Journal Entry is a multi purpose transaction where the debit and credit accounts can be selected.
All types of accounting entries other than Sales and Purchase transactions are made using the Journal Entry. A Journal Entry is a standard accounting transaction that affects multiple Accounts and the sum of debits is equal to the sum of credits. A Journal Entry Impacts the main ledger.
Journal Entries can be used for entering expenses, opening entries, contra entries, bank payments, excise entries, etc. For example, booking running expenses, direct expenses like petrol/transport, sundry expenses, adjustment entries, and adjusting invoice amount.
Note: From version-13 onwards we have introduced immutable ledger which changes the way cancellation of accounting entries works in ERPNext. Learn more here.
To access the Journal Entry list, go to:
Home > Accounting > General Ledger > Journal Entry
1. How to create a Journal Entry
- Go to the Journal Entry list, click on New.
- The default Entry Type will be 'Journal Entry'. This is a general purpose entry type. Visit section 3 to know more about entry types.
- You can change the Posting Date.
- Expand the table, select an Account from which amount is debited.
- The above details can be added from a Journal Entry Template too with the 'From Template' field.
- Select the Party Type and Party if it's a Debtor entry.
- Add a row where the amount will be credited.
- Note that, in the end, total debit and credit amounts should add up to be the same.
- Save and Submit.
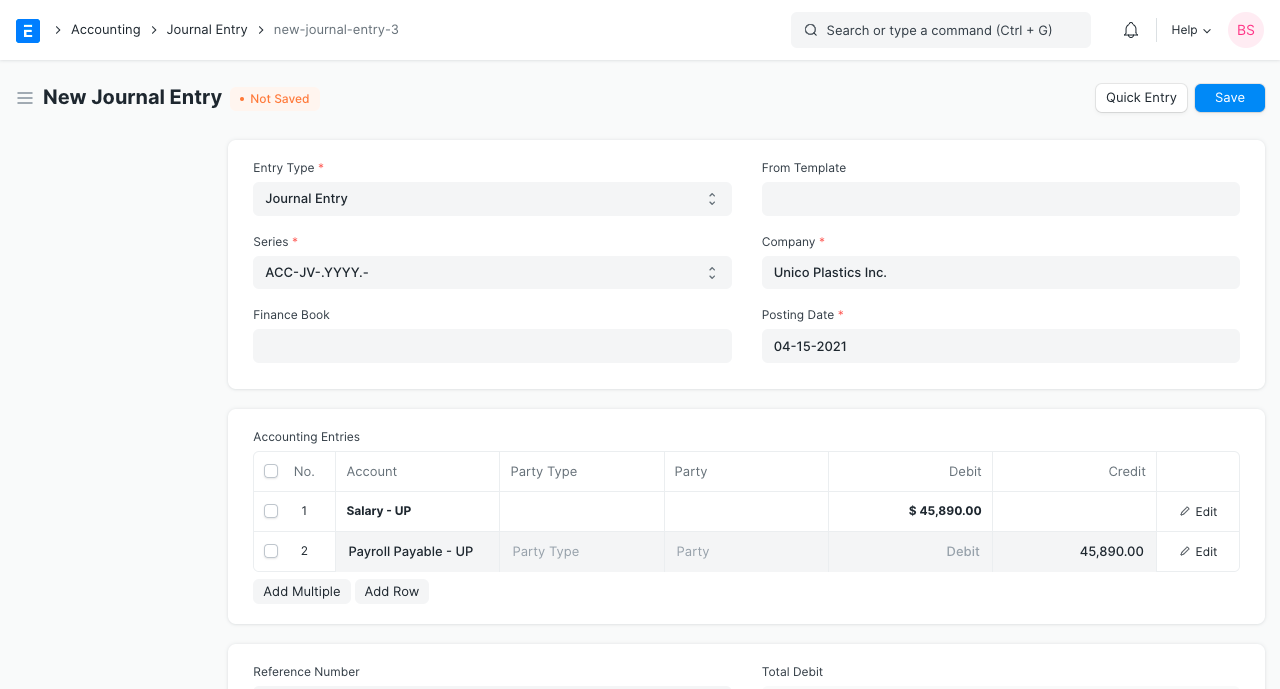
Finance Book: You can post this entry to a specific Finance Book. On leaving this field blank, this Journal Entry will show up in all Finance Books. This field will only be visible if 'Enable Finance Books' under the Fixed Asset Defaults section of the Company master is checked.
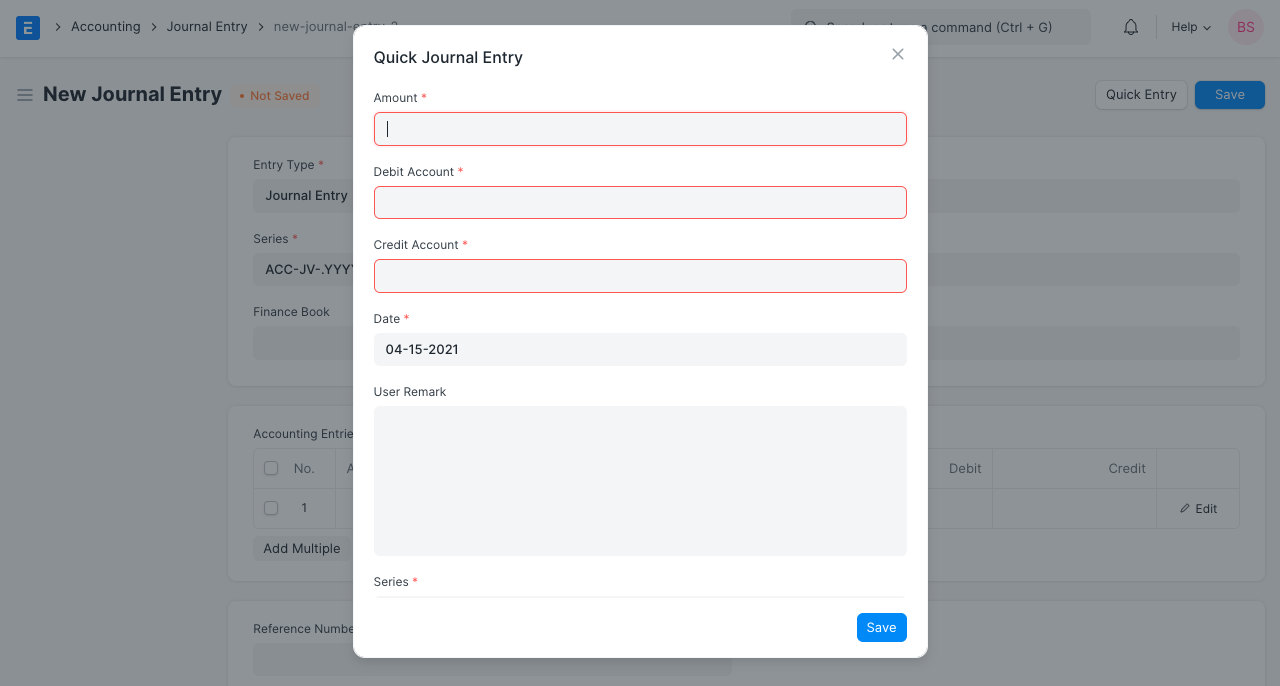
1.1 Quick Entry
When creating a Journal Entry, a Quick Entry button can be seen on the top right. This makes creating the Journal Entry a bit easier. Enter the amount, select the accounts, add a remark. This will populate the 'Accounting Entries' table with the selected details.
2. Features
2.1 Accounting Entries
- Accounting Dimensions: A Project or Cost Center can be linked here to track the costing separately. To know more, visit this page.

- Bank Account No: If you've added a Bank Account, the number associated with that bank account will be fetched.
- Reference Type: If this Accounting Entry is associated with another transaction, it can be referenced here. Select the Reference Type and select the specific document. For example, if you're creating a Journal Entry against a specific Sales Invoice. Link this Journal Entry to the invoice. The “outstanding” amount of that invoice will be affected.
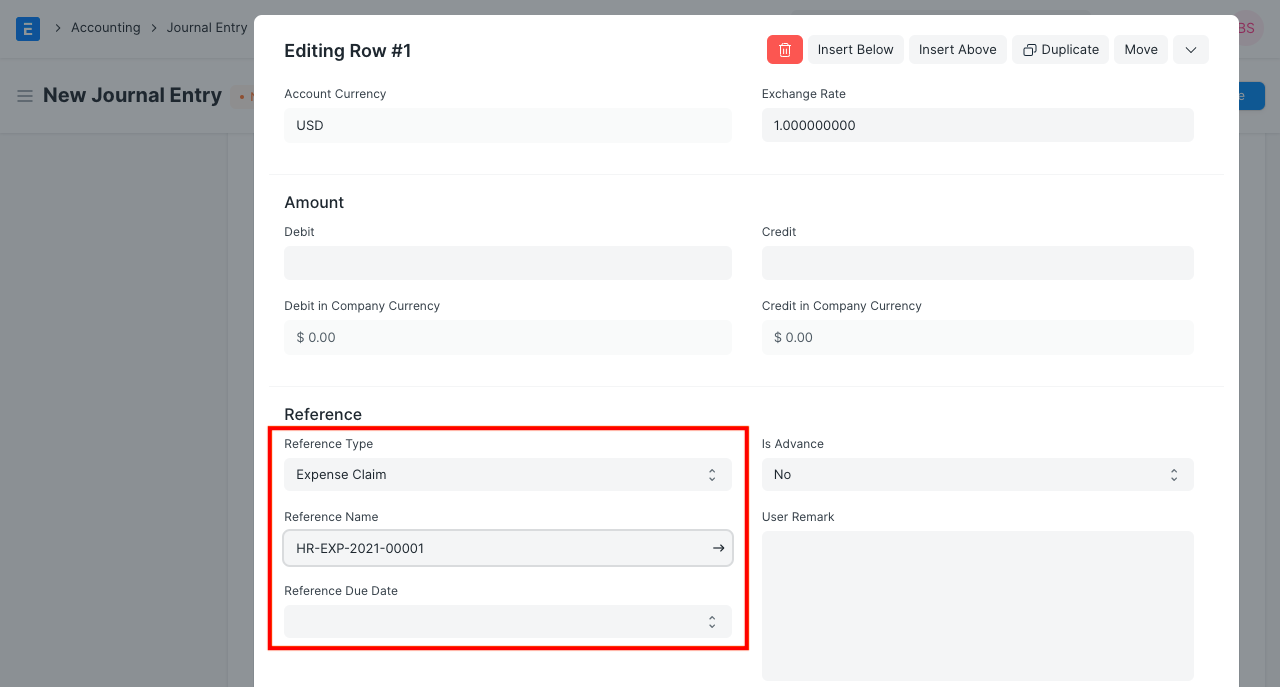
Following are the documents that can be selected in the Journal Entry under Reference Type:
- Sales Invoice
- Purchase Invoice
- Journal Entry
- Sales Order
- Purchase Order
- Expense Claim
- Asset
- Loan
- Payroll Entry
- Employee Advance
- Exchange Rate Revaluation
- Invoice Discounting
- Is Advance: If this is an advance payment by a Customer, set this option to 'Yes'. This is useful when you have linked a 'Reference Type' form to this Journal Entry. Selecting “Yes” will link this Journal Entry to the transaction selected in the 'Reference Name' field. To know more, visit the Advance Payment Entry page.
- User Remark: Any additional remarks about the entry can be added in this field.
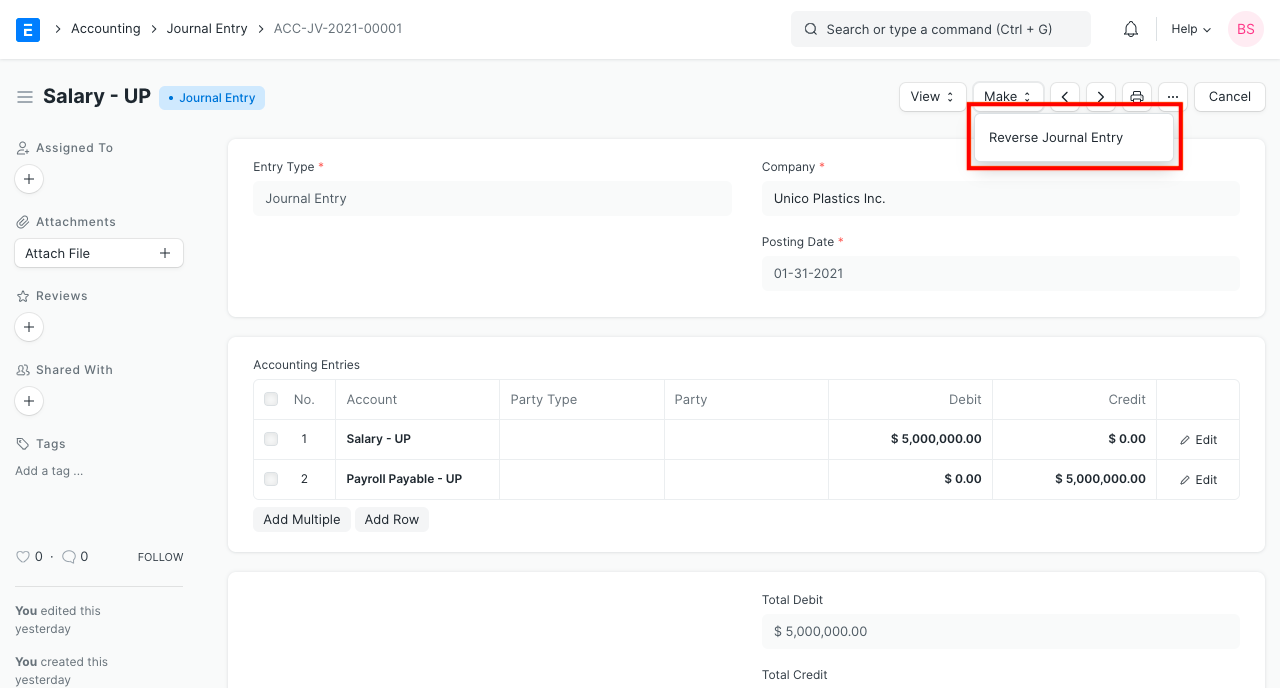
2.2 Reverse Journal Entry
In any submitted Journal Entry, there is a dedicated button to reverse the Journal Entry. On clicking the 'Reverse Journal Entry' button, the system creates a new Journal Entry by reversing debit and credit amount against the respective accounts.
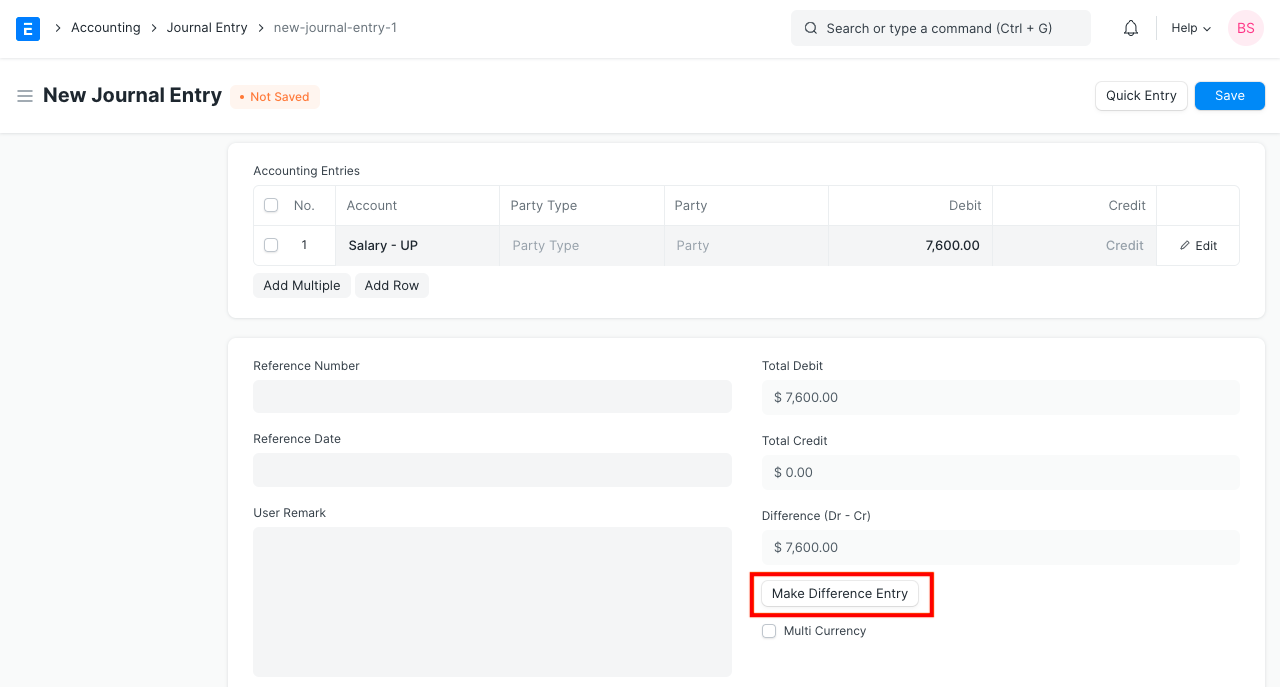
2.3 Difference Entry
The “Difference” is the difference that remains after summing all debit and credit amounts.
As per double entry accounting system, the total debit should be equal to the total credit.
This should be zero if the Journal Entry is to be “Submitted”. If this number is not zero, you can click on “Make Difference Entry” and the system will automatically add a new row with the amount required to make the total as zero. Select the account to debit/credit and proceed.
2.4 Referencing
A Reference Number can be entered manually and a Reference Date can be set. On entering a Reference Number here, a 'Remark' will be seen, for example:
Note: supplier
Reference #2321 dated 30-09-2019 ₹ 1,000.00 against Sales Invoice ACC-SINV-2019-00064
In th Reference section, the following fields can be entered manually if the bill was recorded offline and not in the ERPNext system. This is only for reference purposes.
- Bill No
- Bill Date
- Due Date
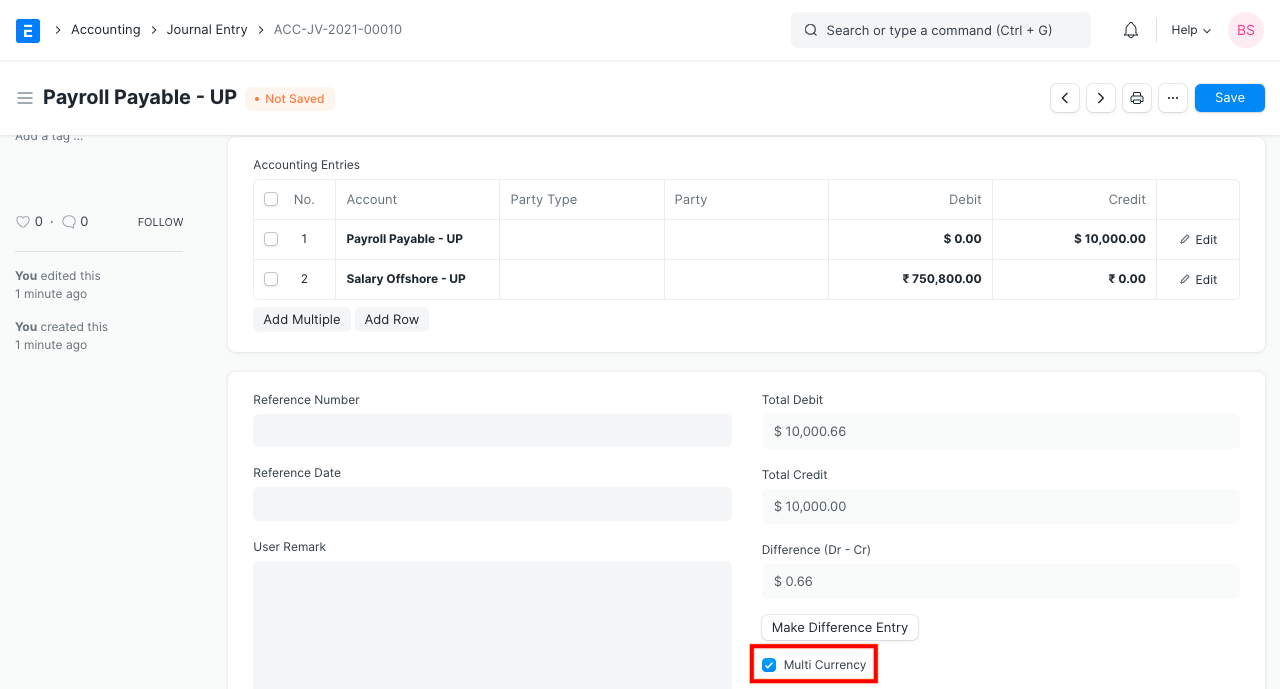
2.5 Multi Currency entries
If the accounts selected are in different currencies, tick the 'Multi Currency' checkbox. If this checkbox is not enabled, you will not be able to select any foreign currencies in the Journal Entry. This will show the different currency and fetch the 'Exchange Rate'. To know more, visit the Multi Currency Accounting page.
2.6 Journal Entry Template
From Template field: Selecting an option in this will load details from a Journal Entry Template.
It will fetch and add the following details to the entry:
- Entry Type
- Company
- Series
- Accounts in Accounting Entries
- Is Opening
To learn more go to the Journal Entry Template page.
2.7 Print Settings
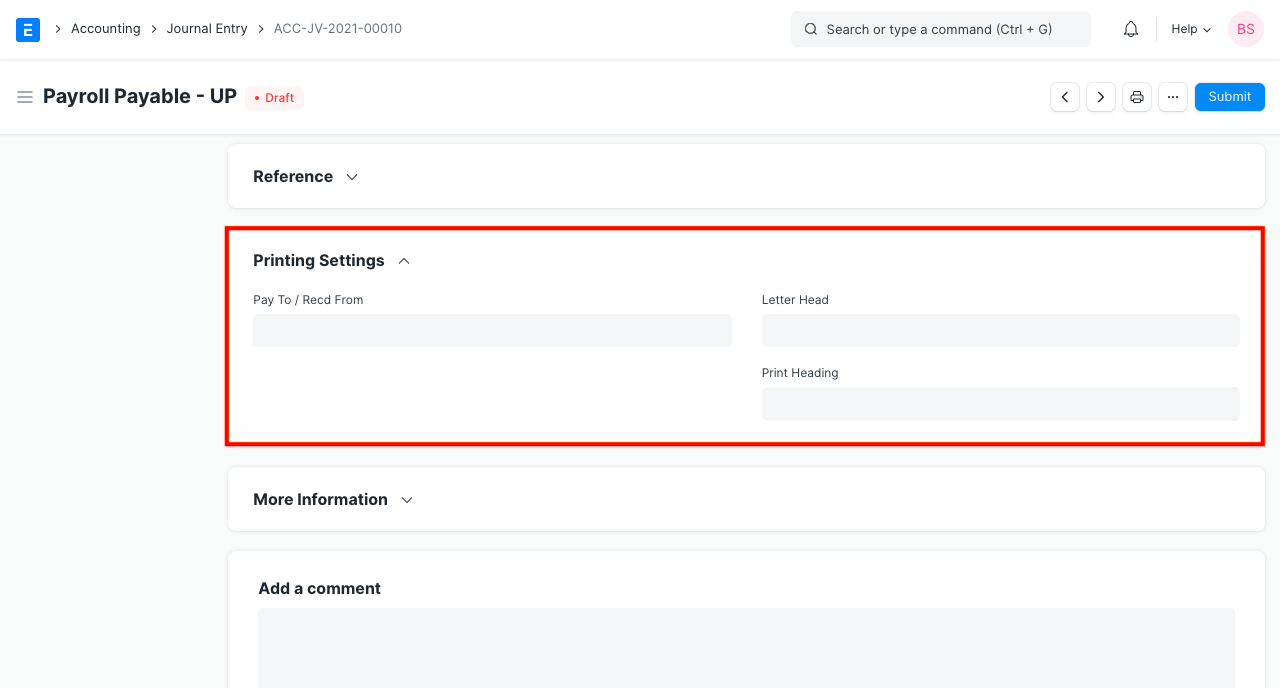
Pay To / Recd From: The name entered here will show up in the Sales Invoice. This is useful for printing cheques. Go to the print view in the Journal Entry and select the 'Cheque Printing Format'.
Letterhead
You can print your Journal Entry on your company's letterhead. Know more here.
Print Headings
Journal Entries can also be titled differently for printing purposes. You can do this by selecting a Print Heading. To create new Print Headings go to:
Home > Settings > Printing > Print Heading
Read Print Headings to know more.
2.7 More Information
- Mode of Payment: Whether the payment was done using Wire Transfer, Bank Draft, Credit Card, Cheque, or Cash. New Modes of Payment can also be created. If a Bank Account is set in Mode of Payment, it will be fetched here when the Mode of Payment is selected.
- Is Opening: If the Journal Entry is of type 'Opening Entry' this field will be set to 'Yes'. To know more, visit the Opening Balance page.
- From Template: When a template is selected, the 'Accounting Entries' table will be emptied first before loading the accounts from the template. You can add more account entries after that.
3. Journal Entry Types
Let's take a look at some of the common accounting entries that can be done via Journal Entry in ERPNext.
3.1 Journal Entry
This is a general purpose entry type which can be used for different purposes. Let's see a few examples.
Expenses (non accruing)
Many times it may not be necessary to accrue an expense, but it can be directly booked against an expense Account on payment. For example, a travel allowance or a telephone bill. You can directly debit Telephone Expense (instead of your telephone company) and credit your Bank on payment.
- Debit: Expense Account (like Telephone expense).
- Credit: Bank or Cash Account.
Crediting Salaries
For crediting employee salaries, 'Journal Entry' type is used. In this case,
- Debit: The salary components.
- Credit: The bank account.
3.2 Inter Company Journal Entry
If a transaction occurs between a parent and child company, or sister companies, or two companies belonging to the same group, this option can be used to make an Inter Company Journal Entry.
To know more visit the Inter Company Journal Entry page.
3.3 Bank Entry
Use this type when making or receiving a payment using a Bank Account. For example, paying for an entertainment charges etc using the Company's bank account.
3.4 Cash Entry
This is the same as 'Bank Entry' but the payment is made via Cash Account.
3.5 Credit Card Entry
This is a type of entry to easily identify all credit card entries.
3.6 Debit Note
This is a document sent by a customer (your Company) to a supplier (your Supplier) when returning goods/items.
You can also create a Debit Note directly from a Purchase Invoice.
"Debit Note" is made for a Supplier against a Purchase Invoice or accepted as a credit note from Supplier when a company returns goods. When a Debit Note is made, the Company can either receive a payment from the Supplier or adjust the amount in another invoice.
- Debit: Supplier Account.
- Credit: Purchase Return Account.
To know more, visit this page.
3.7 Credit Note
This is a document sent by a supplier to a customer when returning goods/items.
"Credit Note" is made for a Customer against a Sales Invoice when the company needs to adjust a payment for returned goods. When a Credit Note is made, the seller can either make a payment to the customer or adjust the amount in another invoice.
- Debit: Sales Return Account.
- Credit: Customer Account.
To know more, visit this page.
A debit/credit note is usually issued for the value of the goods returned or lesser.
3.8 Contra Entry
A Contra Entry is booked when the transaction is booked within the same Company of types:
- Cash to Cash
- Bank to Bank
- Cash to Bank
- Bank to Cash
This is used to record withdrawing or depositing money from a Bank Account. When this entry is used, the money does not leave the company unless it is again used to pay for something.
3.9 Excise Entry
When a Company buys goods from a Supplier, company pays excise duty on these goods to Supplier. And when a company sells these goods to Customers, it receives excise duty. Company will deduct payable excise duty and deposit balance in Govt. account.
When a Company buys goods with Excise duty:
- Debit: Purchase Account, Excise Duty Account.
- Credit: Supplier Account.
When a Company sells goods with Excise duty:
- Debit: Customer Account.
- Credit: Sales Account, Excise Duty Account.
Note: Applicable in India, might not be applicable for your country. Please check your country regulations.
3.10 Write Offs or Bad Debts
If you are writing off an Invoice as a bad debt, you can create a Journal Voucher similar to a Payment, except instead of debiting your Bank, you can debit an Expense Account called Bad Debts.
- Debit: Bad Debts Written Off
- Credit: Customer
Note: There may be regulations in your country before you can write off bad debts.
3.11 Opening Entry
This entry is useful when moving from an another software to ERPNext during any time of the year. Your outstanding bills, equities etc. can be recorded to ERPNext using this entry type. Selecting type will fetch the Balance Sheet accounts.
3.12 Depreciation
Depreciation is when you write off certain value of your assets as an expense. For example if you have a computer that you will use for say 5 years, you can distribute its expense over the period and pass a Journal Entry at the end of each year reducing its value by a certain percentage.
- Debit: Depreciation (Expense).
- Credit: Asset (the Account under which you had booked the asset to be depreciated).
To know more, visit the Asset Depreciation page.
Note: There may be regulations in your country that define by how much amount you can depreciate a class of Assets.
3.13 Exchange Rate Revaluation
If your Chart of Accounts has accounts with multiple currencies, a Journal Entry of type 'Exchange Rate Revaluation' helps in dealing with this situation. This entry is intended to be created from an Exchange Rate Revaluation form. To know more visit the Exchange Rate Revaluation page.