Service Level Agreement
A service level agreement (SLA) is a contract between a service provider (either internal or external) and the end user on the level of service expected from the service provider.
SLAs are output-based, their purpose is specifically to define the timeline in which the Customer will receive the service. SLAs do not define how the service itself is provided or delivered.
To access the Service Level Agreement list, go to:
Home > Support > Service Level Agreement > Service Level Agreement
1.Prerequisites
Before creating and using a Service Level Agreement, it is advised that you create/update the following first:
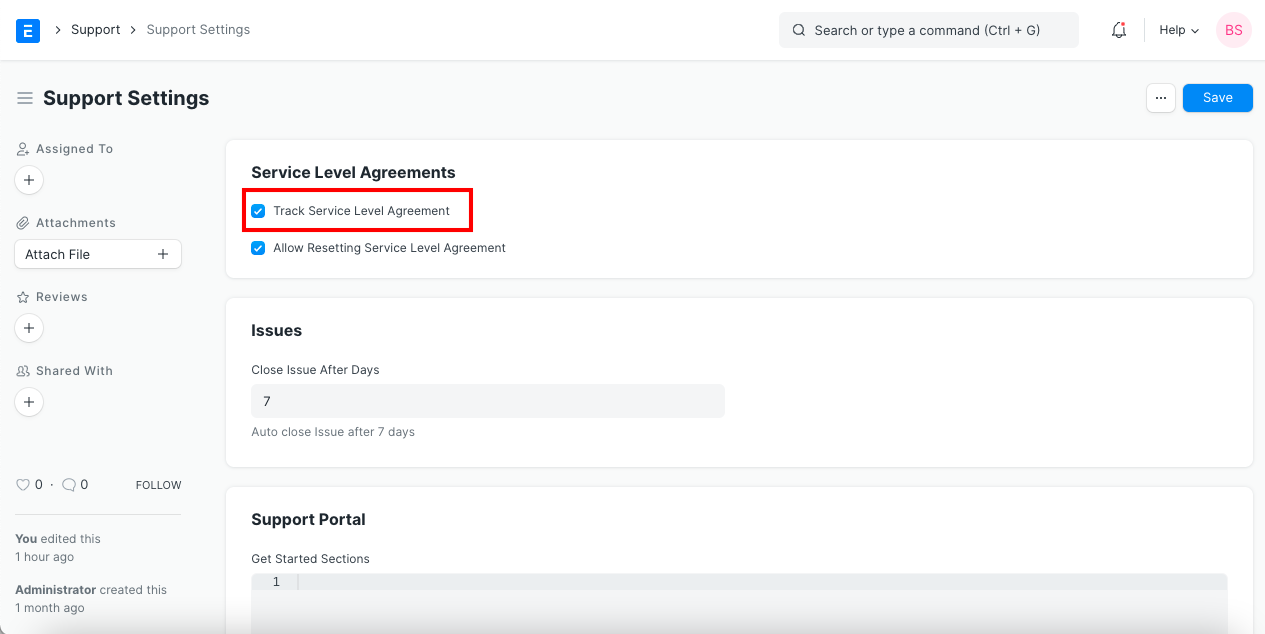
Enable Track Service Level Agreement in Support Settings
2. How to Create a Service Level Agreement
- Go to the Service Level Agreement list, click on New.
- Enter a name for the Service Level.
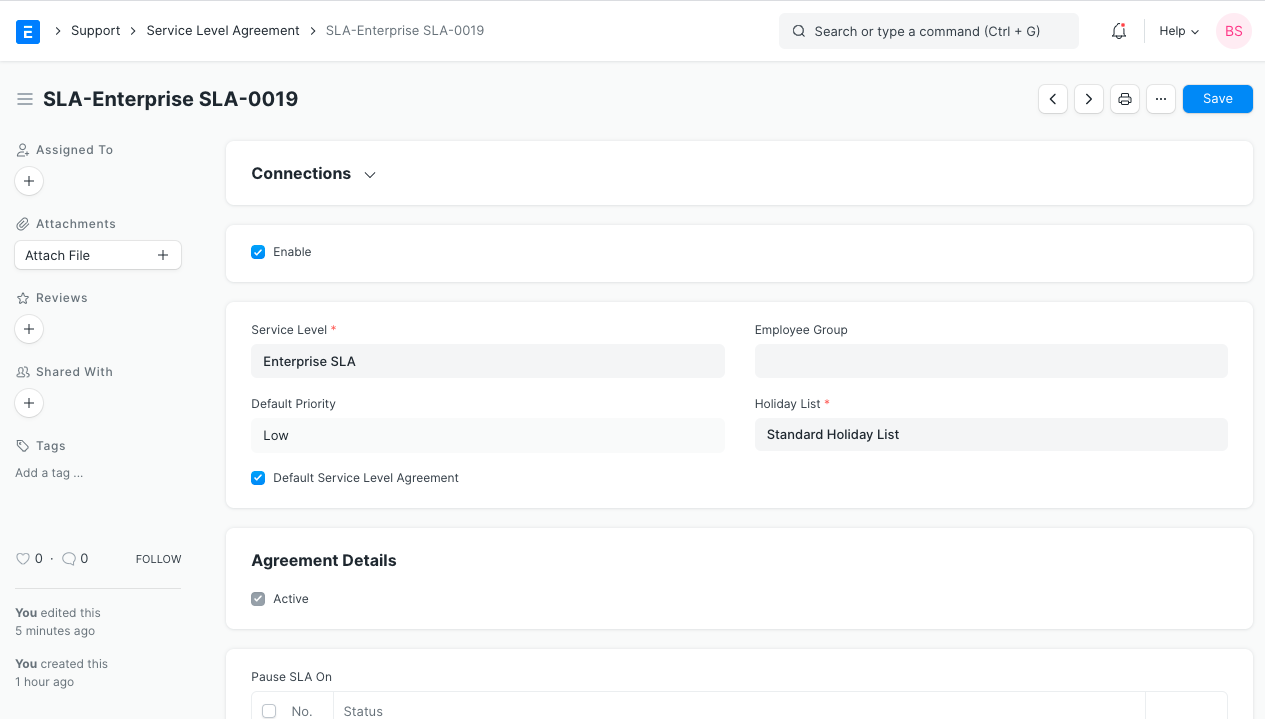
- Select an Employee group, that will handle a particular Service Level.
- Set a Holiday List. Service Level Agreement won't be applied in the days mentioned in the Holiday List.
- 'Enable' determines if a Service Level Agreement is enabled or disabled.
- Ticking 'Default Service Level Agreement' will apply this SLA to a customer if they don't have a particular SLA assigned to them.
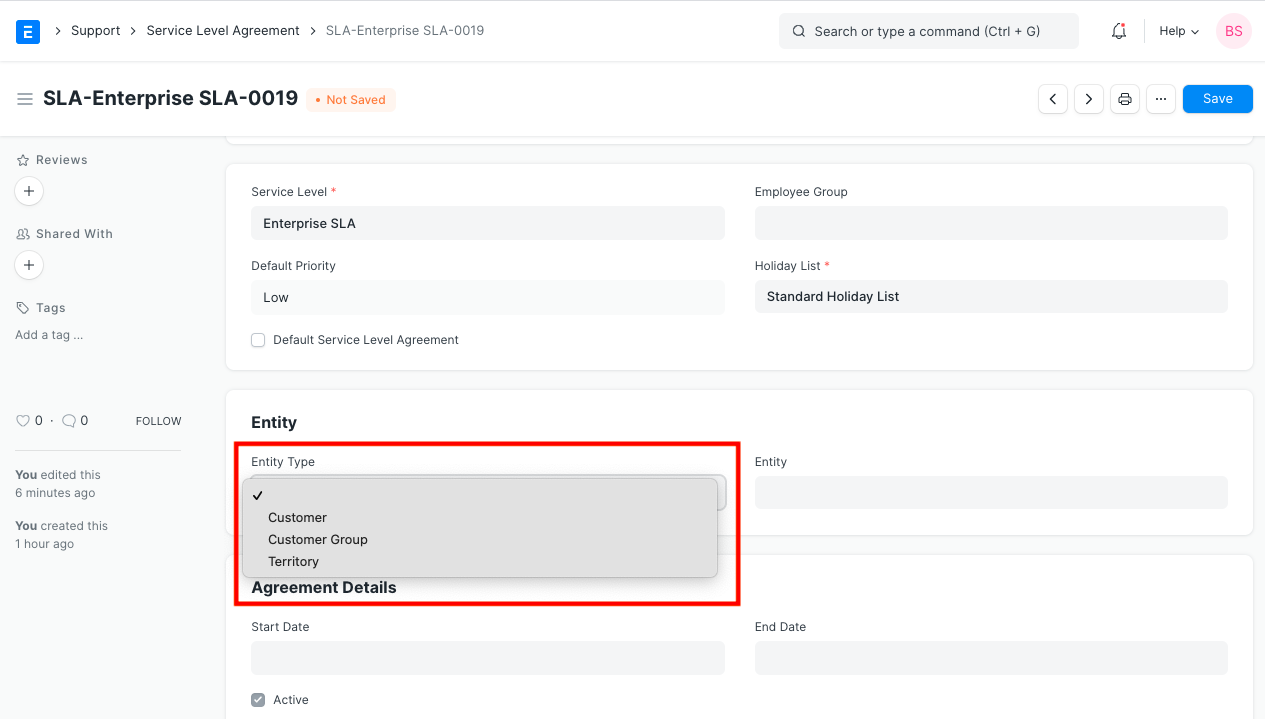
- Entity Type: Service Level Agreements can be assigned to a Customer/Customer Group/Territory enabling you to apply Service Level Agreement based on these factors.
- Entity: Select the specific Customer/Customer Group/Territory.
- Start / End Date: Defines the validity of the agreement.
Priorities: You can set multiple Issue Priorities and their Time to Respond and Resolve (in hours and mins).
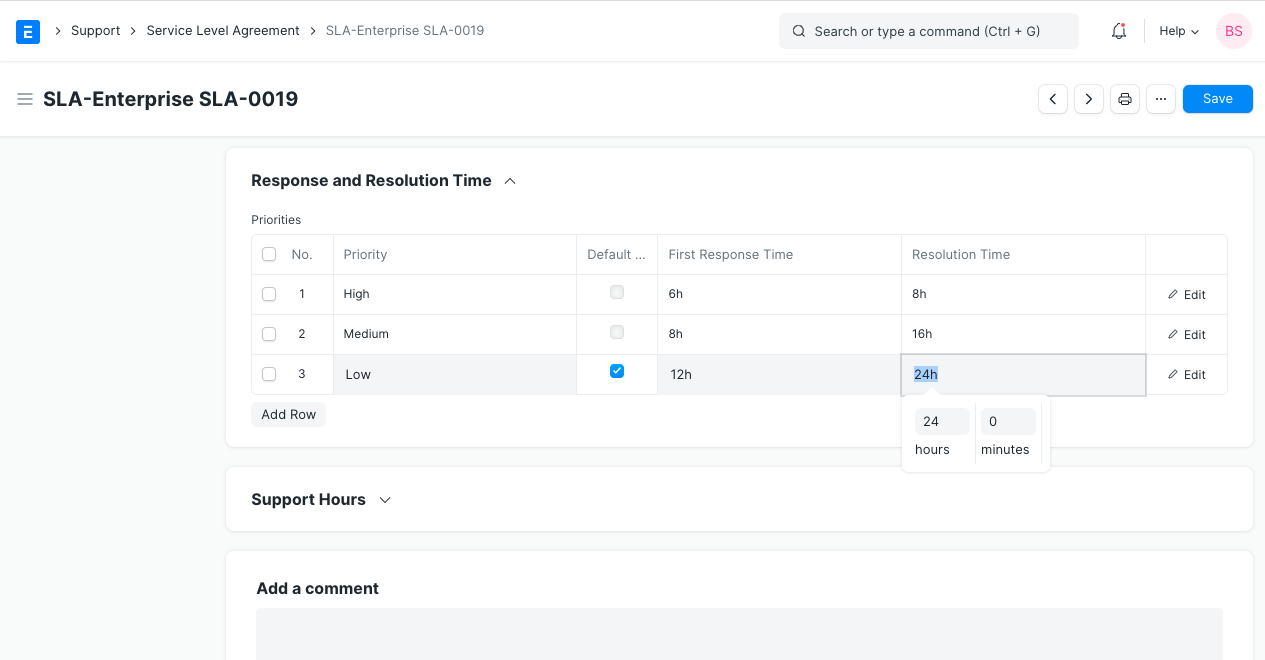
- Default Priority: Default Priority selected in Priorities table that will be applied in the Service Level Agreement.
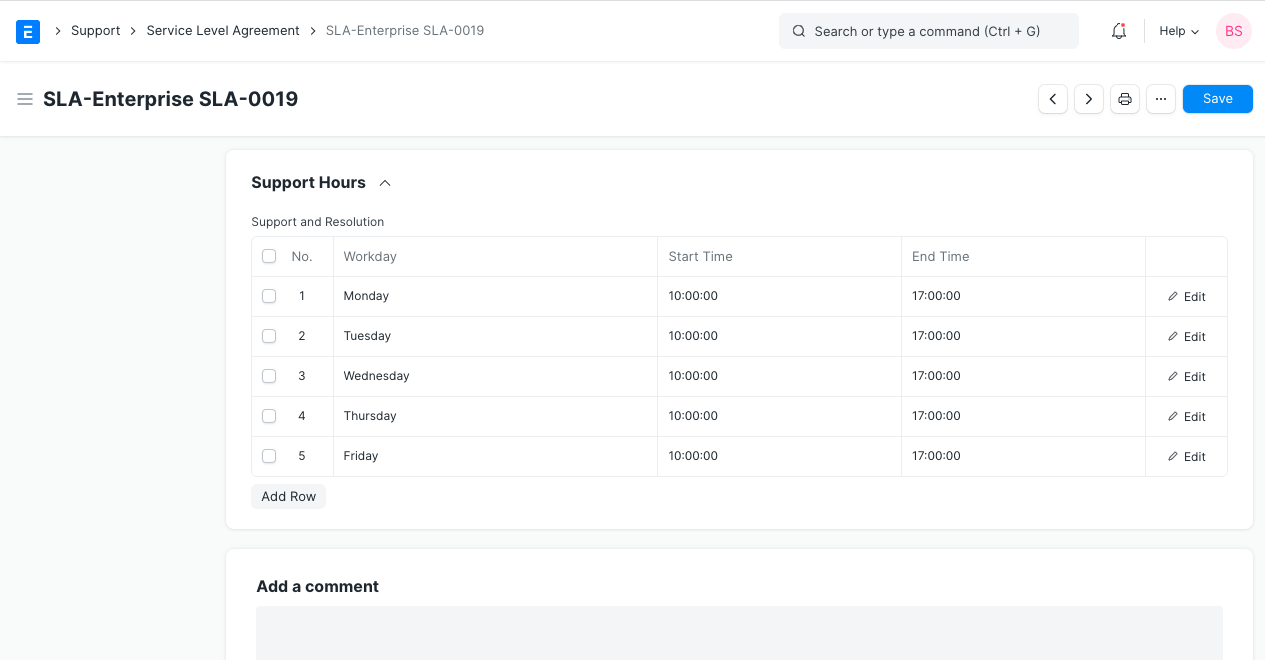
Support Hours: Contains the Days of the week on which Support is provided. Has a Start Time and End Time of the Working day.
Save.
3. Features
3.1 Applies to New Issues
Once an SLA is saved, it'll be applied to Issues raised by Customers/Territories as per the option you chose in 'Entity Type'.
3.2 Resetting an SLA
An SLA can also be reset until the time does not fail. For example, if the SLA is 3 days, you can reset the SLA only within 3 days of the Issue being created. After that, the Service Level will display failed.
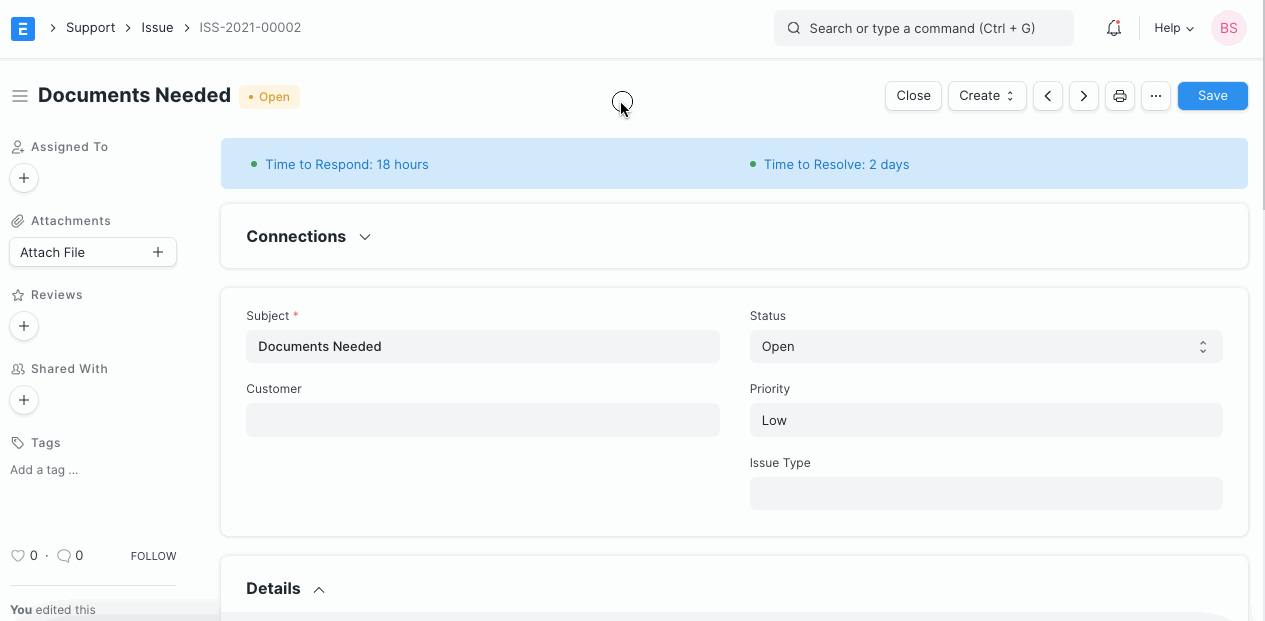
3.3 Time respond / resolve in Issues
The time to respond to an Issue and the time to resolve will be shown:
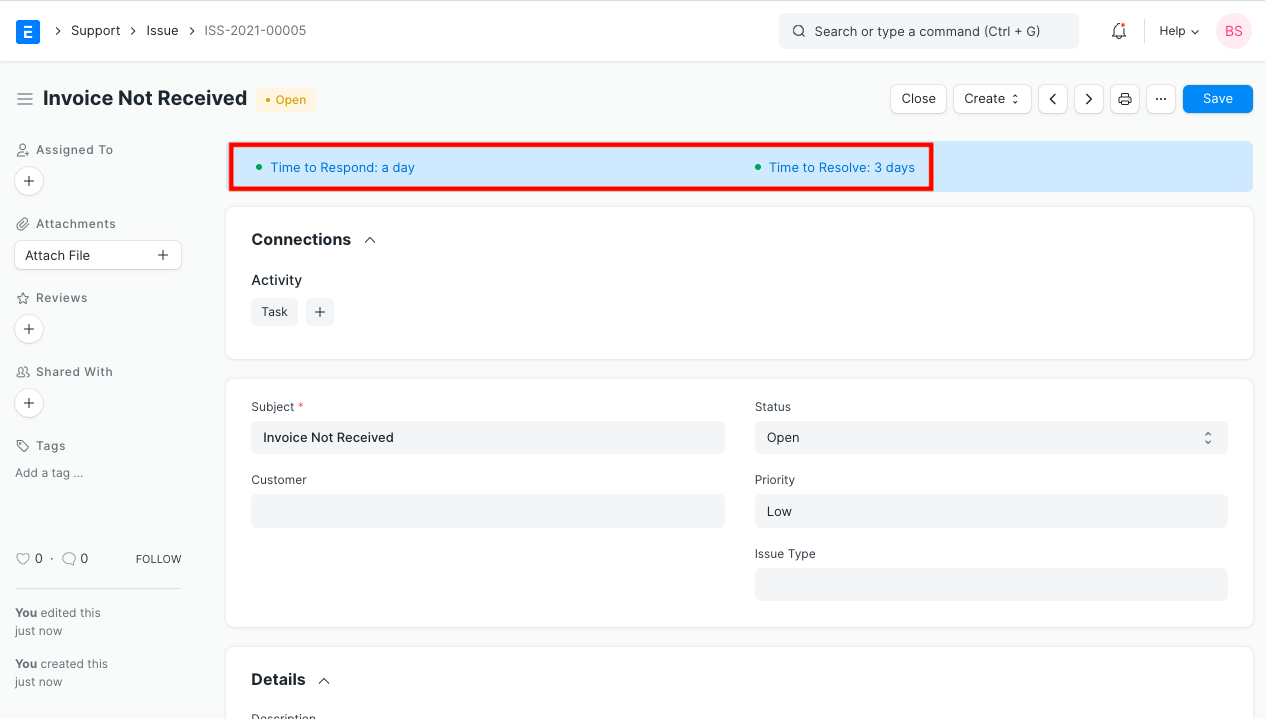
These times are based on the timelines set in the 'Priority' field in the Service Level's Priorities table.
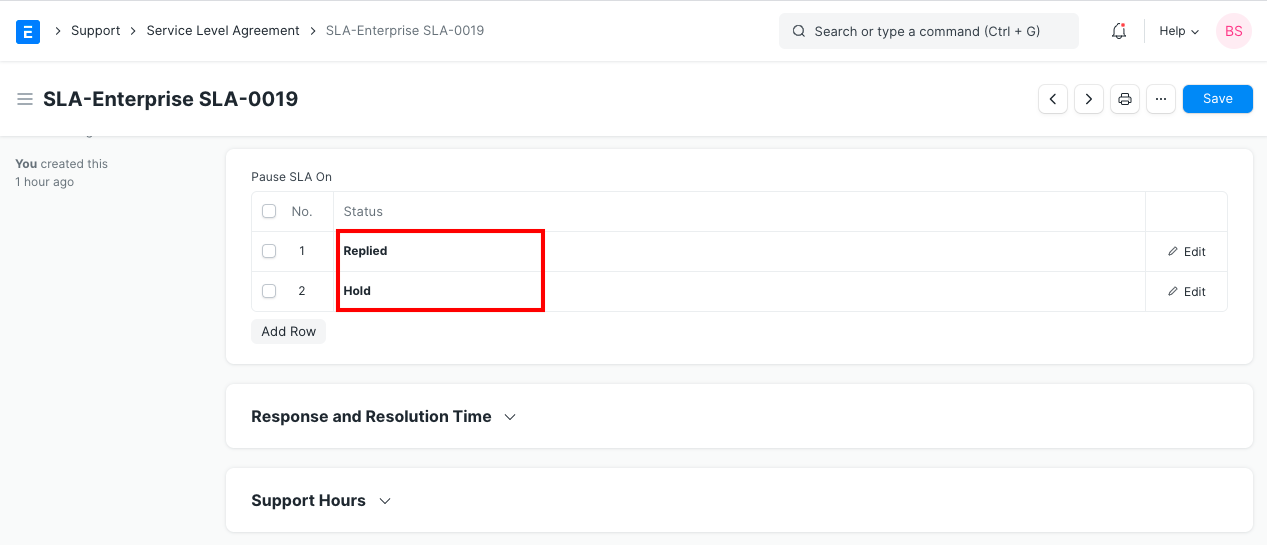
3.4 Pause SLA on Statuses
From version 13 onwards, ERPNext allows you to pause SLA on issues when you are waiting for an event to happen. You can do this by selecting a status that is configured in this "Pause SLA On" table.
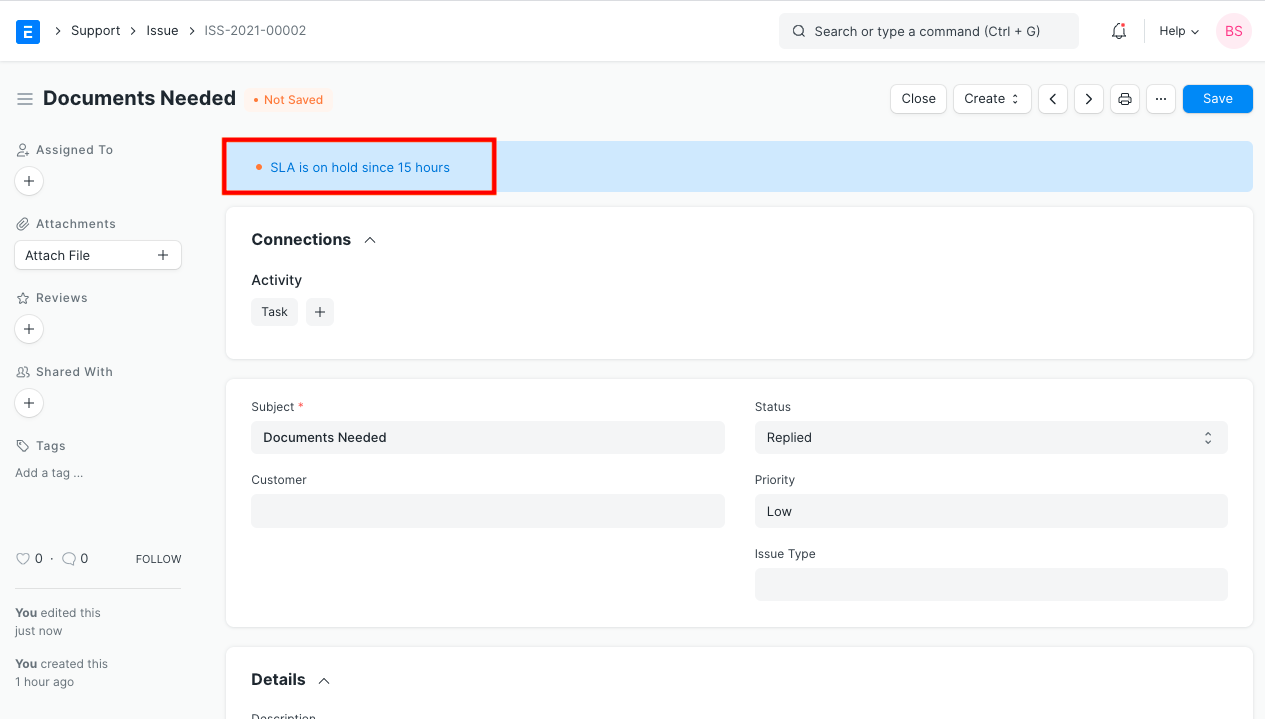
- Set the statuses on which you want to pause SLA in the SLA document. You can also add custom statuses here.
- When the status is changed to any of the above, resolution and response fields are unset and the dashboard indicators change to:
- When the status of the issue changes back to a non-hold status (which is not configured in the "Pause SLA On" table), the Total Hold time field will be set in your Issue document.
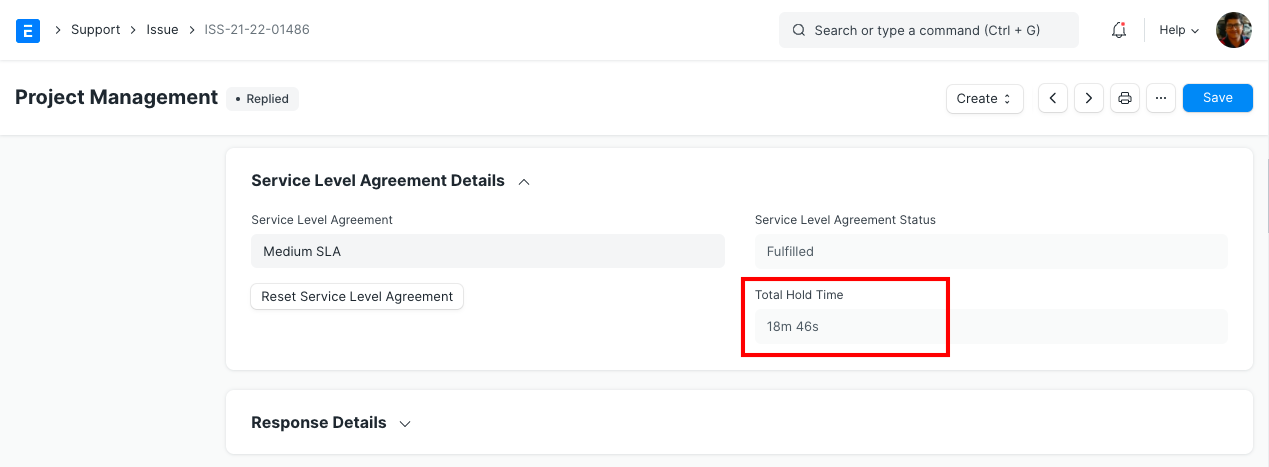 The Response and Resolution time will be recalculated by adding the hold time, thereby restarting your SLA timers.
Note: Service Level DocType was removed in version 13 and all functions are handled only with the Service Level Agreement DocType.