Issue
An Issue is an incoming query from a Customer, usually via email or from the Contact section of your website.
Tip: A dedicated support Email Address is a good way to keep track of incoming queries. For example, you can send support queries to ERPNext at support@erpnext.com and it will automatically create an Issue in our system.
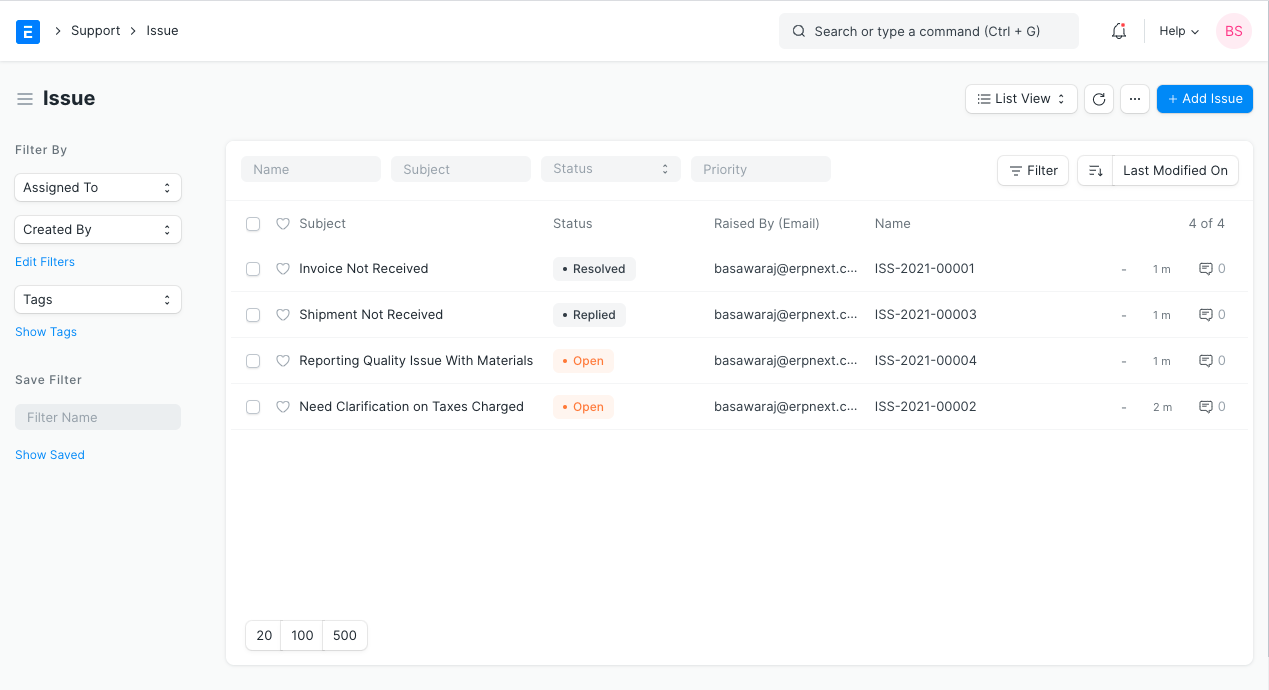
To access the Issue list, go to:
Home > Support > Issues > Issue
1. Prerequisites
Before creating and using Issues, it is advised that you create the following first:
2. How to Create Issue
Issues are automatically created if you use the append to feature in Email Account.
You can also create an Issue manually, to do that:
- Go to the Issue list, click on New.
- Enter the Subject, Raised By, and a description of the Issue.
2.1 Additional Options when Creating an Issue
Status: When a new Issue is created, its status will be "Open", when it is replied, its status becomes "Replied".
- Open: The Issue has been created and yet to be replied to.
- Replied: A reply has been sent to the Issue.
- Hold: The Issue is on Hold due to some reason.
- Resolved: When the users are reasonably sure that they have provided the customer with a solution to their problem but have not received an acknowledgment about the resolution from the customer.
- Closed: The Customer got a satisfactory resolution that he has indicated with an acknowledgment and the Issue was closed.
If the sender replies to the thread, the status becomes "Open" again. User can "Close" the Issue manually by clicking on the Close button on the top right.
Note: If SLA has been set up, then the fulfillment status of the SLA will be updated on both, the Closed as well as the Resolved status.
- Customer: If the email was sent from a Customer stored in your ERPNext account, then a Customer link will appear in this field.
- Priority: Priority can be set as per the requirements. By default, there are three priorities--Low, Medium, and High. You can delete these or add more as needed.
- Issue Type: An Issue can be classified using Issue Type. Examples of Issue Types can be: 'Functional', 'Technical', 'Hardware', etc.
- Raised By (Email): The email ID from which the Issue was sent will be shown here.
3. Features
3.1 Details
- Description: This is a text field in which details about the Issue can be seen. This can also contain an image or a table.
3.2 Service Level Agreement
It is a contract between a service provider and the end user that defines the level of service expected from the service provider.
User can select the Service Level Agreement (SLA) from the list.
- Every Issue will have a Time to Response and Time to Resolve within which the Support team has to Respond and Resolve the Issue.
- The Priority can be changed to escalate the Issue. The priorities need to be specified in the Service Level Agreement.
- If needed, the Service Level Agreement can be reset by clicking on the Reset Service Level Agreement button in Issues shown as follows:
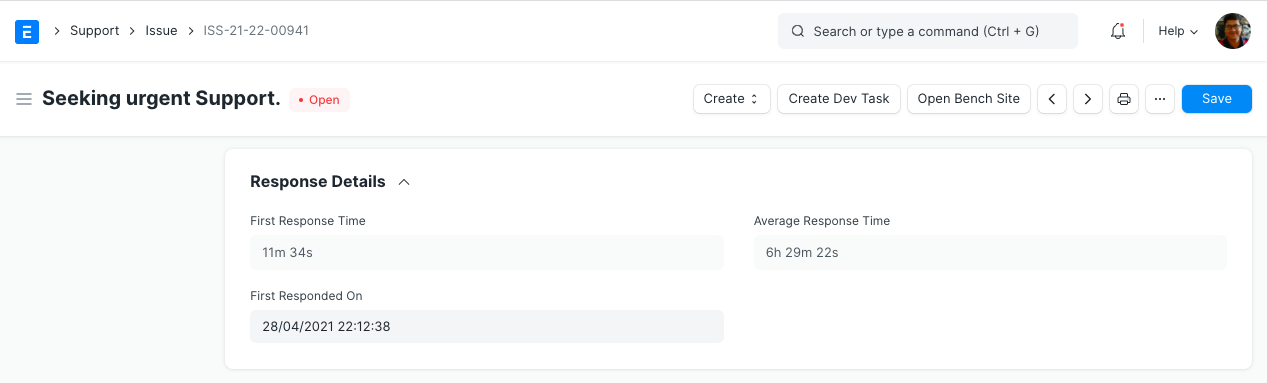
3.3 Response
Mins to First Response: Time in minutes from when the Issue was created to when the first reply was sent.
First Responded on: When a Support team member first replies to the issue, first response date and time will be updated.
Average Response Time: The average time taken to respond to the Customer. This is calculated by taking the average of all time spans between Received and Sent Communications. This field will be updated on every reply sent to the customer.
3.4 Reference
User can filter the issues based on these fields linked to the Issue:
- Lead
- Contact
- Email Account
- Project
- Company
3.5 Resolution
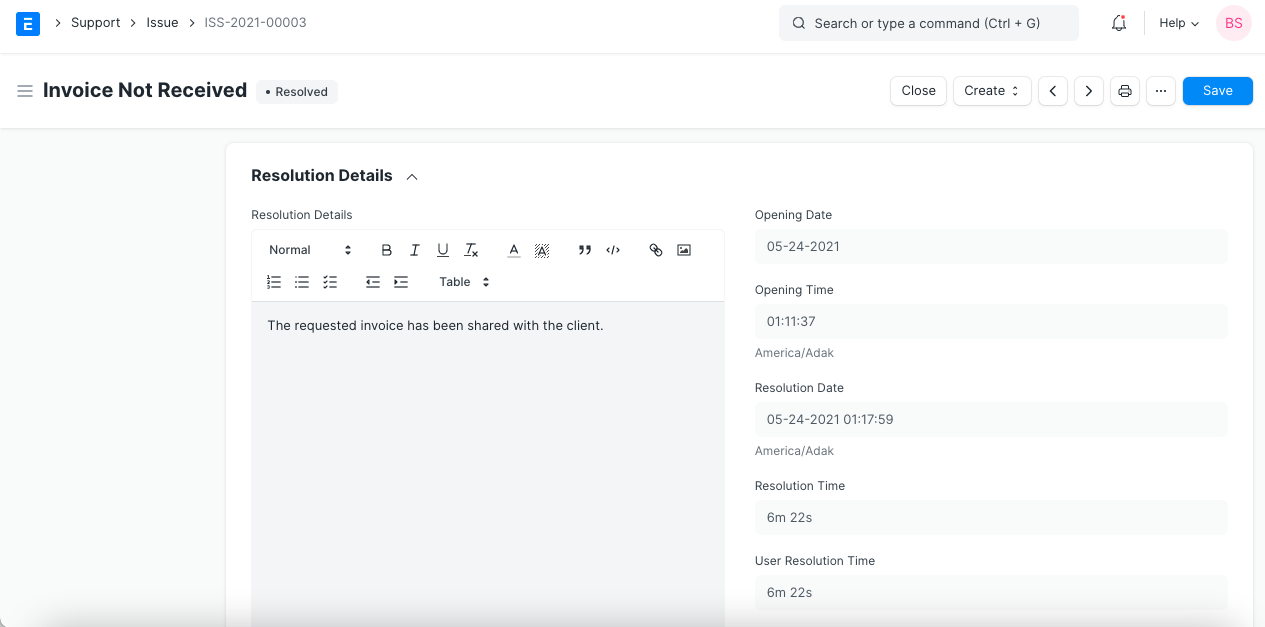
- Opening Date: When the issue is created or logged the date be posted.
- Opening Time: When the issue is created or logged the exact time will automatically be posted.
- Resolution Date: When the user resolved the issue, Date and Time will get updated in this field.
- Resolution Details: User can enter the details of the issue, once it is resolved. This is a text field. Also, user can upload the image, enter or create a table.
- Resolution Time: Total time taken to close the ticket (from Issue creation to closing).
User Resolution Time: Many times a user has to wait for a customer's reply in order to solve some Issue. While measuring User's productivity this wait time shouldn't be taken into consideration. Hence, user resolution time is the total time taken by a user to close the ticket and can be calculated as:
_Resolution time - Total Time for which the user had to wait for a customer's reply_
The Resolution Time and User Resolution Time metrics are set on "Close". These metrics reset automatically when the Issue reopens or splits.
Via Customer Portal
If the Customer raising the Issue is a Website User (no access to modules), this checkbox will be ticked to indicate that.
4. After Saving
4.1 Add Comments
Once the Issue is registered, support team Users can add comments for the issue. This field is editable. Comments in Issues are for internal discussions and will not be visible to the Customers.
4.2 New Email
Users can compose an email to the person that has raised the Issue. All the mails (received as well as sent) can be seen in a thread in the Issue.
4.3 Discussion Thread
The email discussion thread in an Issue maintains all the emails which are sent back and forth against this Issue in the system so that you can track what transpired between the sender and the person responding.
- When a New Email is sent from your mailbox, an automatic reply is sent to the sender with your message and the Support Ticket Number.
- The sender can send additional information to this email.
- All subsequent emails containing this Issue number in the subject will be added to this Issue thread.
- The sender can also add attachments to the email.
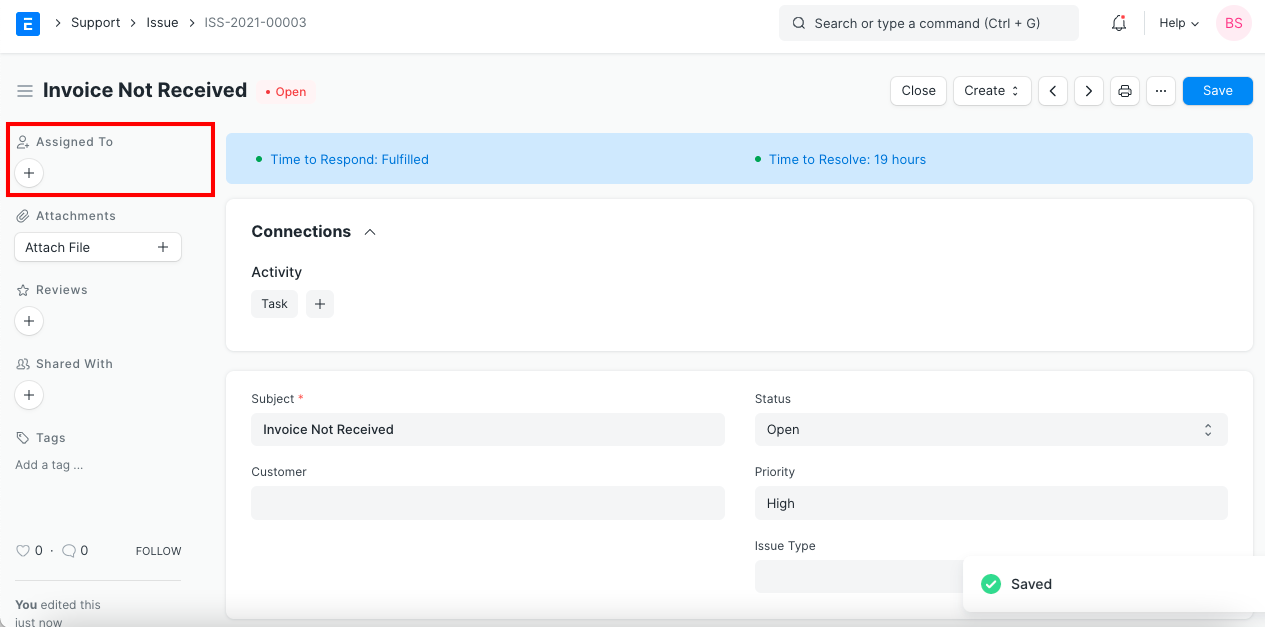
4.4 Assigning Issues to Users
Issues can be assigned automatically among Users using Assignment Rule.
You can assign an Issue to a specific User by clicking on "Assign" feature in the left sidebar. This will add a new To Do to the user and also send a message indicating that this Issue is allocated.
4.5 Closing
- You can close the Issue manually by clicking on 'Close' in the toolbar.
- If the sender does not reply in 7 days, then the Issue gets closed automatically.