Warehouse
A warehouse is a commercial building for storage of goods. Warehouses are used by manufacturers, importers, exporters, wholesalers, transport businesses, customs, etc.
They are usually large plain buildings in industrial areas of cities, towns, and villages. They mostly have loading docks to load and unload goods from trucks.
The terminology of 'Warehouse' in ERPNext is a bit broader though and maybe can be regarded as "storage locations". You can create a sub-Warehouse which could be a shelf inside your actual location.
This can become quite a detailed Tree like the following:
Warehouse > Room > Row > Shelf > Bin
To access the Warehouse list, go to:
Home > Stock > Settings > Warehouse
1. How to create a Warehouse
- Go to the Warehouse list, click on New.
- Enter a name for the Warehouse.
- Set/check the Parent Warehouse. If you tick on 'Is Group', you can create sub-Warehouses under this group Warehouse.
- Save.
Warehouses are saved with their respective Company’s abbreviations. This facilitates identifying which Warehouse belongs to which company at a glance.
1.1 Additional options when creating a Warehouse
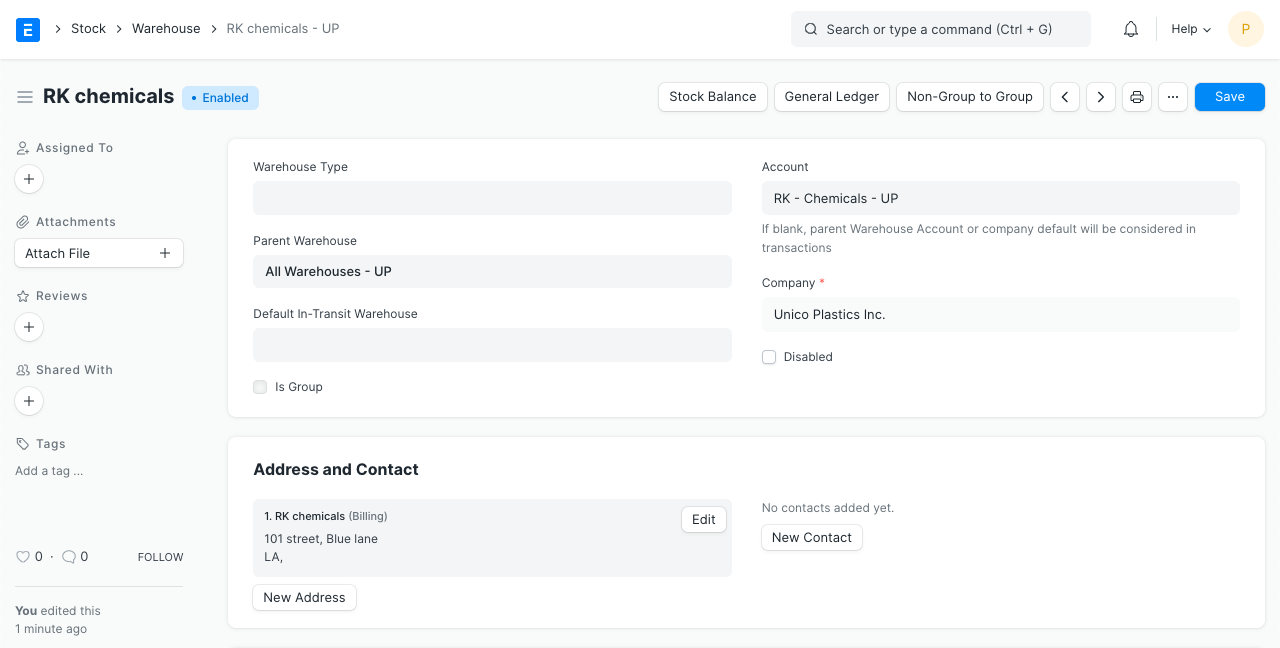
Account: Set a default account here for all transactions with this Warehouse. Setting this account will show transactions from this Warehouse in the Accounting Ledger. Warehouse Type: You can create a Warehouse Type to classify Warehouses. For example, Supplier Warehouses, Stock Warehouses, WIP Warehouses, Rooms, etc. can be tagged. This classification is useful when generating reports or in certain stock transactions.
Address and contact
You can add Billing, Shipping, and other types of addresses for the Warehouse. You can also add a contact, this could be the Warehouse Manager for example.
1.2 After Saving
After saving a Warehouse, you'll see the following options:
- Stock Balance: This will open the Stock Balance report to display the quantity, valuation, balance, etc.
- General Ledger: This will open the General Ledger to display the accounting transactions.
- Non-Group to Group: If the Warehouse is a Non-Group Warehouse, i.e. cannot contain other Warehouses under it, this button will make this a Group Warehouse.
2. Features
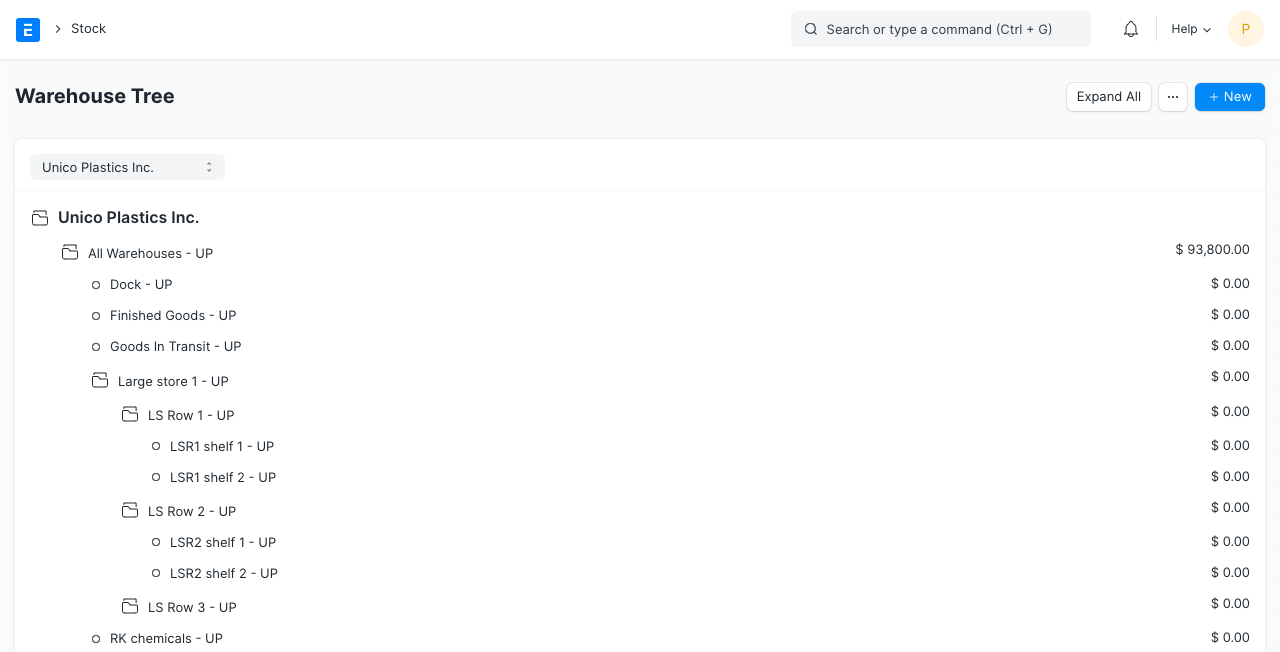
2.1 Tree View
You can also switch to 'Tree' View which will show all the group and child Warehouses.
2.2 Warehouse Account
In ERPNext, if you enable Perpetual Inventory, every Warehouse must belong to a specific company to maintain company-wise stock balance. To do so, each Warehouse should be linked with an Account in the Chart of Accounts (the same name as the Warehouse itself). This account captures the monetary equivalent of the goods or materials stored in that specific warehouse.
If you have a more detailed Warehouse Tree, most likely it's a good idea to link the sub-locations (room, row, shelf, etc.) to the account of the actual Warehouse (the root Warehouse of that Tree) as most scenarios do not require to account for value of stock items per Shelf or Bin. For example, if you have Warehouse A, and the room, rows are B, C, etc., then link B and C to the account of A.
Tip: ERPNext maintains stock balance for every distinct combination of Item and Warehouse. Thus you can get the stock balance for any specific Item in a particular Warehouse on any particular date.