Data Import
The Data Import Tool in ERPNext lets you import records from a CSV/Excel file.
Data Import Tool is an easy way to upload (or edit) bulk data (especially master data) into the system.
To begin importing data, go to:
Home > Data Import and Settings > Import Data
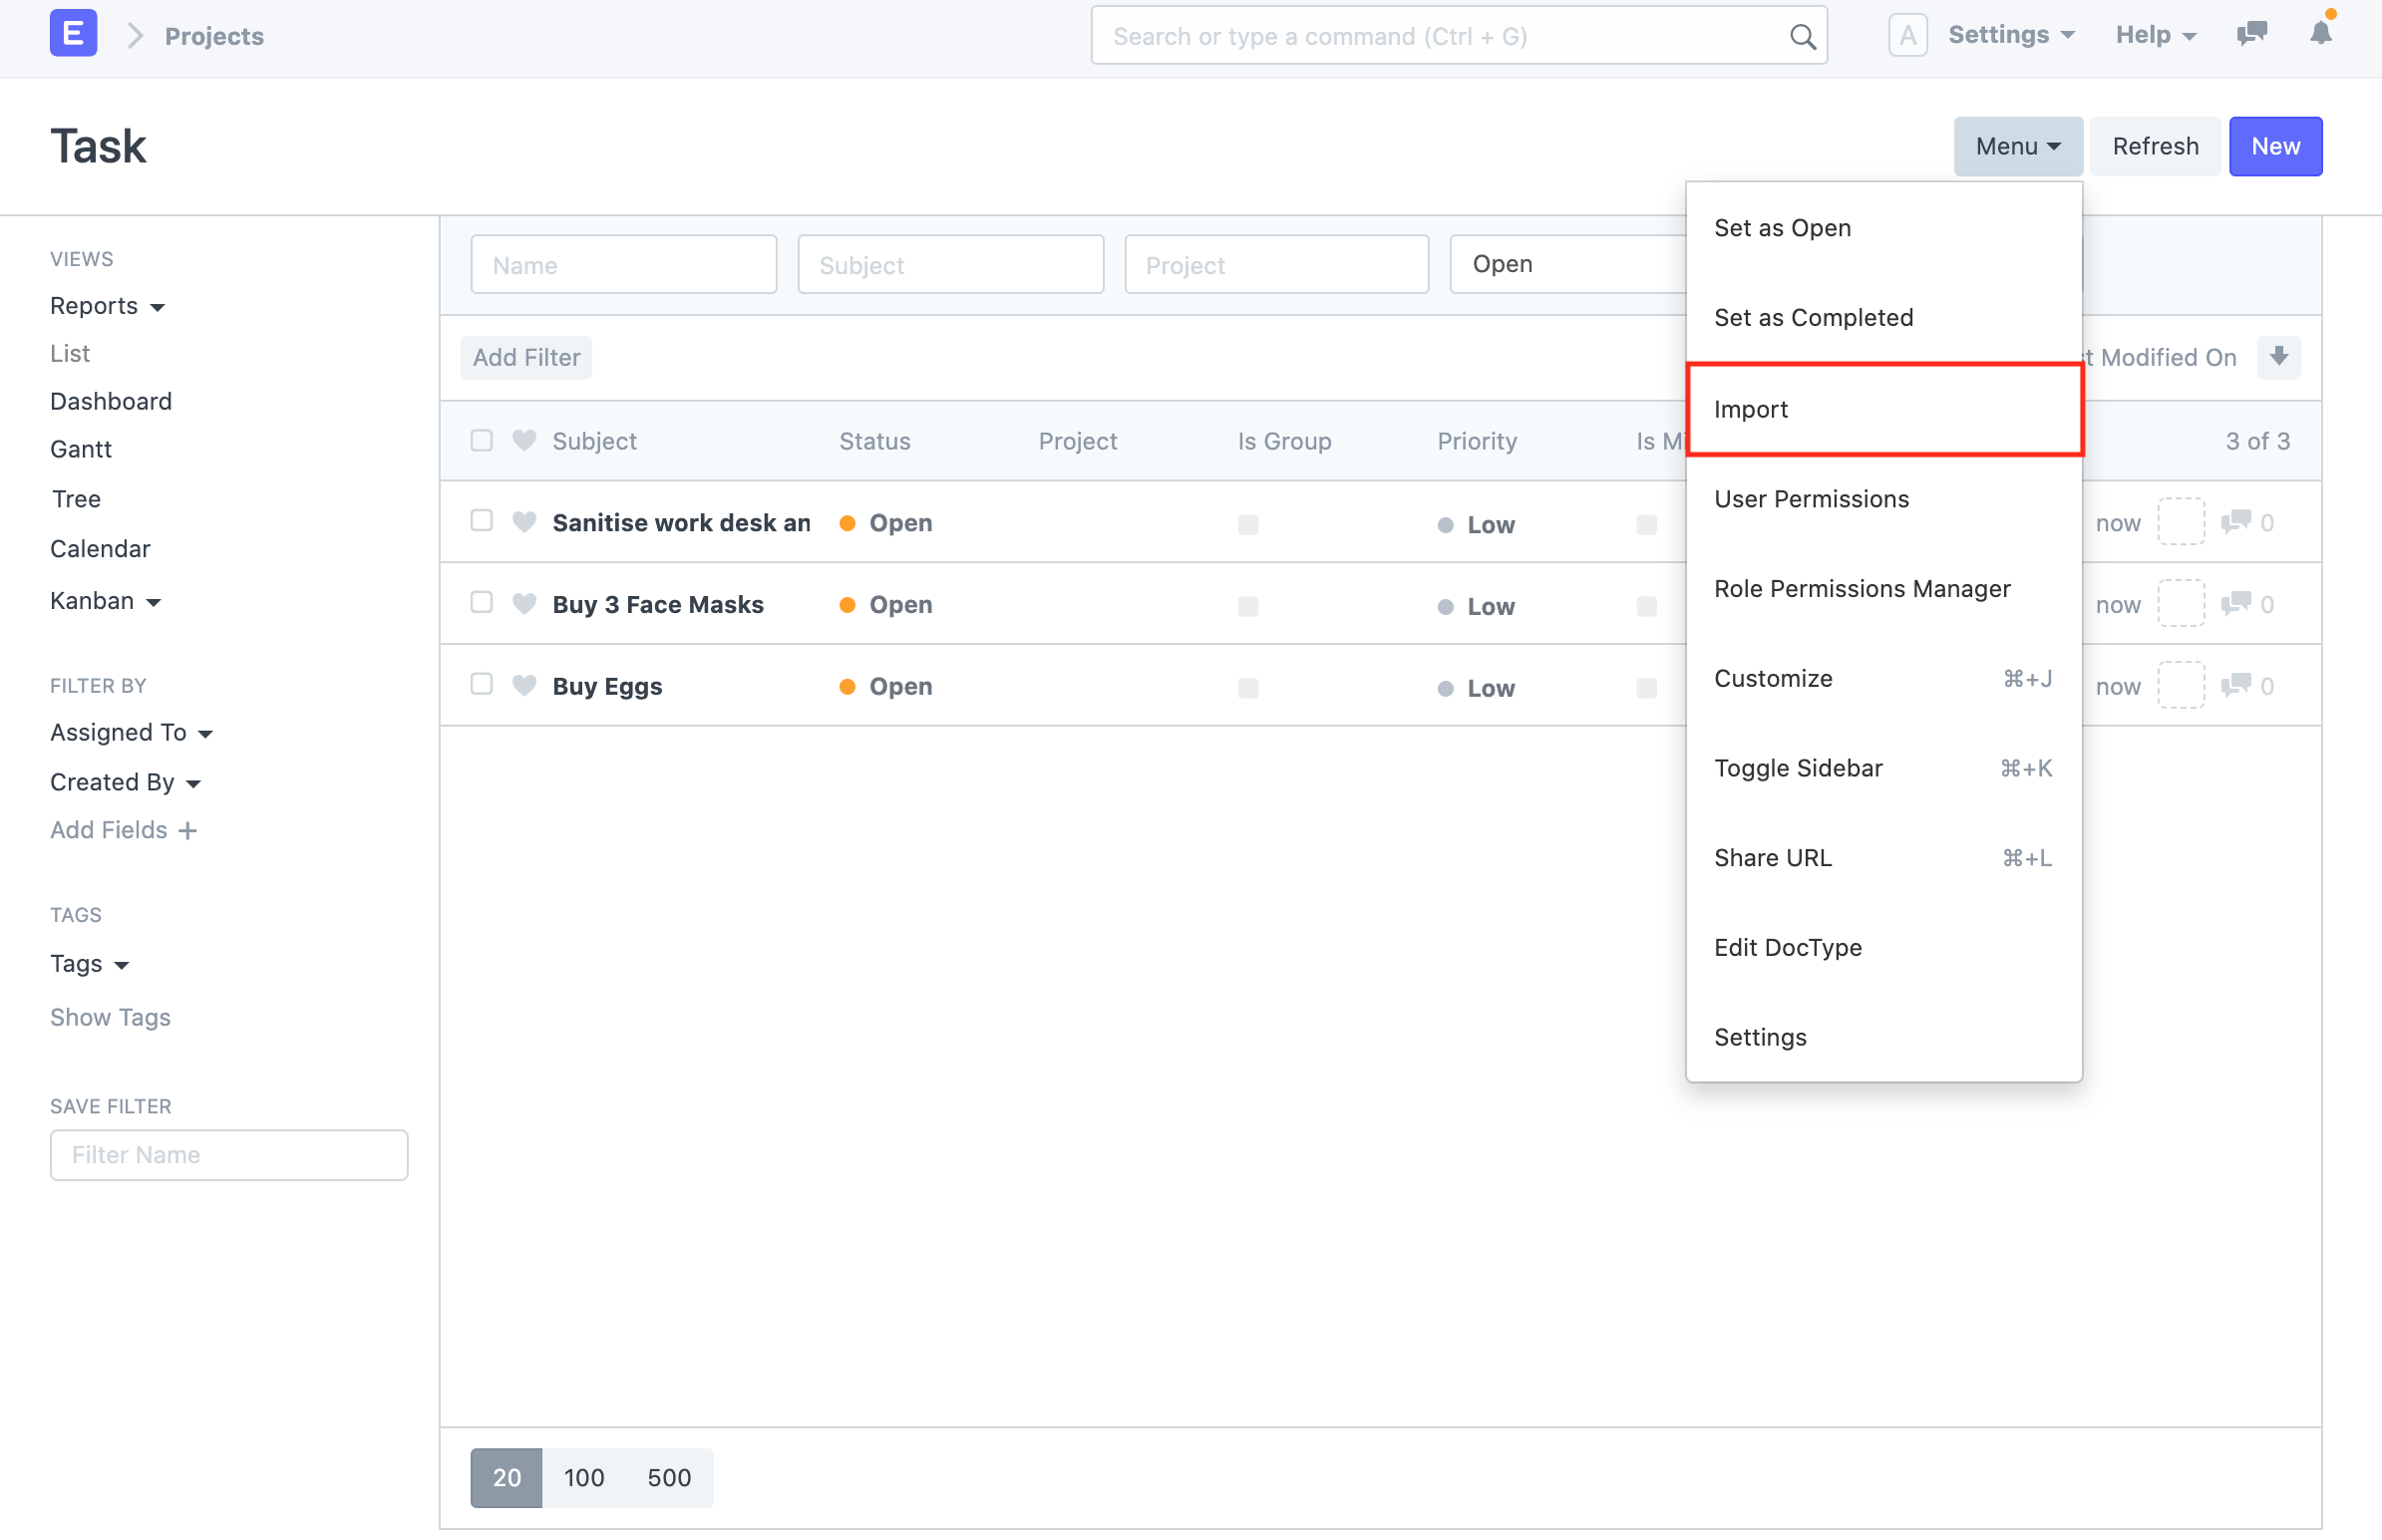
Or go to the Document you want to import and click on Menu > Import:
Before using Data Import ensure that you have all of your data ready.
1. Inserting New Records
Let's say you want to import the list of Customers from your old system into ERPNext. The first step is to download a template in which we can enter our data.
1.1 Download the Template
- Go to Customer List, click on Menu > Import. Click on New.
- Select Import Type as Insert New Records.
- Click on Save.
- Now, click on Download Template.
- While inserting new records, the template should be blank. If you have a few Customers in your system, you can select Export Type as "5 Records" to see the format in which you have to enter the data in the template.
- Select the File Type of the export template.
- Select the fields that you want to fill in as the Customer details.
- Click on Export.
1.2 Entering Data in the Template
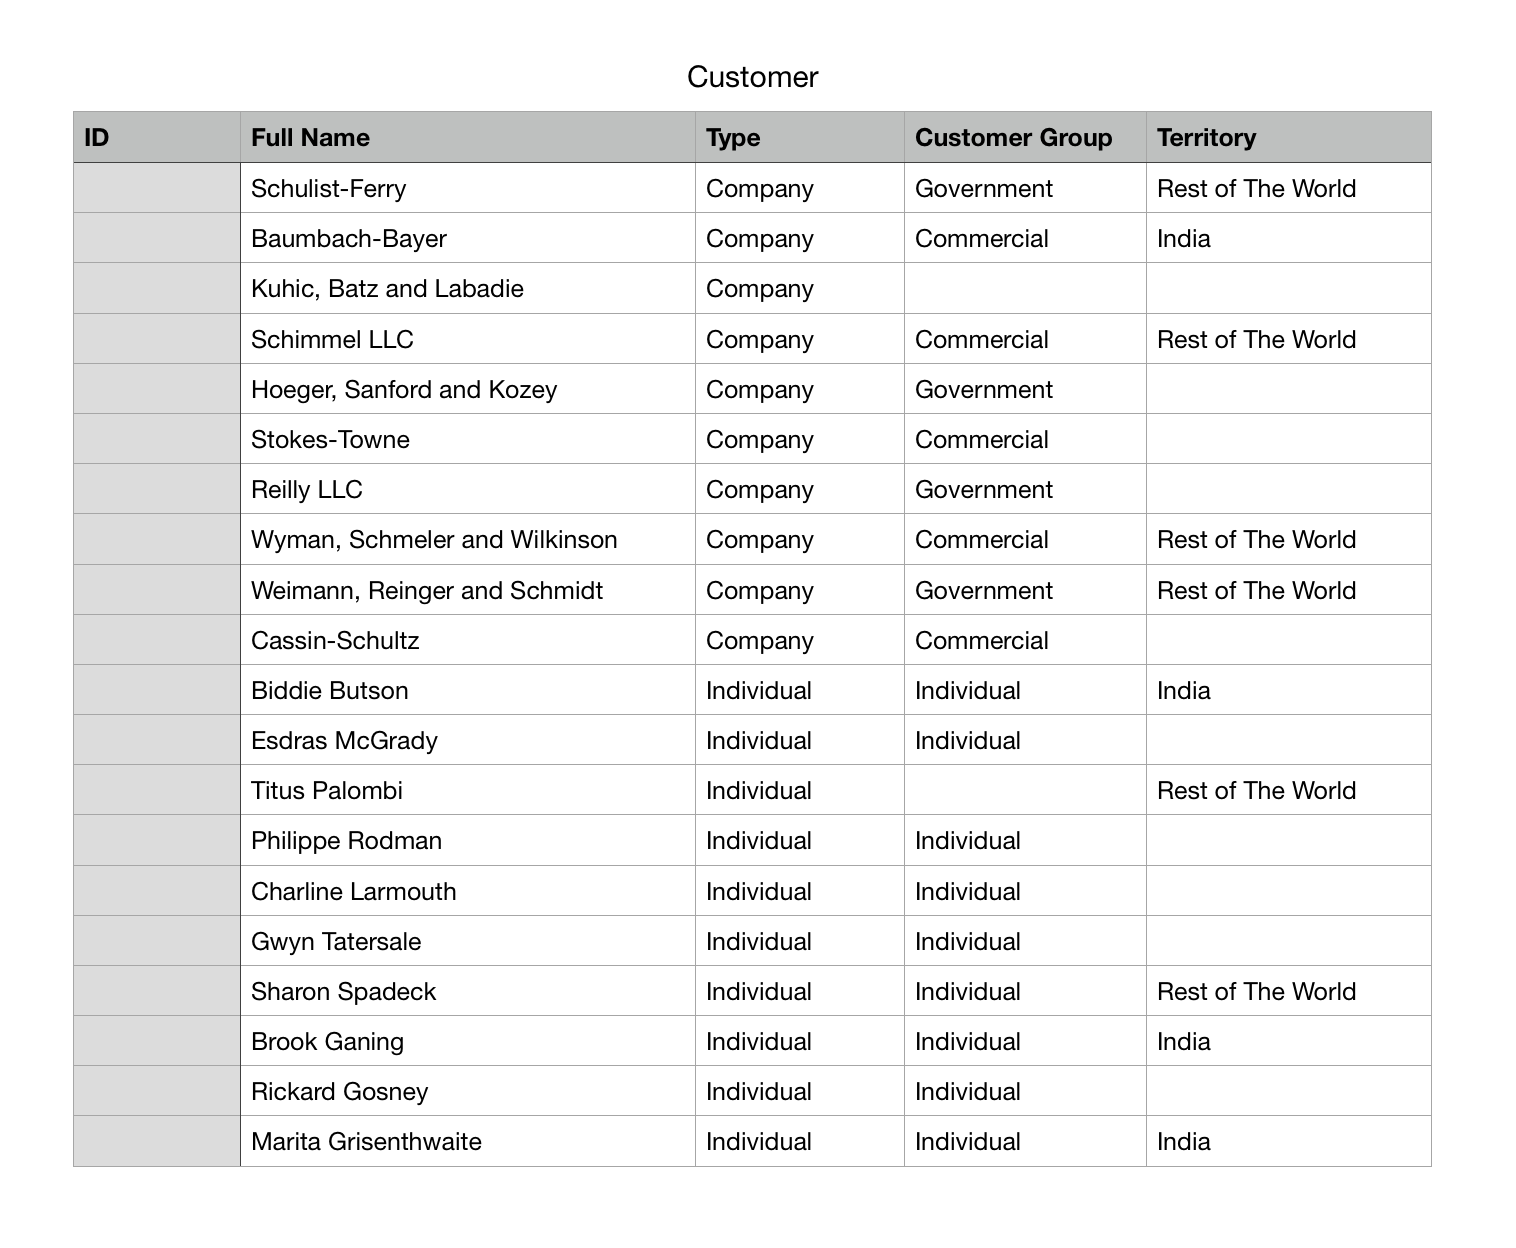
Your downloaded template will look something like this:

Open the downloaded template in a spreadsheet application (like Excel, Numbers, or Libre Office) and enter the data below the column headings shown as follows:
Now, save your template as an Excel or Comma Separated Values (CSV) file.
You can leave the ID column as blank while inserting new records.
When you import this template, each row will make a Customer record in the system.
1.3 Importing the Template
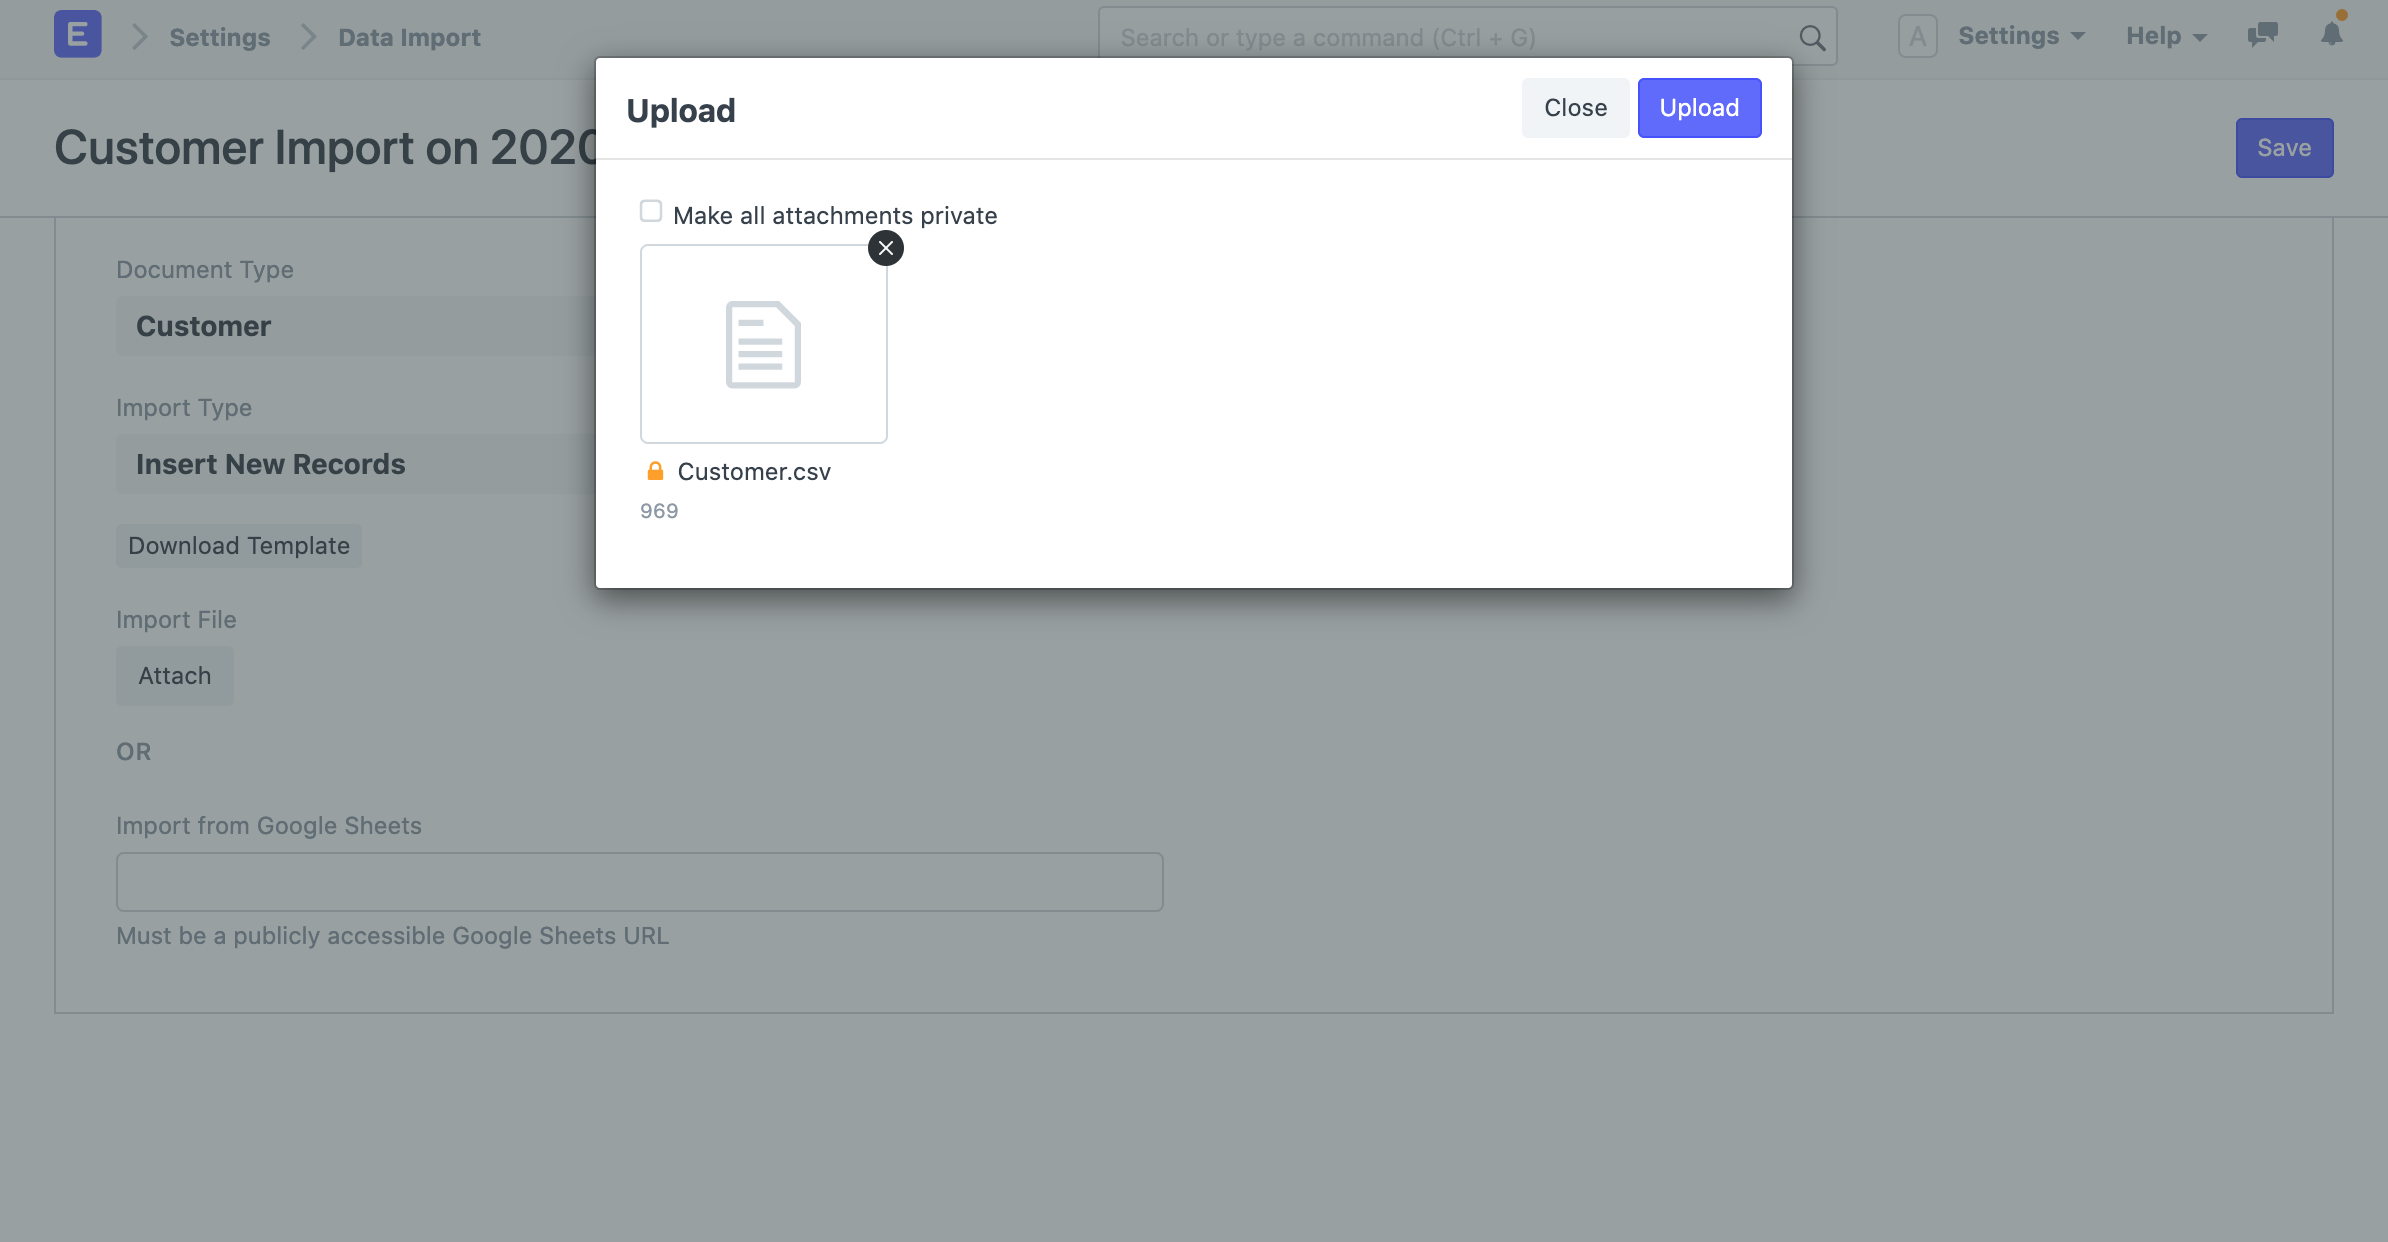
- After updating your template file, go back to the Data Import form and attach the file by clicking on the Attach button.
- Select the template file and click on Upload.
- After the upload is successful, click on Start Import.
If there are any errors in your template, they will be shown in the Warnings section. The warnings will be categorized by Row or Column with their number so that you can easily track them down in the template and resolve them. You must resolve all the warnings before you can import the data.
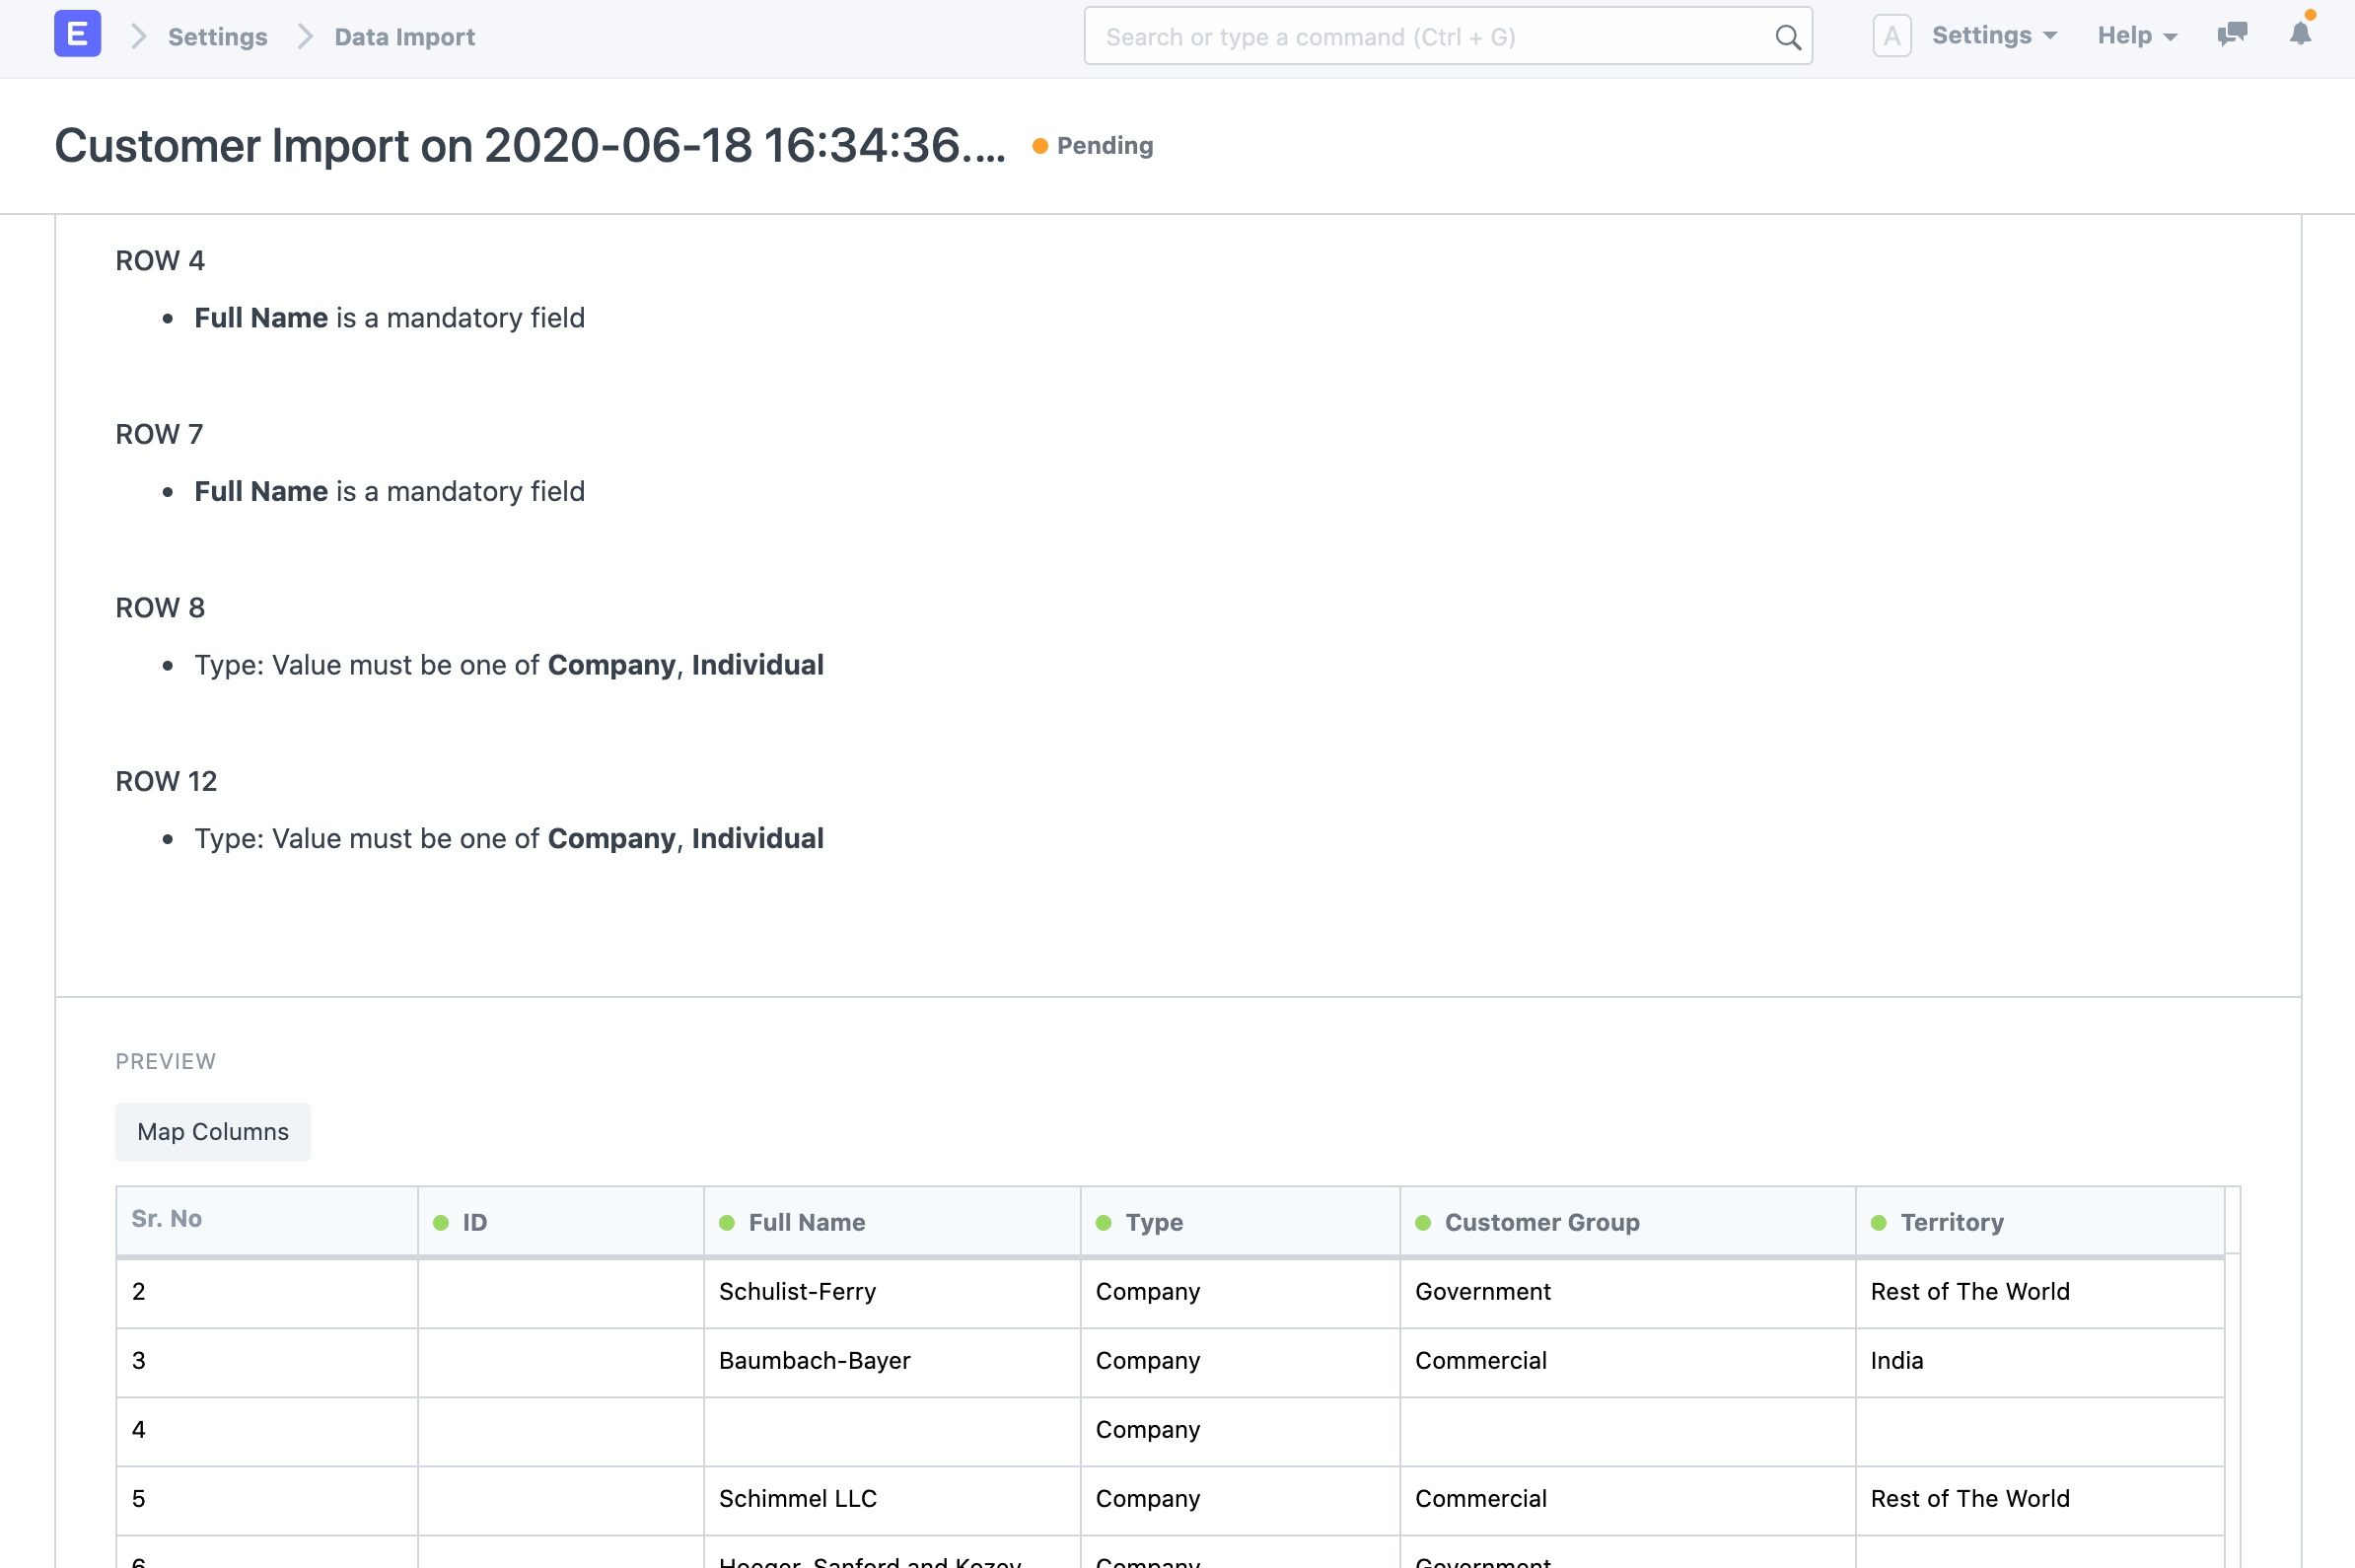
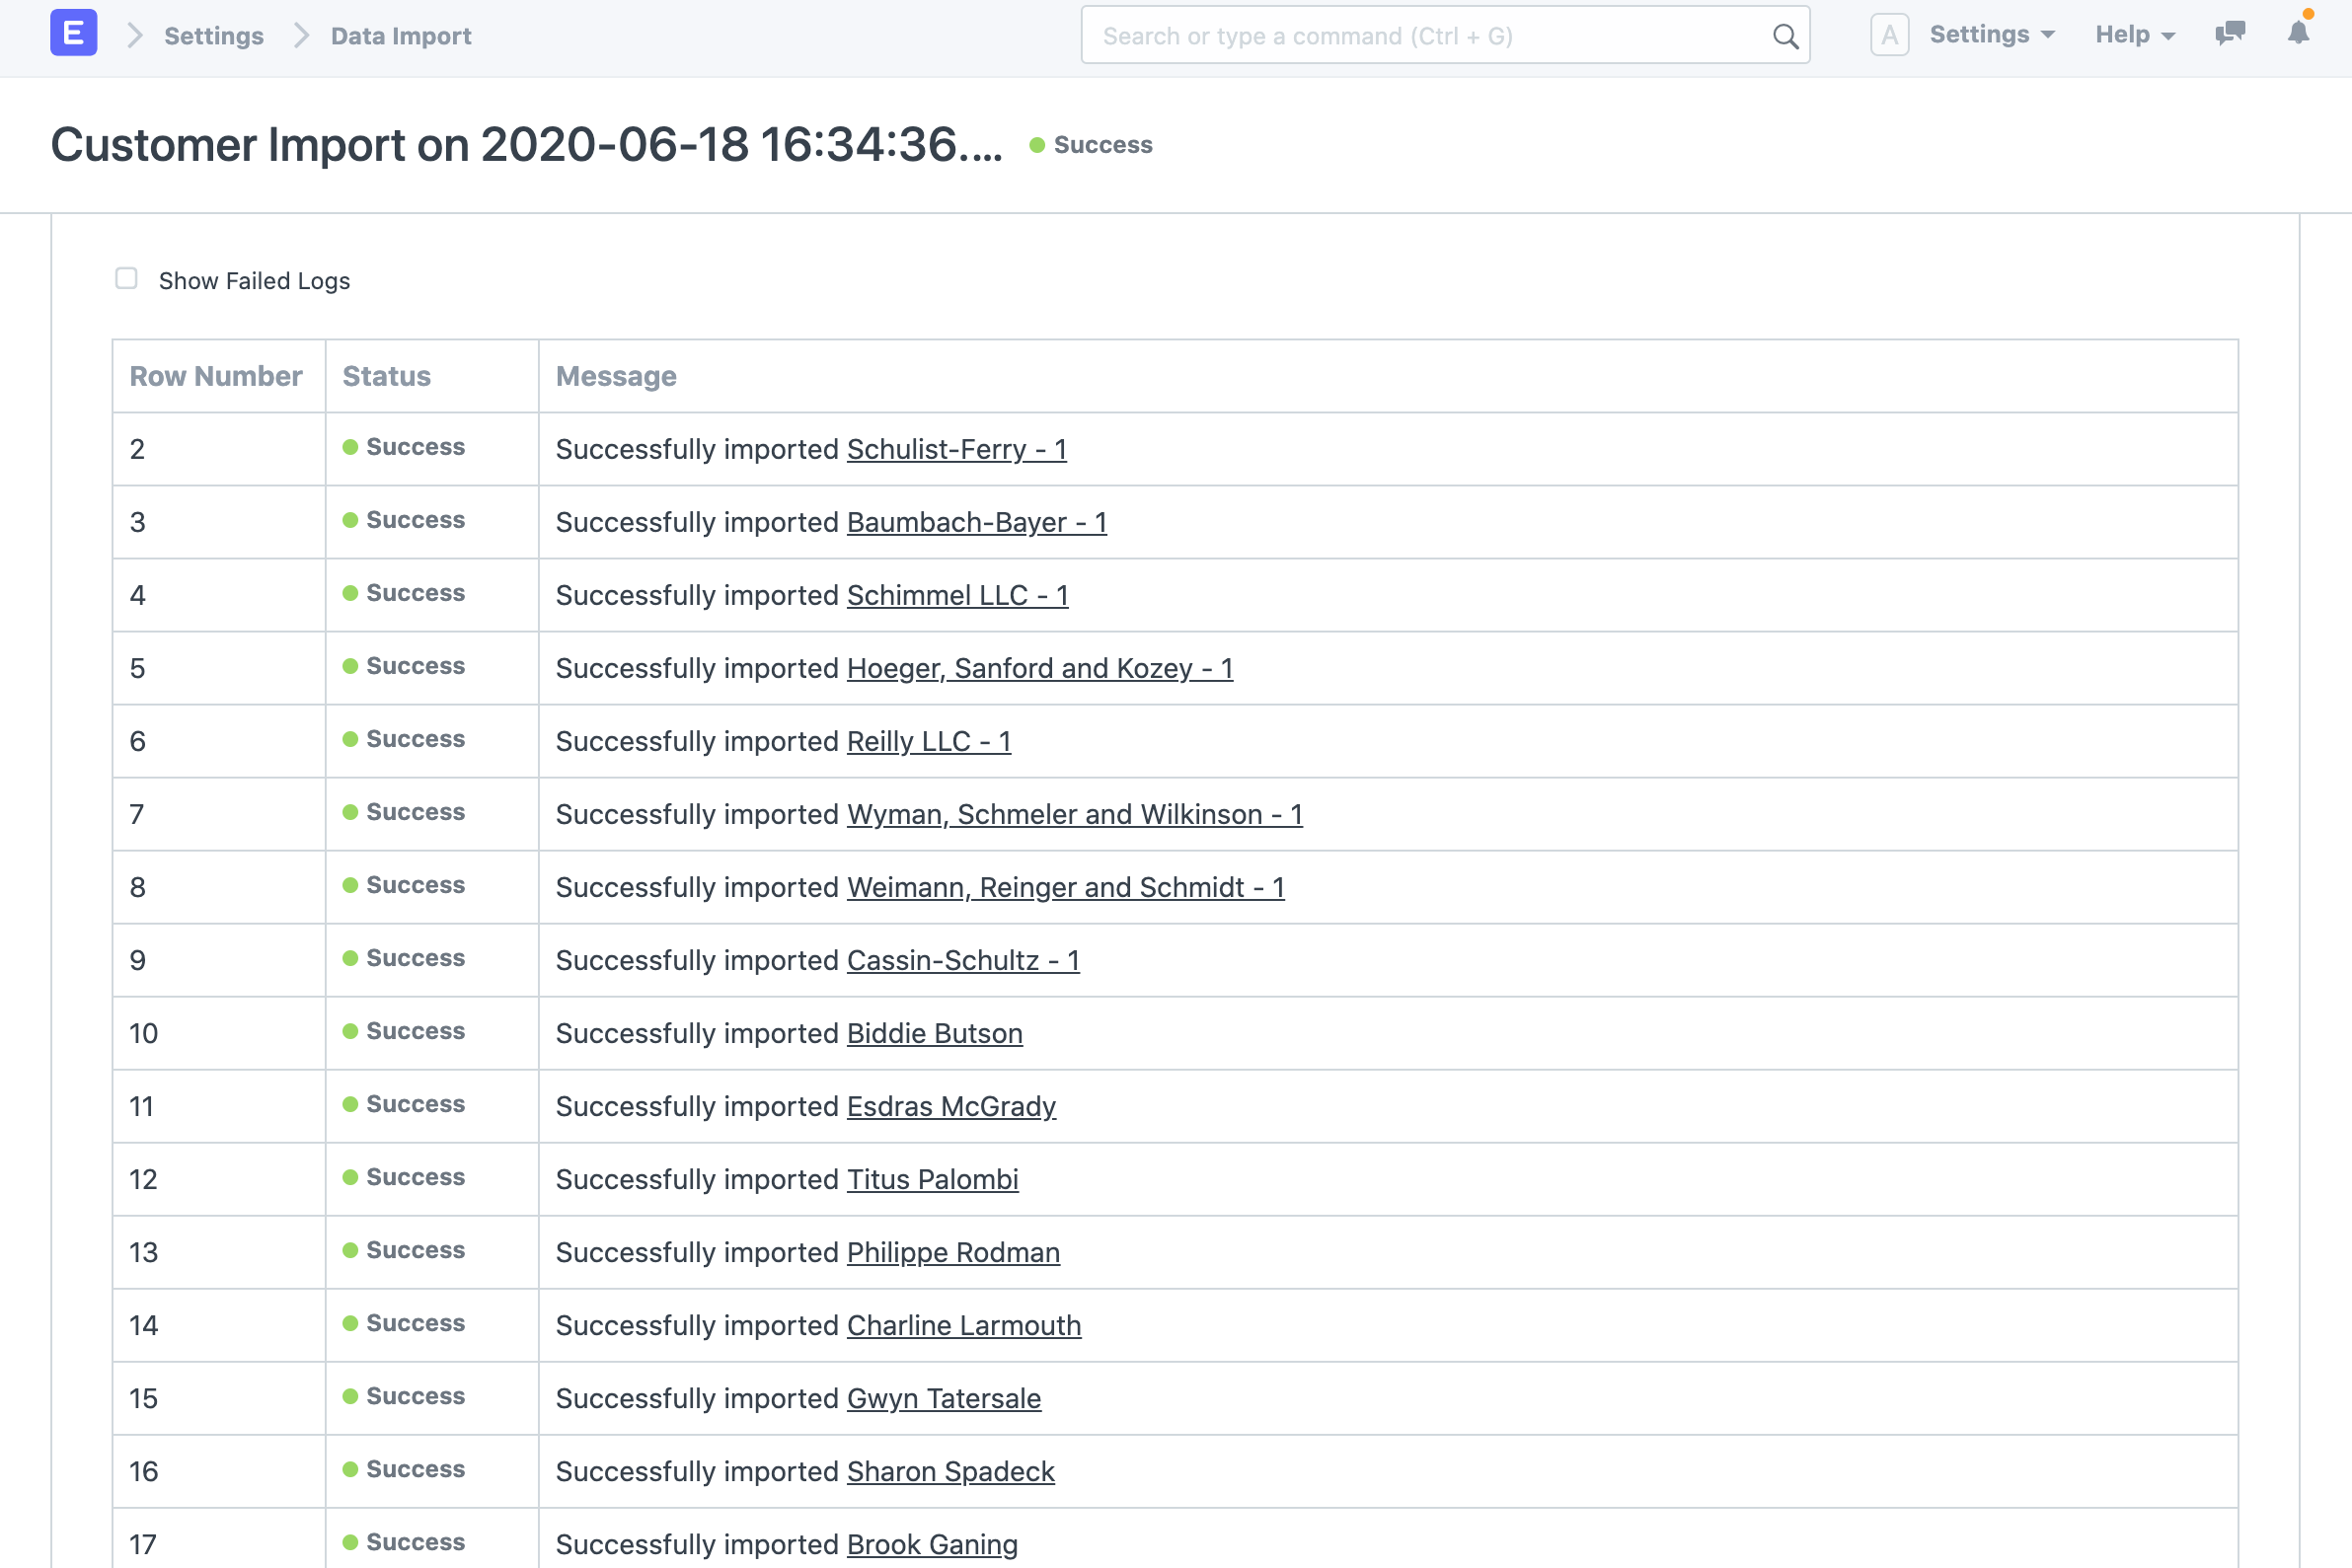
After you have resolved the warnings, click on Start Import again to import the data. On successful import of the data, you'll see a log of each record that was created in the Import Log section.
2. Updating Existing Records
Let's say you want to update Customer data in bulk in your system. The first step is to download the template with the data.
2.1 Download the Template
- Go to Customer List, click on Menu > Import. Click on New.
- Select Import Type as Update Existing Records
- Click on Save.
- Now, click on Download Template.
- While updating existing records, you must export the records from the system with the ID field and the fields that you want to update. You can choose All Records or Filtered Records depending on your case.
- Select the fields that you want to update for the Customer records.
- Click on Export.
2.2 Updating Data in the Template
Your downloaded template will look something like this:
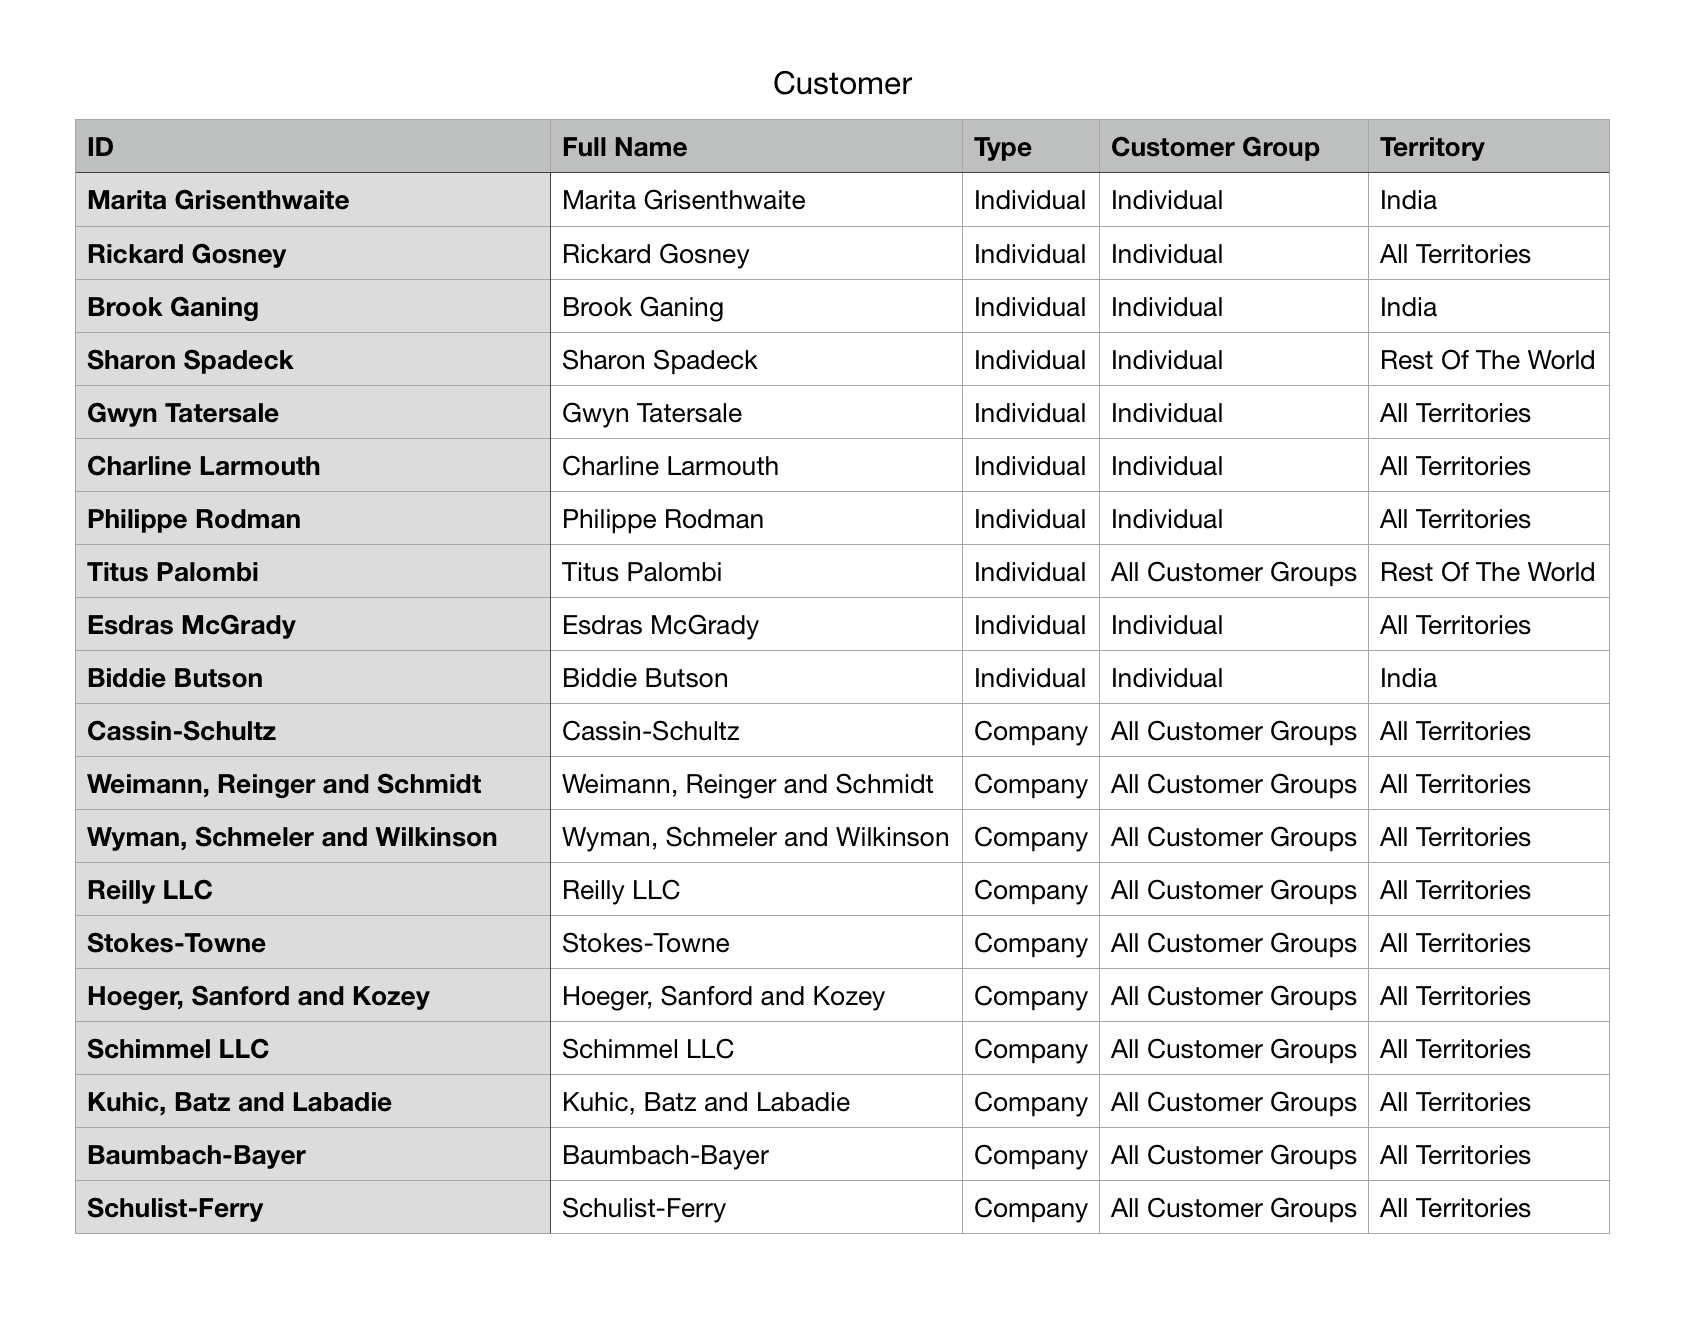
Now, change the values in your template and save the file as Excel or CSV.
While exporting records for updating them, ensure that the ID column is exported and is untouched. The values in the ID column are used to identify the records in the system. You can update the values in other columns but not in the ID column. If you remove some child table row, the system will consider that the row is supposed to be deleted.
2.3 Importing the Template
Follow the steps in Importing the Template section above.
3. Importing Child Records
Data in ERPNext is stored in tables like a spreadsheet with columns and rows of data. Each form likes Sales Order has multiple fields like Customer, Company, etc. It also has tables like the item table, tax table, etc. In Data Import, the set of fields in the Sales Order are treated as the main table and the rows inside the child table (item table) are treated as the child table for data import.
Each form in ERPNext can have multiple child tables associated with it. The child tables are linked to the parent tables and are implemented where there are multiple values for any property. For example, an Item can have multiple prices, a Sales Invoice has multiple Items, Taxes, and so on.
When you export a document with child tables, for e.g., each child row will appear on a separate row but it is associated with a single parent row. The subsequent values in the parent columns will remain blank. You must ensure that this order is not broken when you are importing them via Data Import.

4. Import Options
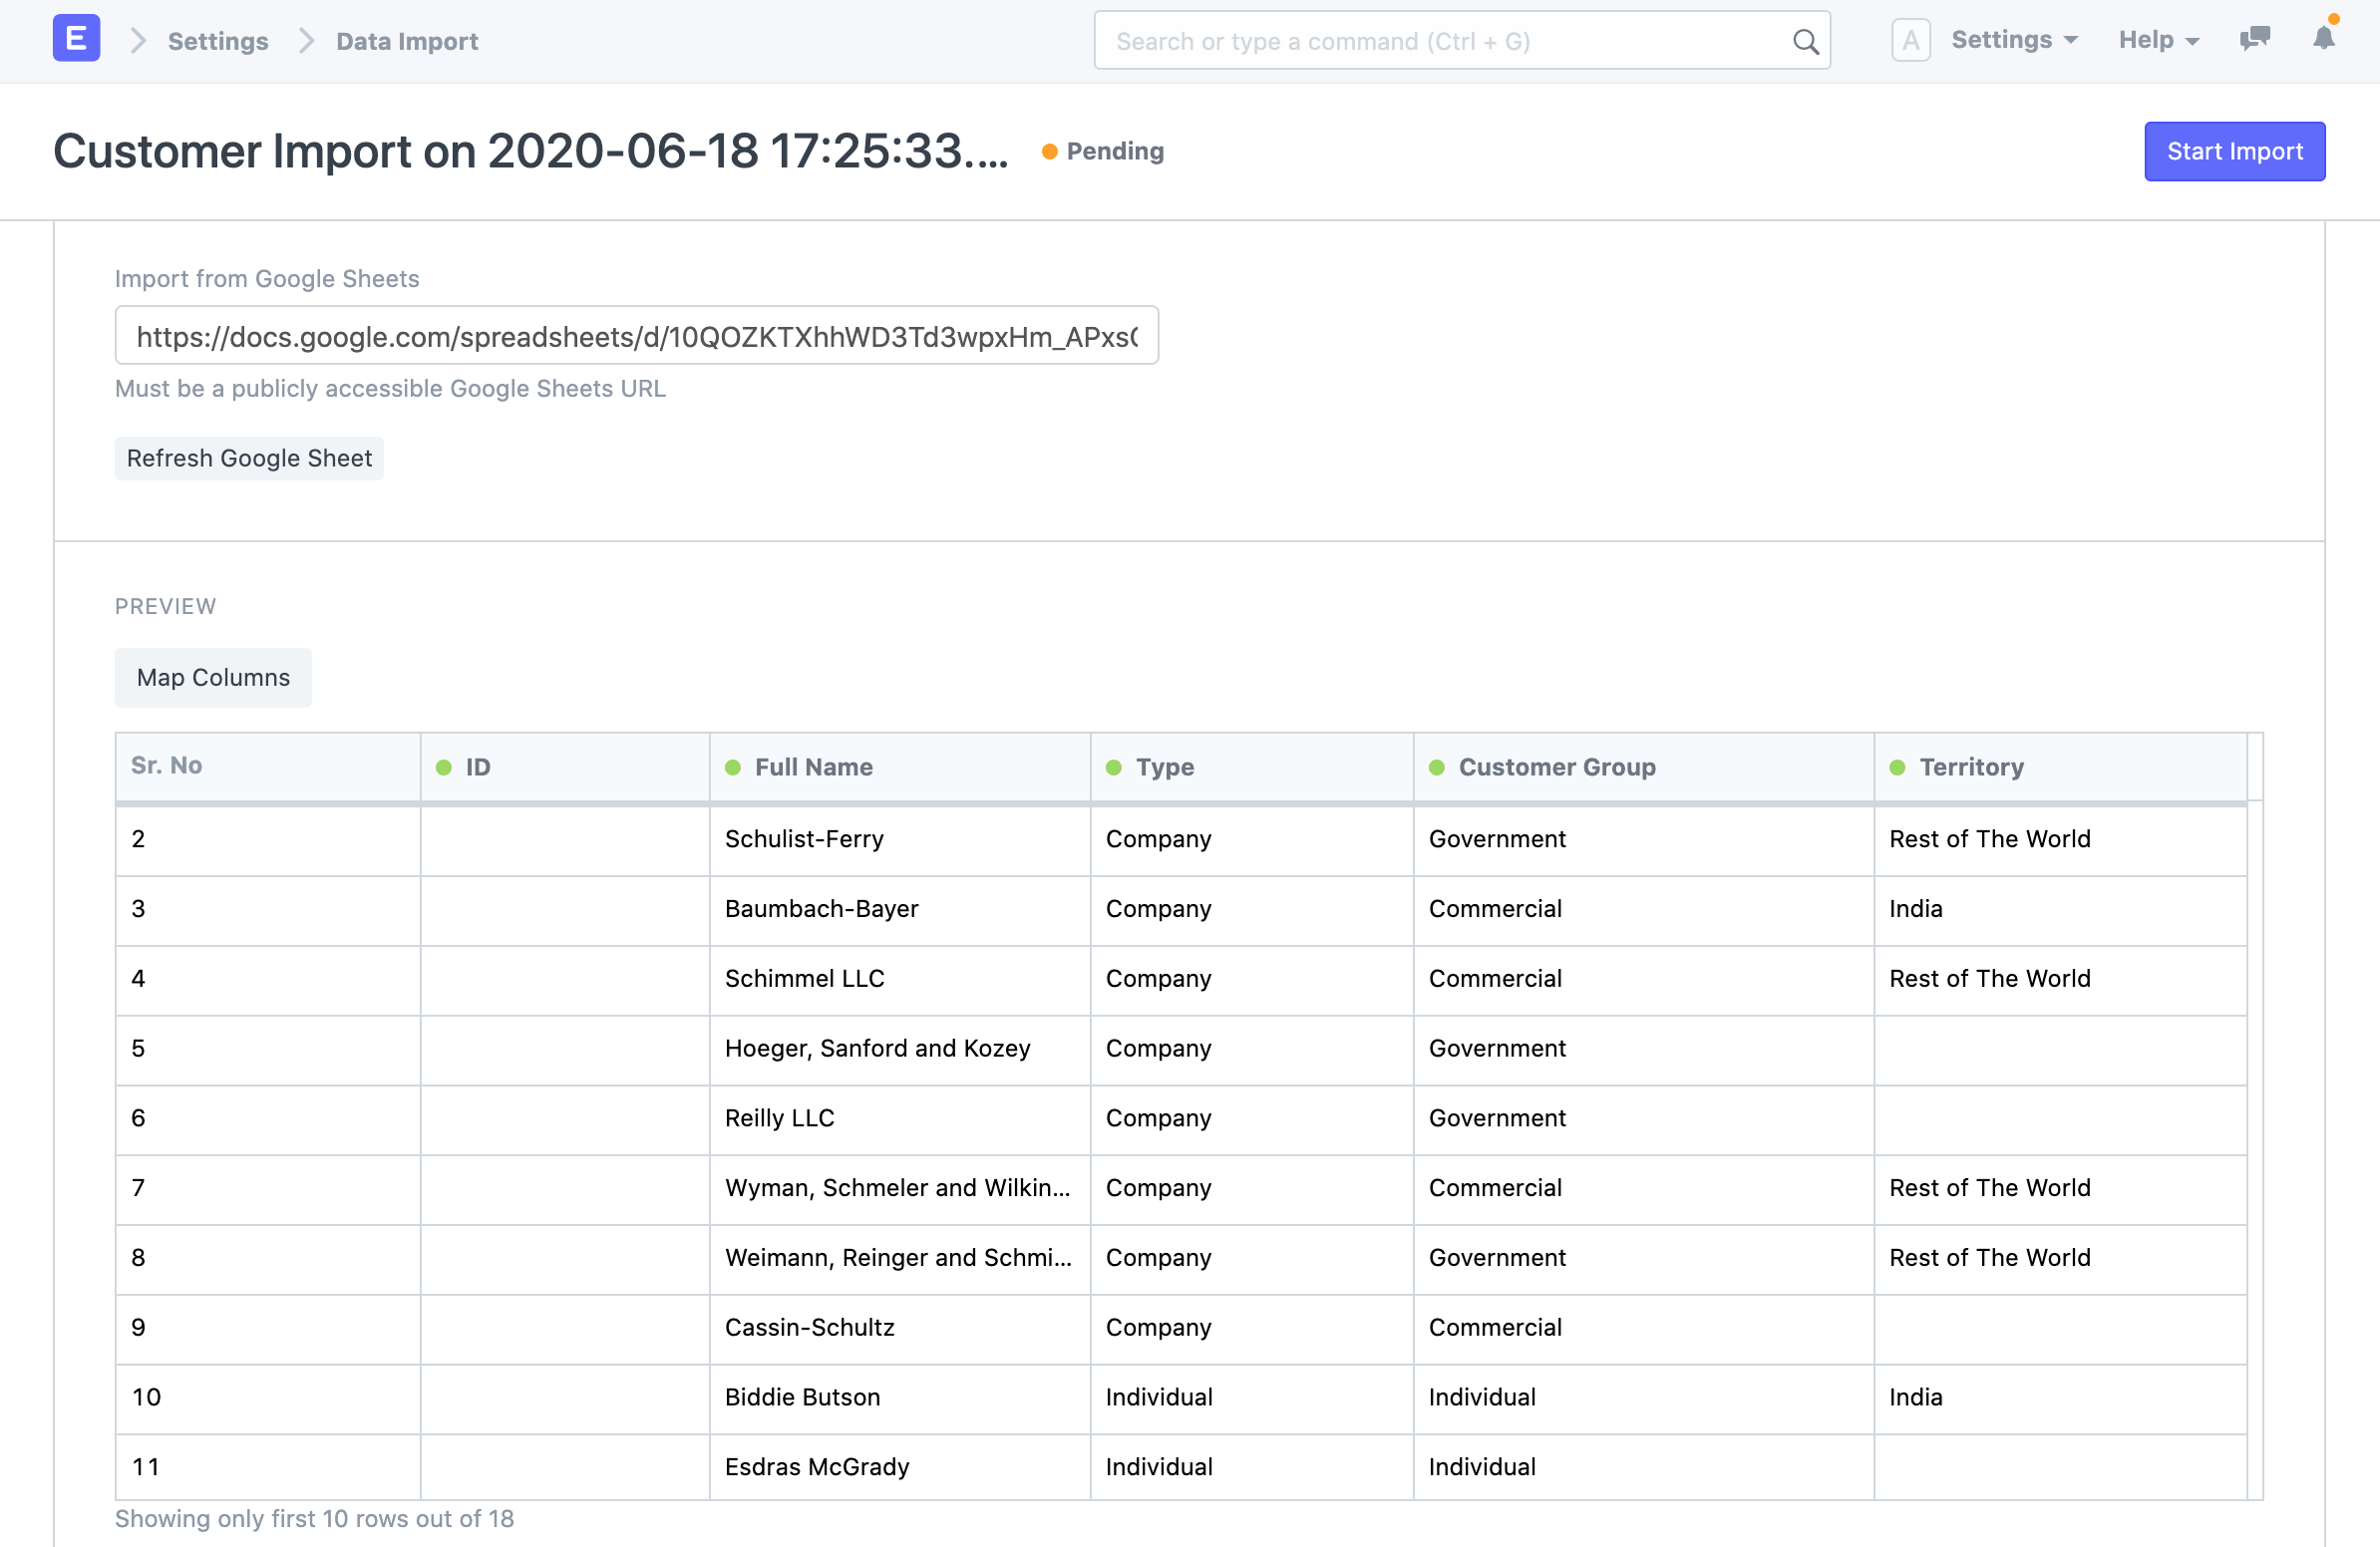
4.1 Import from Google Sheets
You can also import data from Google Sheets. Import your template in Google Sheets and enter the data. Make sure the Google Sheet is public. You can test this by opening the Google Sheets URL in an incognito browser window.

4.2 Submit After Import
In ERPNext document types are mainly of two types - masters and transactions. The masters are records like Customer and Task which can only be saved not submitted. Transactions like Sales Orders, Purchase Invoices are submittable documents and can be submitted.
When you select a submittable document type for Import, you can tick Submit After Import to submit the document after it is imported.
4.3 Don't Send Emails
Let's say you have created a Notification in your system and whenever a Lead is created an email is sent. Now, if you are bulk importing Leads then a lot of emails will be sent, which may not be desired. You can disable this option to avoid sending emails.
5. Additional Notes
5.1 Upload Limit
There is no hard limit on the number of records that can be imported. But you must try and upload only a few thousand records at a time. Importing a large number of records (let's say 50,000) might slow down the system considerably for the users that are using the system.
5.2 CSV Files
A CSV (Comma Separated Value) file is a data file that you can upload into ERPNext to update various data. Any spreadsheet file from popular spreadsheet applications like MS Excel or Open Office Spreadsheet can be saved as a CSV file.
If you are using Microsoft Excel and using non-English characters, make sure to save your file encoded as UTF-8.
For older versions of Excel, there is no clear way of saving as UTF-8. So save your file as CSV, then open it in Notepad, then save as “UTF-8”. (Or upgrade your Excel!)