Taxjar Integration
TaxJar integration allows ERPNext users to auto-calculate taxes based on the addresses of customers, companies and delivery locations.
How to Setup TaxJar?
TaxJar Account and API Tokens:
You will need the API tokens from your account to setup Taxjar.
- Create a Taxjar account first as per your requirements.
- Login to your account dashboard and click on the Account button and click on TaxJar API in the dropdown list of options.
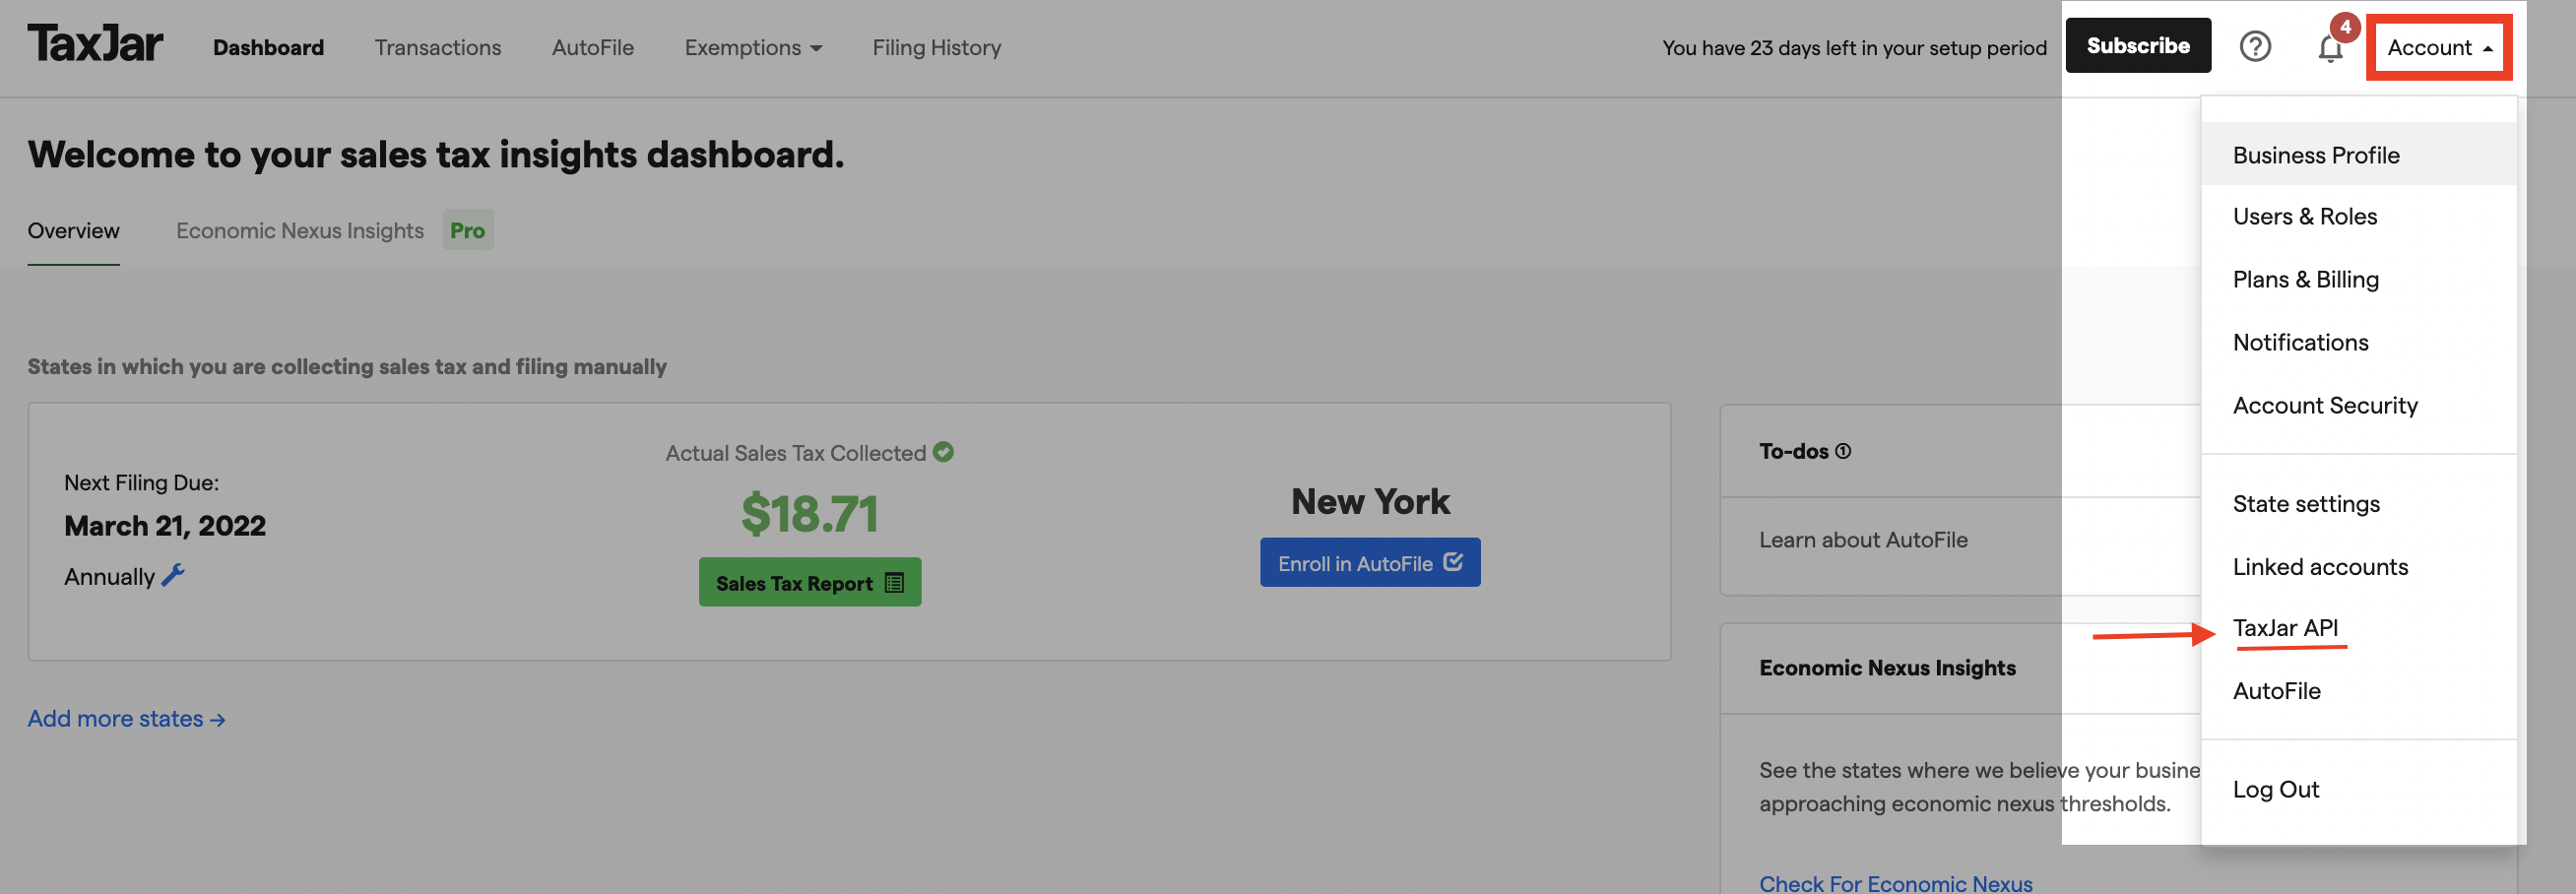
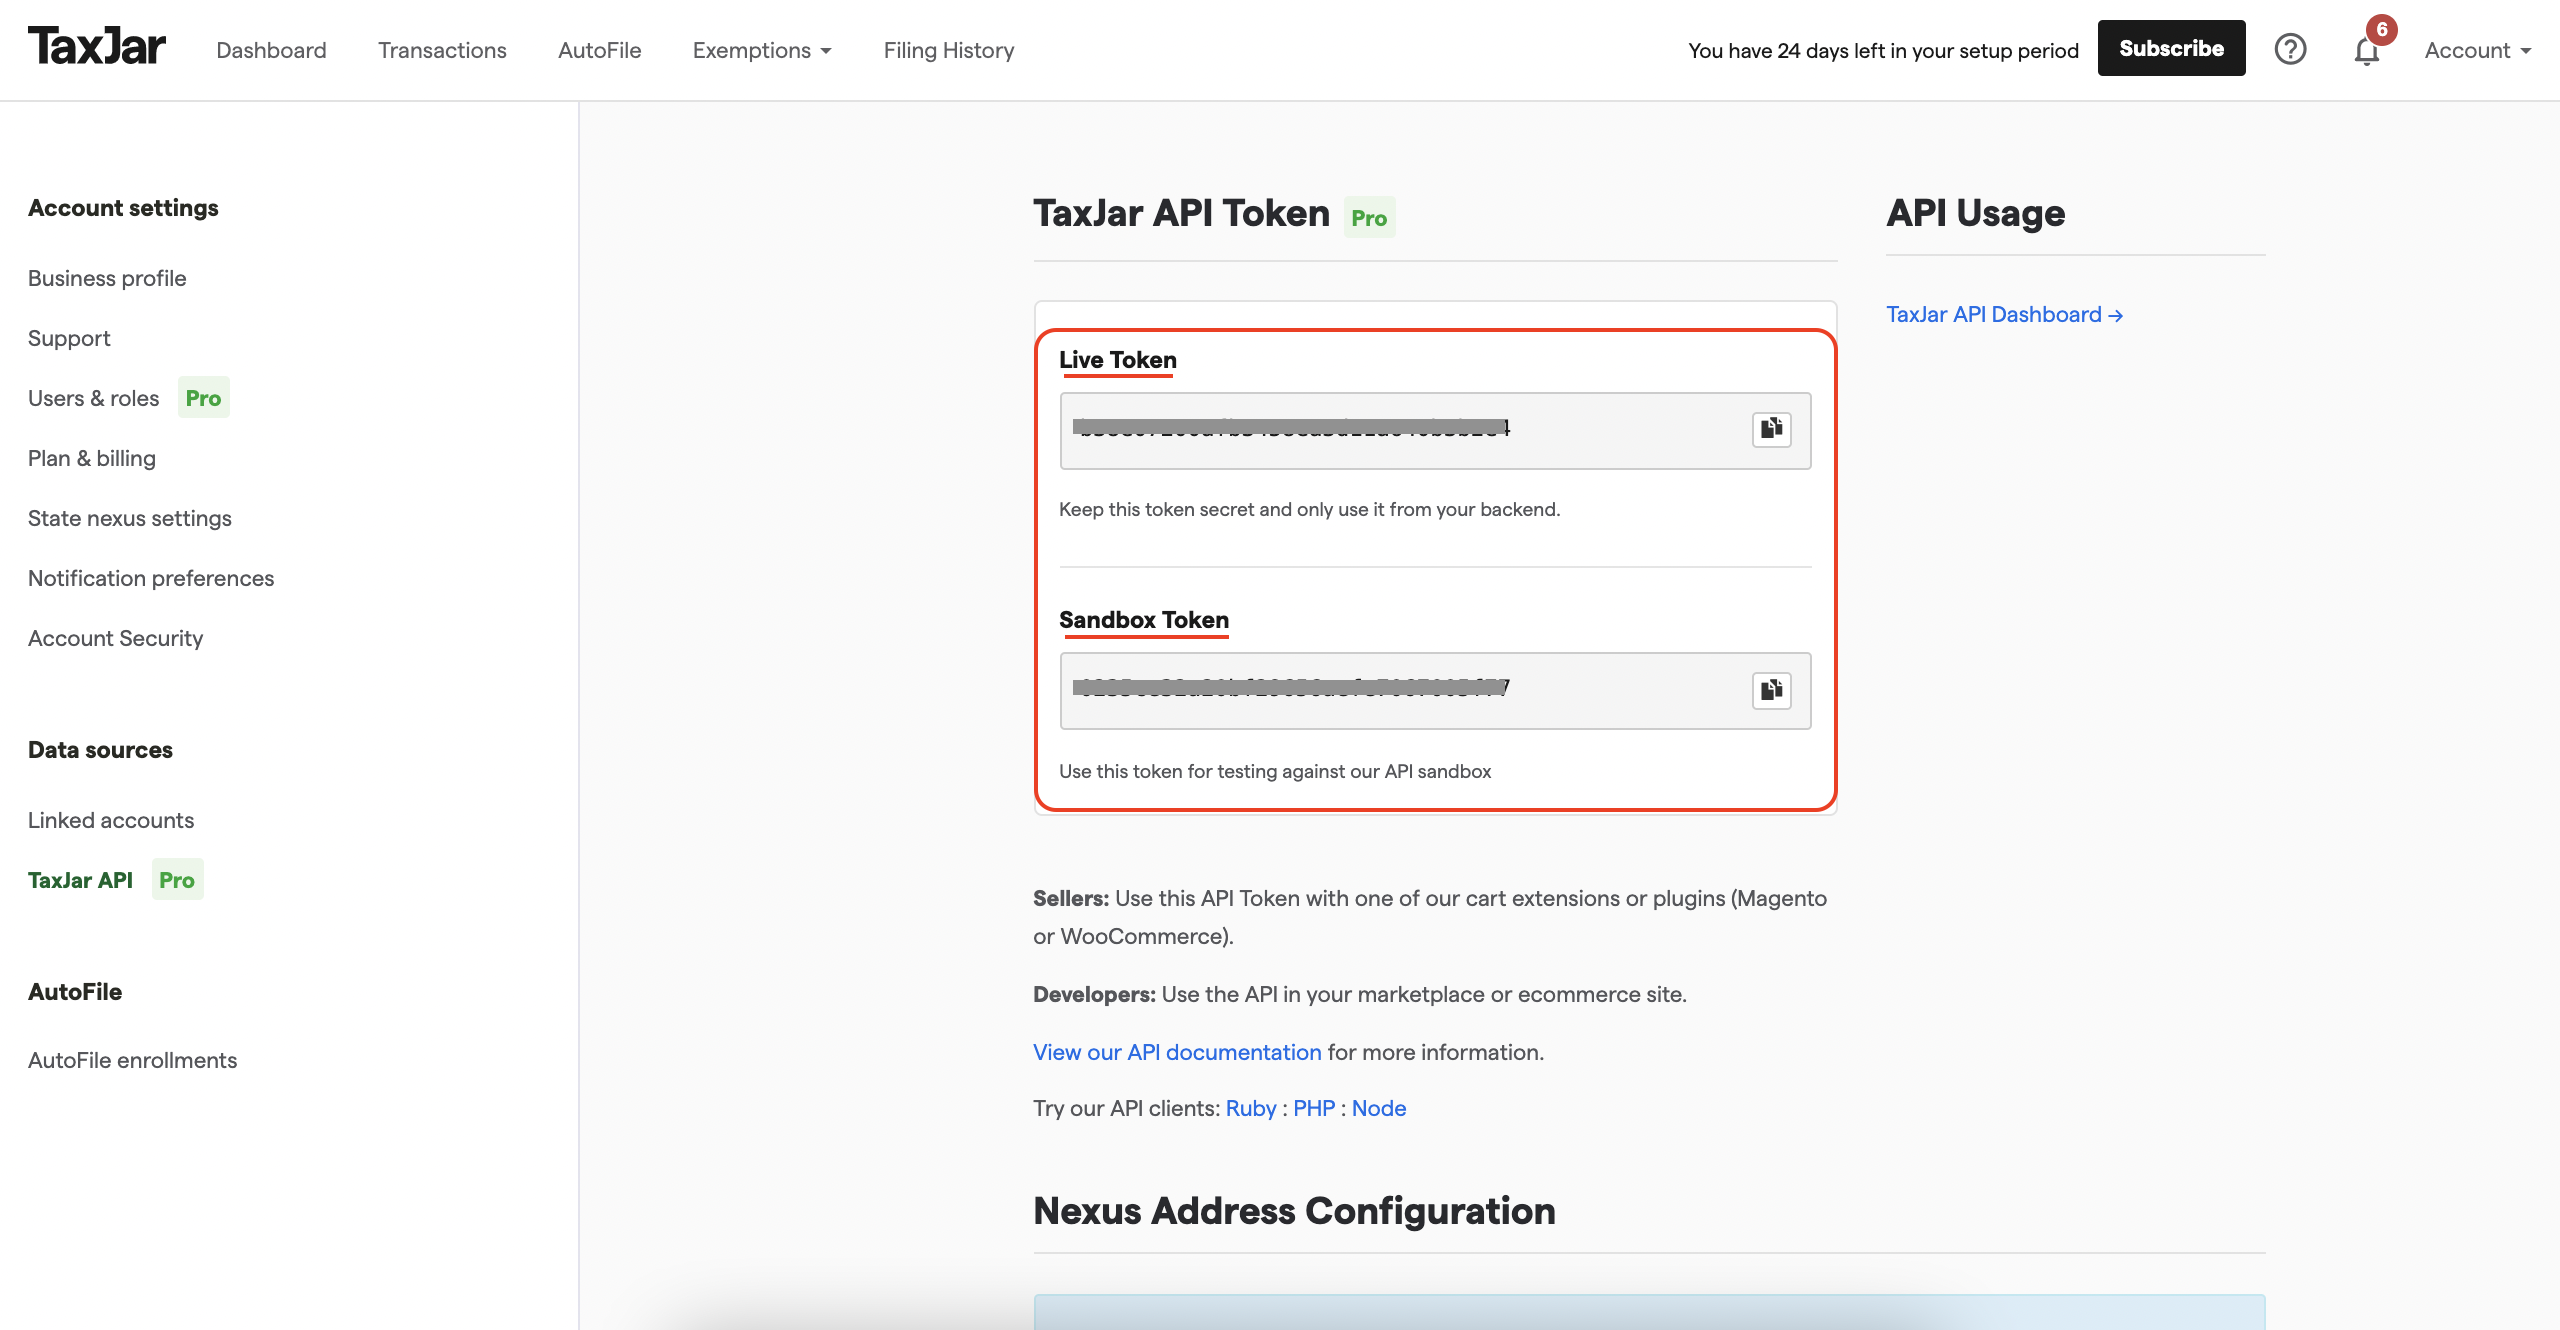
- You will now see your API tokens, these tokens would be needed to configure your ERPNext TaxJar integration.
Adding Nexus and states in TaxJar:
What is Nexus?
You don't need to register to collect sales taxes from customers in every state. You'll only collect sales taxes from customers who live in the states where you have nexus!
"Nexus" is a specific type of connection to a state that's significant enough for you to be required to comply with that state's sales tax laws.
How do I know where I have Nexus?
You'll always have nexus in your home state where you are located.
For more details, please read up on the official TaxJar page about Nexus without fail!
Adding states:
Please follow detailed instructions given on the official TaxJar page here regarding adding/removing states to your dashboard, please follow their instructions from top to bottom as it will help you set up everything perfectly.
Setting up TaxJar on ERPNext:
In the awesomebar, search for 'TaxJar Settings'. This is where you configure your TaxJar integration in ERPNext.
Sandbox Mode:
TaxJar provides a sandbox environment for automated testing and development. After generating a sandbox API token, point your API client to the sandbox environment: https://api.sandbox.taxjar.com]
Setting up tokens and account heads:
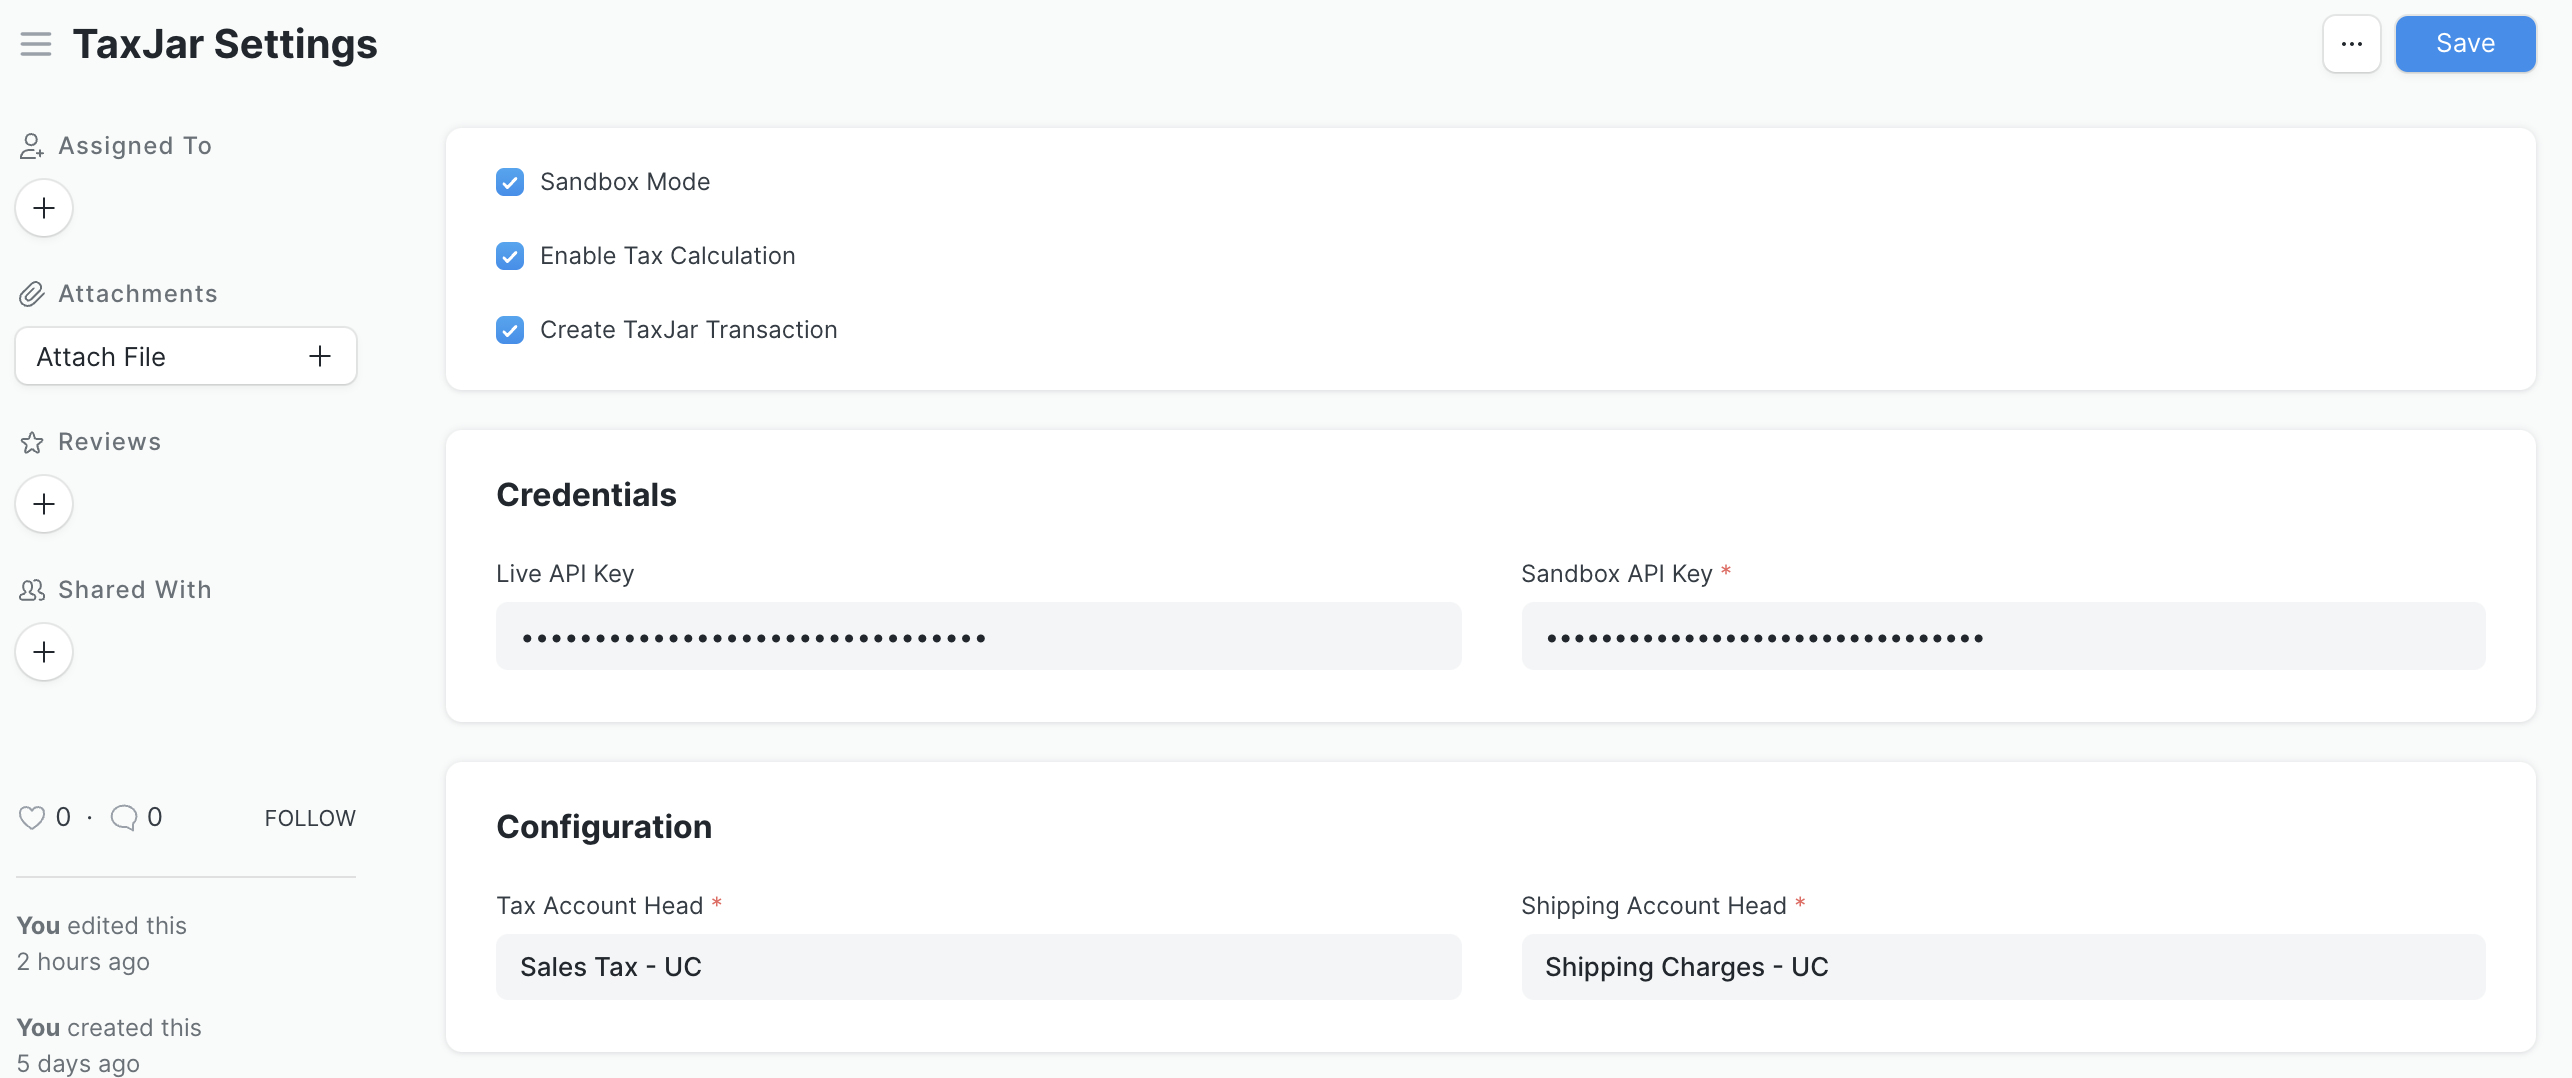
- Enable Tax Calculation, Create TaxJar Transaction:
- You need to enable these options for auto tax calculations and these transactions would appear on your TaxJar account transactions page where you can track them and analyse the tax breakdowns.
- Once you've made some transactions, they would automatically appear on your TaxJar Transactions page:
- You can check out all the transactions made and the detailed tax breakdowns.
- Copy the API tokens from your TaxJar account as directed above and paste it in the Live API Key and Sandbox API key field.
- You will have to set two account heads for Taxes and Shipping, select the accounts as required and once everything has been configured, click on save and you are good to go!
Setting correct addresses
For the integration to work seamlessly please make sure you have created correct addresses for your company, customers, suppliers, etc.
Note:
- While creating an address, make sure in the State/Province field you enter the correct state. TaxJar requires the 2 letter format for the states for ex. New York is considered as NY, but it need not be mandatorily entered that way, the system converts it to the 2-letter state code automatically.
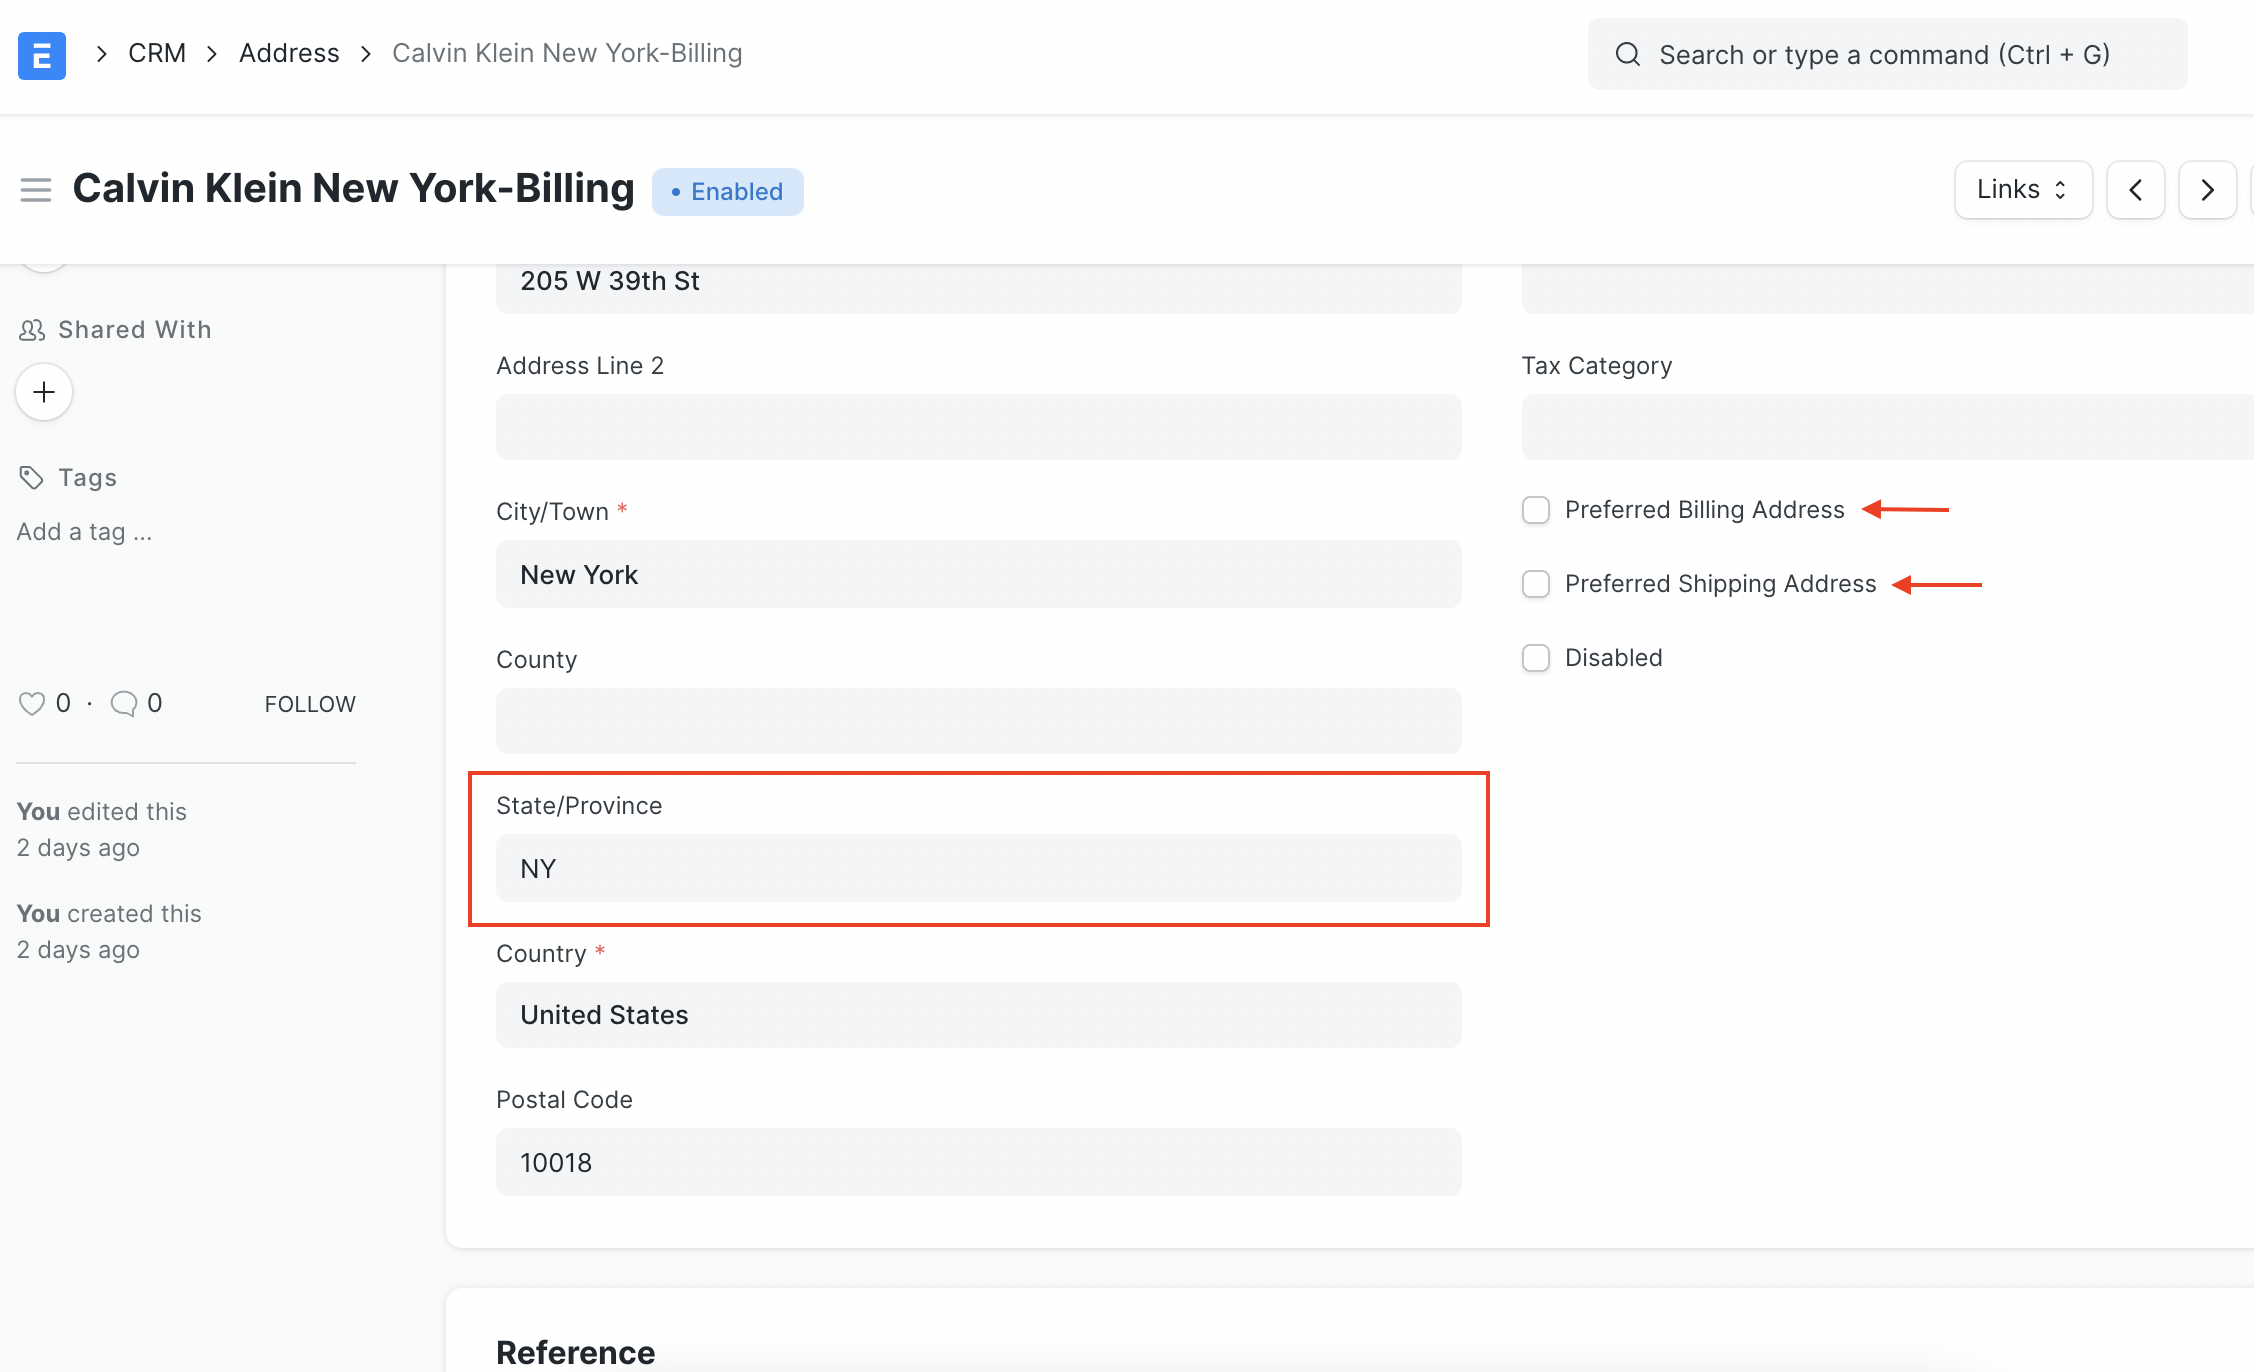
- You may check the Preferred Billing Address and Preferred Shipping Address checkboxes to auto-fill those fields in different invoices and avoid the hassle.
- Ensure that you have correctly filled the City/Town, State/Province, Country, Postal Code fields.
- You might want to disable the taxes if any, that are set by default.
TaxJar in Action!
In this instance we have a company that is based out in New York and we are issuing a Sales Invoice to a customer based within the same state.
As you see, the taxes and charges based on the state and pincode gets applied automatically on saving.