Customize tables within your Print Format Builder
You can customize the 'Items' column present your Print Format Builder by navigating as shown below:
- Create your Customized Print Format by going into the 'Settings' button and clicking on 'Customize'.
- Add a relevant name to the new customized Print format you are creating.
- Once you are inside the New Print Format, you can click on the button 'Select columns' in the field which says 'Items (Table)'

Open the table and you will see a list of columns that are present in the standard format of your Print Format as shown below:
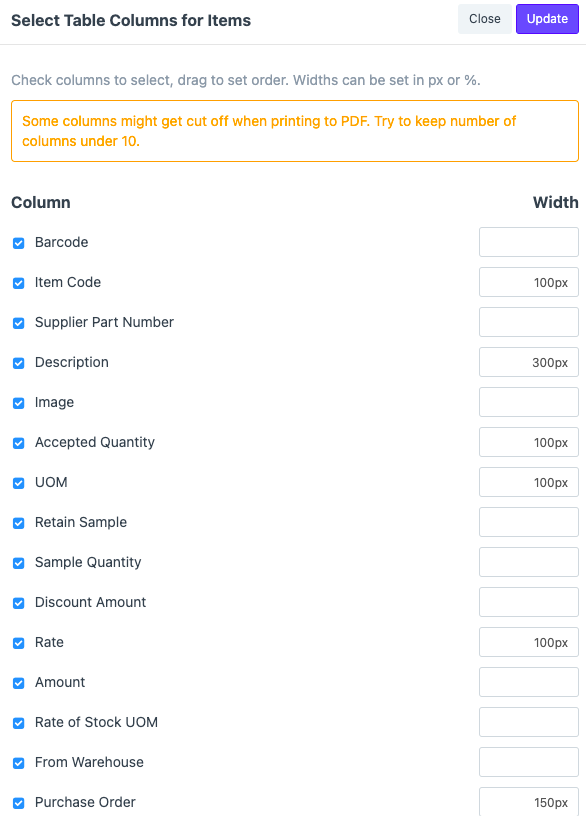
The options you select here will be shown in Print Format.
Select the columns you want to keep in the Table that you are creating for your customized Print Format. You can adjust the Width and their order according to your requirement.
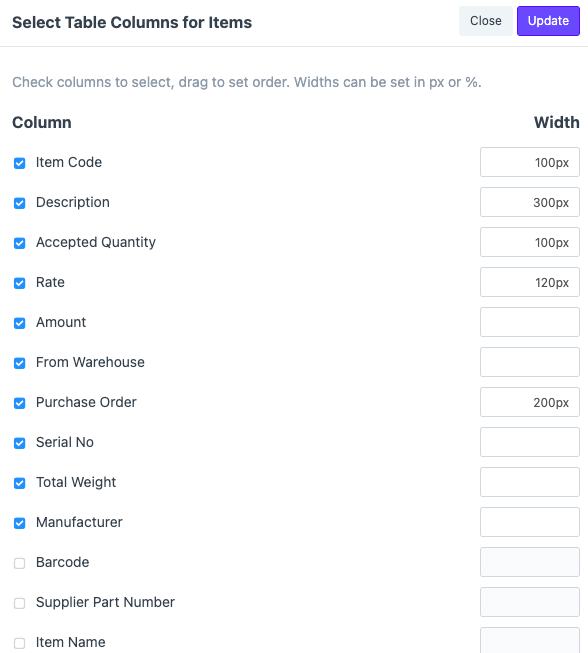
Once you have selected the columns you want your Print Format to have, click on 'Update' and 'Save' the changes you have made after further modifications in the Print format.
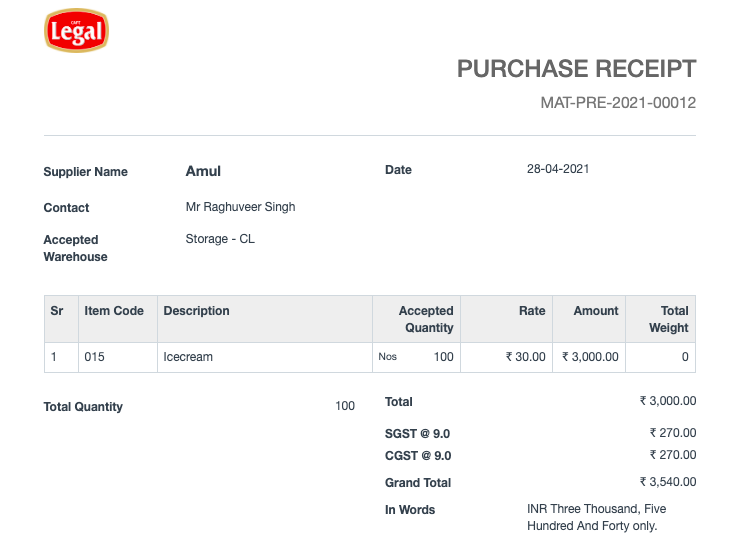
Refresh your screen and select the newly created Print Format. In this case, it is the 'Purchase Receipt'.

Once you click on the Print Format you newly created, the changes will be visible in the Items table.
To see the difference between the Standard Print Format and the one you just created, you can simply click on the Print format Templates present.