Customer Group
Customer Group is an aggregation of customers that are similar in some way.
Customer groups allow you to organize your customers. Typically Customers are grouped by market segment based on the domain in which a business operates. Customer Groups are created in hierarchical manner in ERPNext. You can create a main customer group and add sub customer groups under it.
You can define a price a list which will be automatically applied to all customers belonging to that group. You can also get trend analysis for each group. Individual, Commercial and Government customer groups are created by default. You can add your own customer groups based on your requirement like retail, wholesale etc.
1. How to Create a Customer Group
- Go to CRM > Settings > Customer Group.
- Click on a parent customer group like 'All Customer Groups'.
- Click on 'Add Child'.
- Enter 'Customer Group Name'.
- Tick 'Group Node' if you would like to add sub customer groups under this.
- Click on 'Create New'.
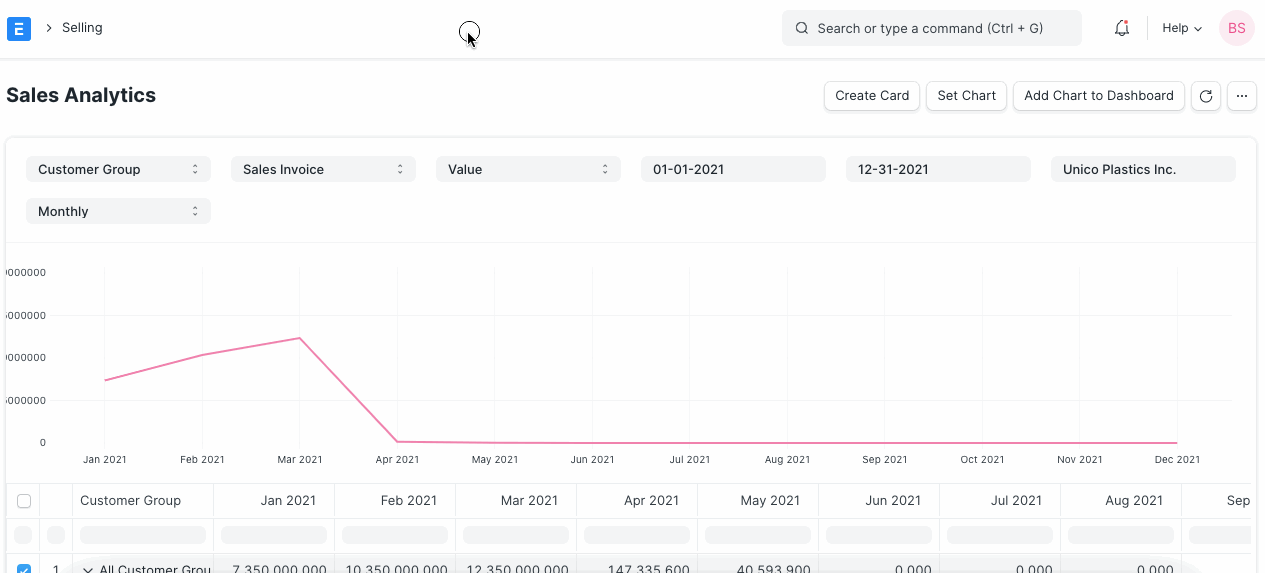
Tip: If you think all this is too much effort, you can leave it at “Default Customer Group”. But all this effort, will pay off when you start getting reports. An example of a sample report is given below:
2. Features
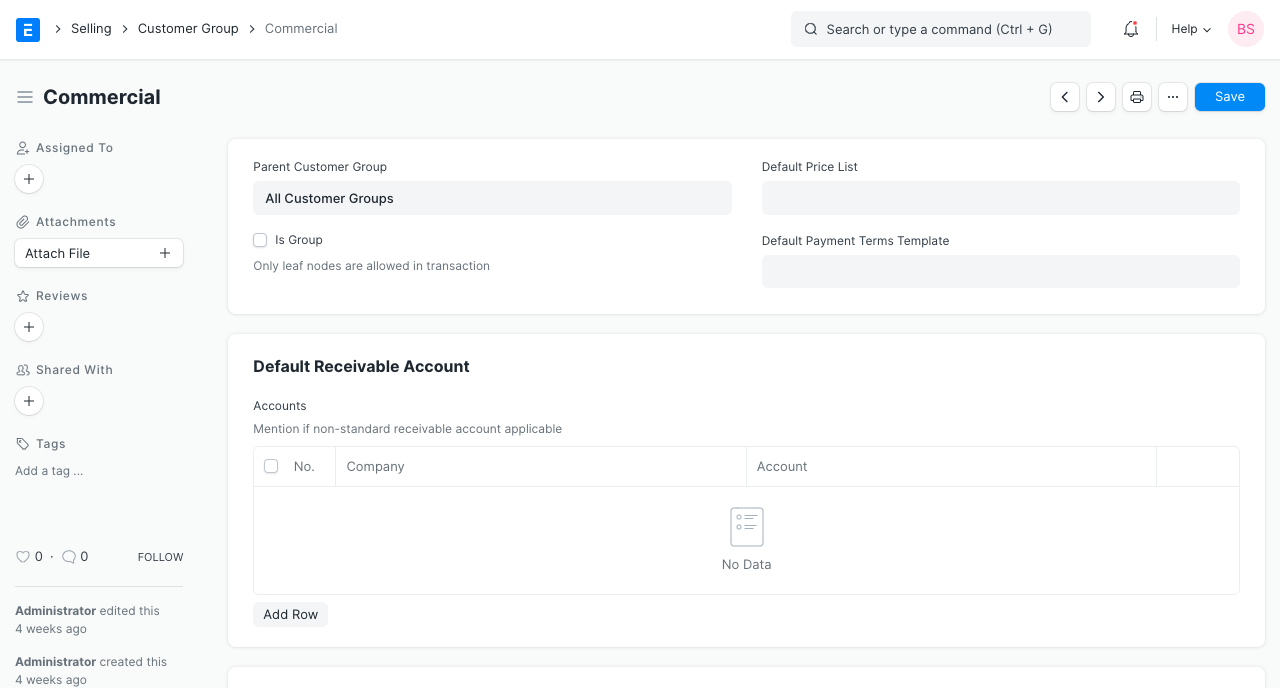
2.1 Assign Credit Limit, Default Price List, and Default Payment Terms Template
You can assign the credit limit, Price List, and Payment Terms and they will be automatically applied when a customer belonging to the customer group is selected in sales transactions like Sales Order and Sales Invoice.
2.2 Default Receivable Account
You need not create a separate accounting ledger for each customer in ERPNext. Read Common Receivable Account for more details.
If you need a separate receivable account for a customer, you can add the same in 'Default Receivable Account' section.