Role Based Permissions
Permission to different documents can be controlled using Role Based Permissions.
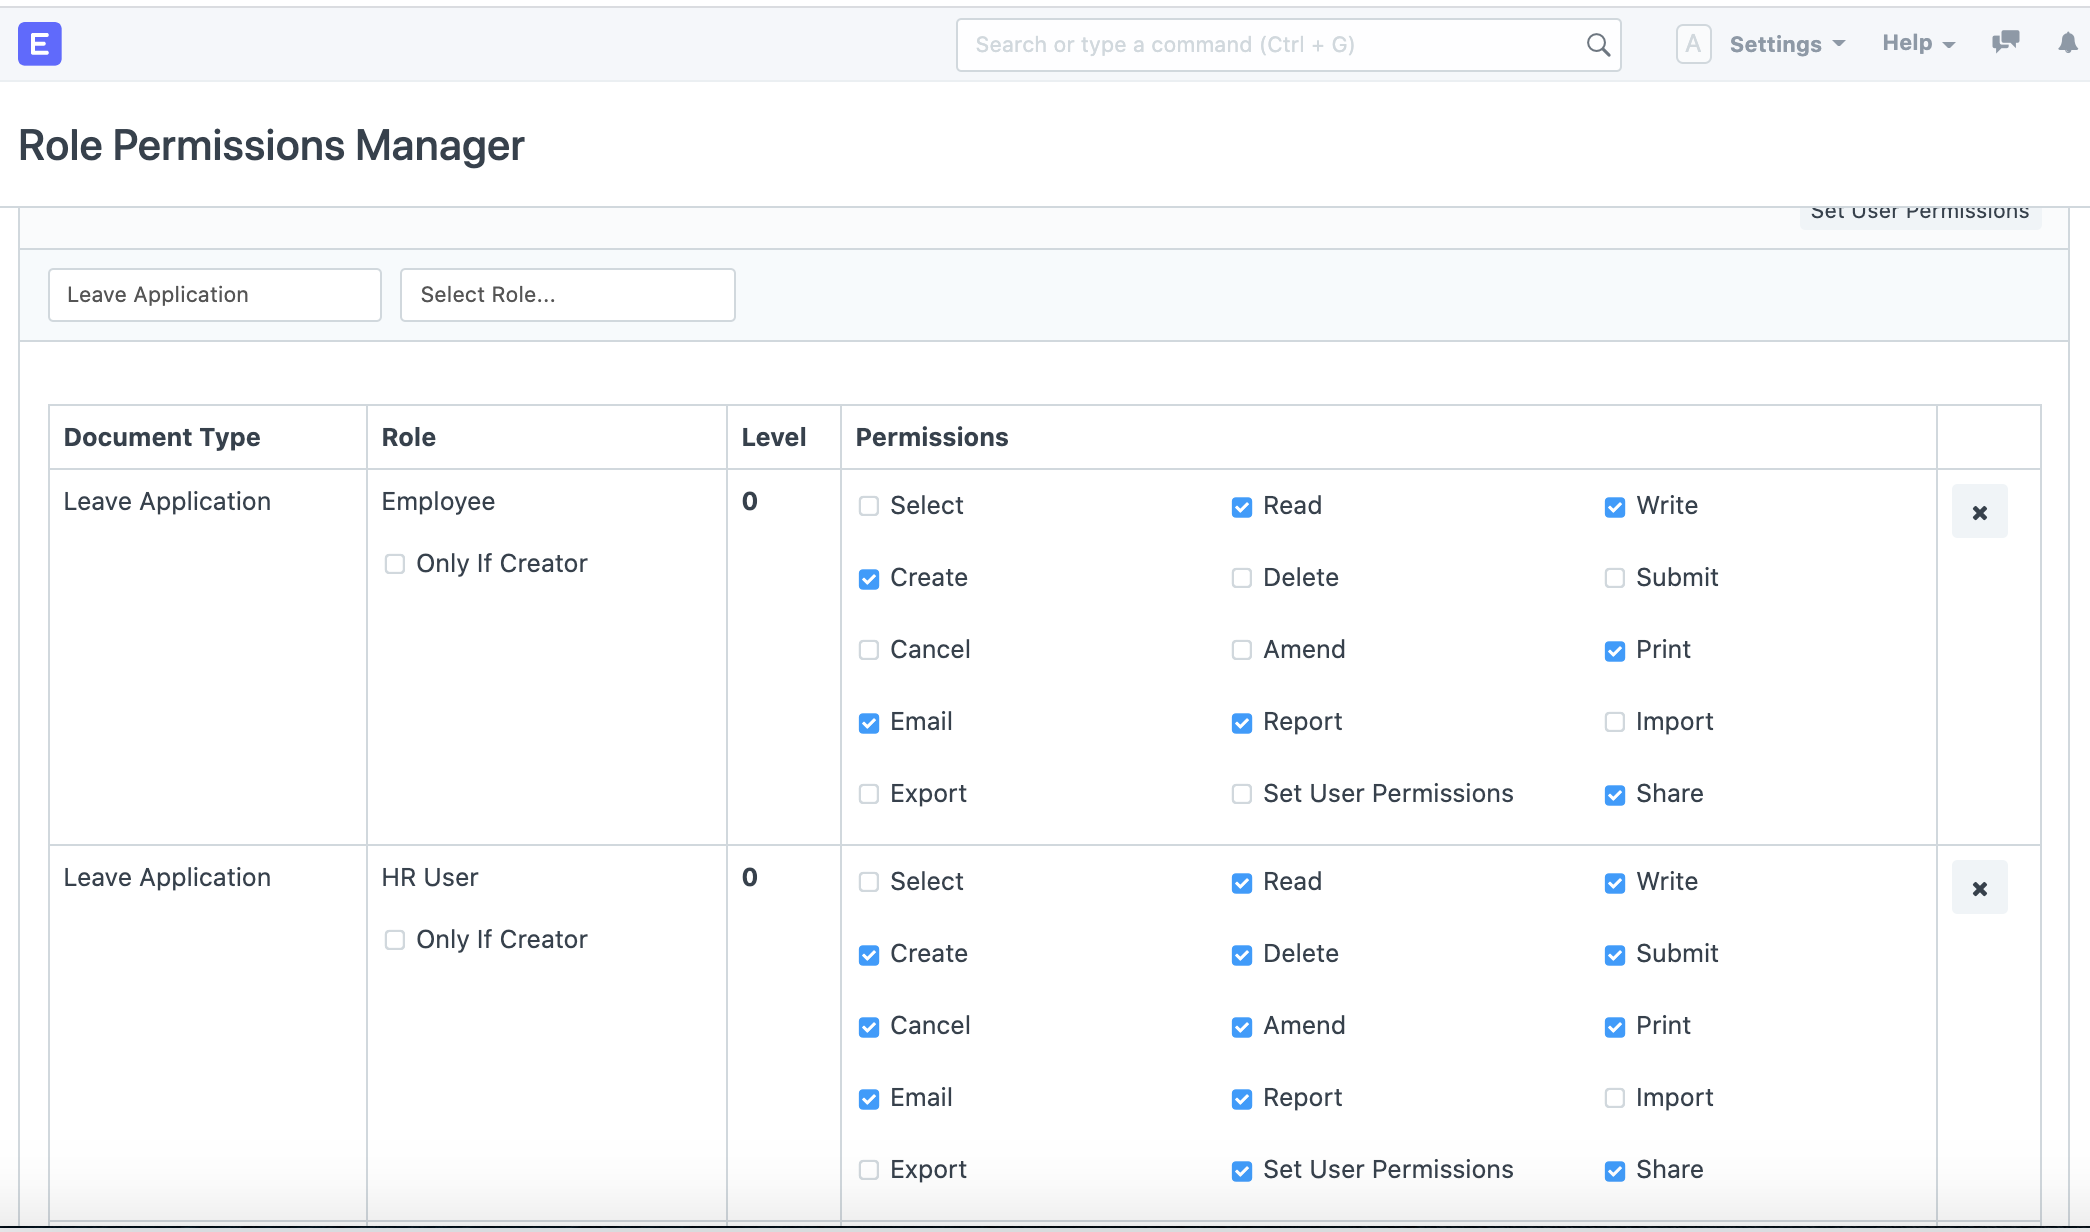
ERPNext has a role-based permission system. It means that you can assign Roles to Users, and Permissions can be set on Roles. The Role Permissions Manager allows you to set which roles can access which documents and with what permissions (read, write, submit, etc.).
Once roles are assigned to a user, their access can be limited to specific documents. The permission structure allows you to define different permission rules for different fields using a concept called Permission Level of a field.
1. How to use the Role Permissions Manager
To start using the Role Permission Manager, go to: > Home > Users and Permissions > Role Permissions Manager
Permissions are applied on a combination of:
- Roles: As we saw earlier, Users are assigned Roles and it is on these Roles that permission rules are applied. For example, a sales user may be given the roles of an Employee and a Sales User.
Examples of Roles include Accounts Manager, Employee, HR User, etc. * Document Types: Each type of document, master or transaction, has a separate list of role-based permissions as seen in the preceding screenshot.
Examples of Document Types are Sales Invoice, Leave Application, Stock Entry, etc. * Permission Levels: In each document, you can group fields by "levels". Each group of fields is denoted by a unique number (0 to 9). A separate set of permission rules can be applied to each field group. By default, all fields are of level 0.
Permission "Level" connects fields with level X to a permission rule with level X. To know more click here. * Document Stages: Permissions are applied on each stage of the document like Creation, Saving, Submission, Cancellation, and Amendment. A role can be permitted to Print, Email, Import or Export data, access Reports, or define User Permissions. * User Permissions: Using User Permissions in ERPNext a user can be restricted to access only specific Documents for that Document Type. Eg: Only one Territory from all Territories. User Permissions defined for other Document Types also get applied if they are related to the current Document Type through Link Fields.
For example, a Customer is a link field in a Sales Order or Quotation. In the Role Permissions Manager, User Permissions can be set using the 'Set User Permissions' button.
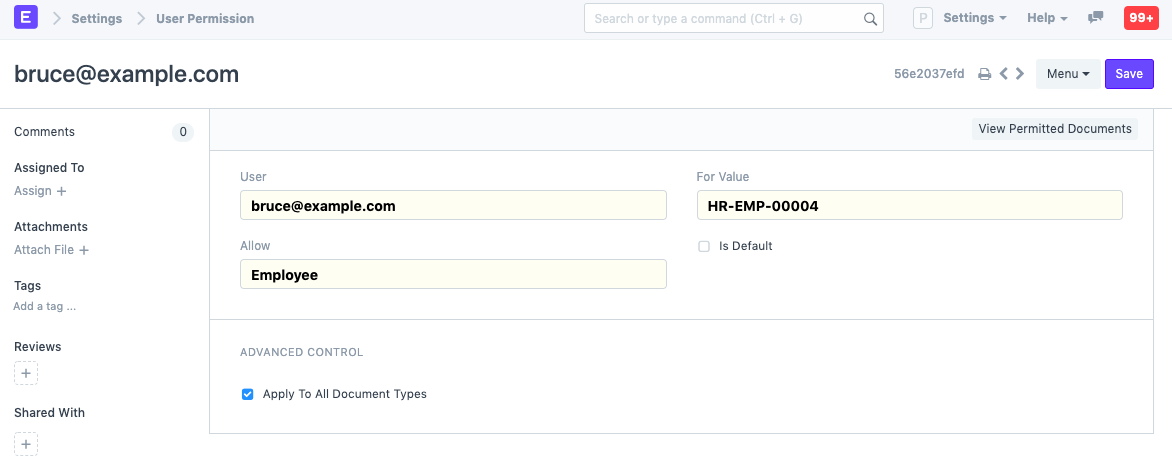
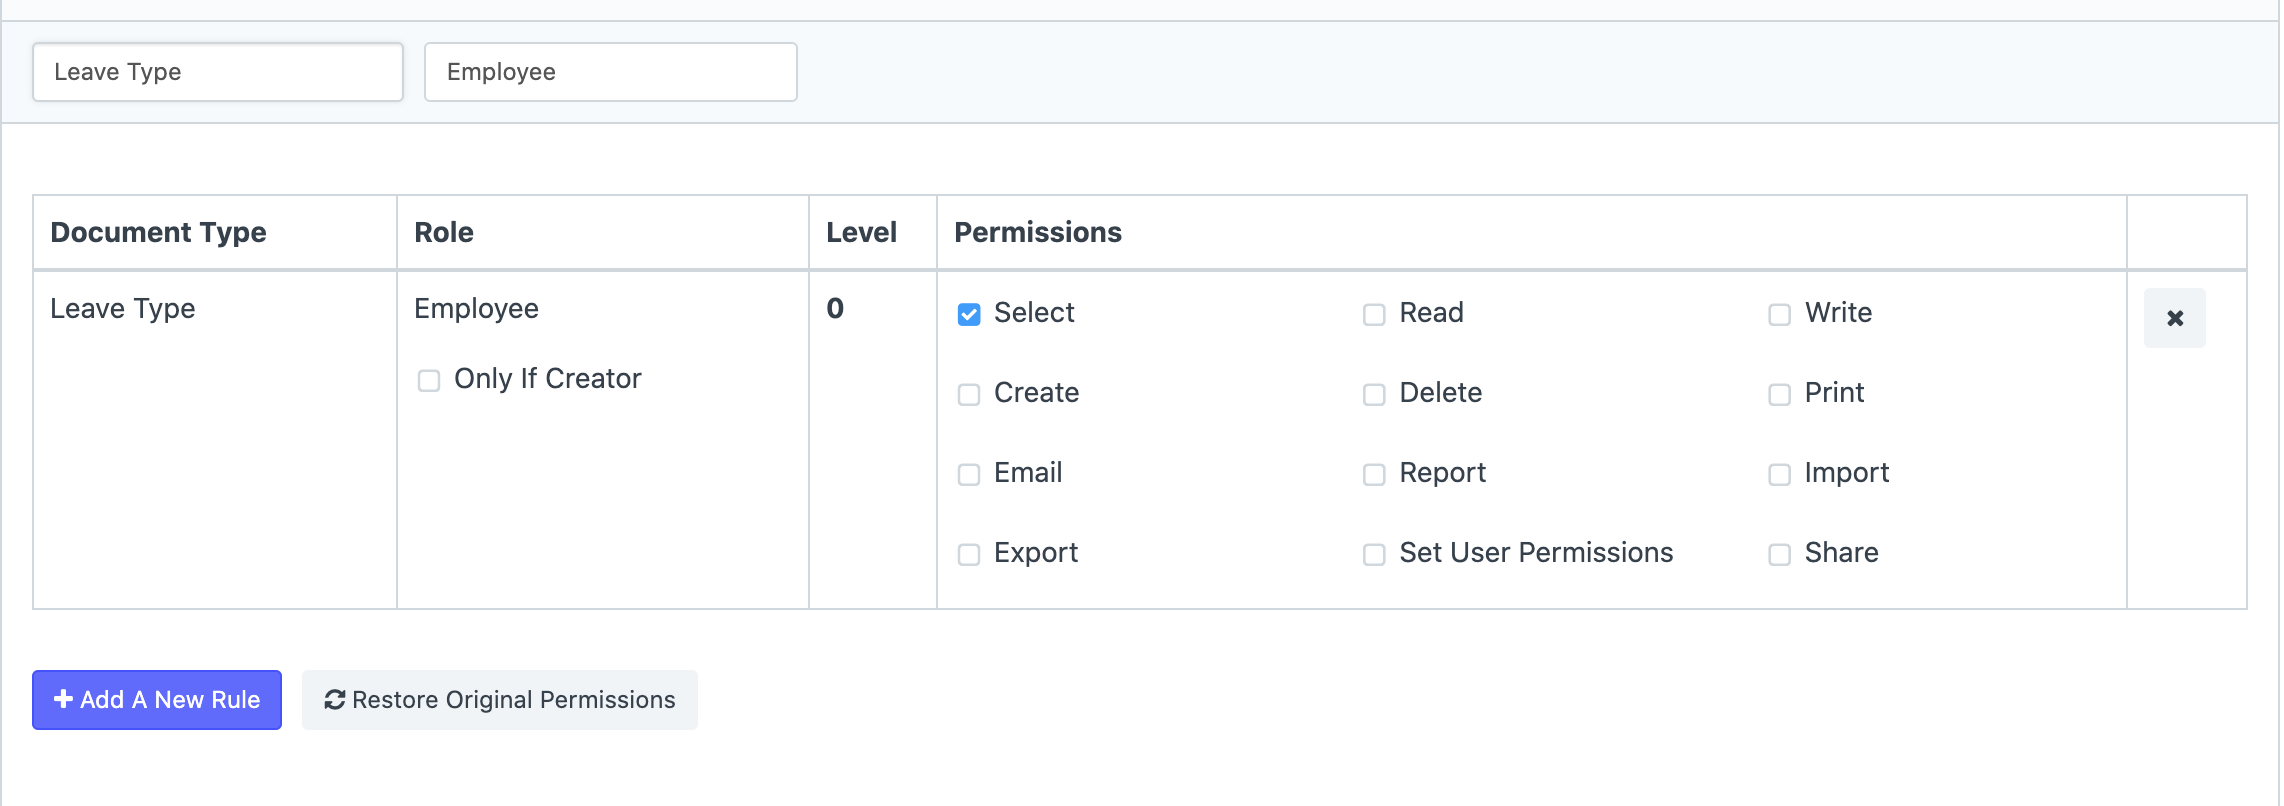
To set User Permissions based on documents/fields go to: > Home > Users and Permissions > Permissions > User Permissions * Add a New Rule: In the Role Permissions Manager, to add a new rule, click on the Add a New Rule button and a pop-up box will ask you to select a Role and a Permission Level. Once you select this and click on 'Add', this will add a new row to your rules table.
2. How Role Based Permissions Work
Leave Application is a good example that encompasses all areas of a Permission System.
- It should be created by an Employee. For this, Employee Role should be given Read, Write, Create permissions.
 * An Employee should only be able to access his/her Leave Application. Hence, User Permissions record should be created for each User-Employee combination.
 * If you want an Employee to only select a document in another document and not have read access to that document as a whole, then grant only Select perm to the role, Employee.
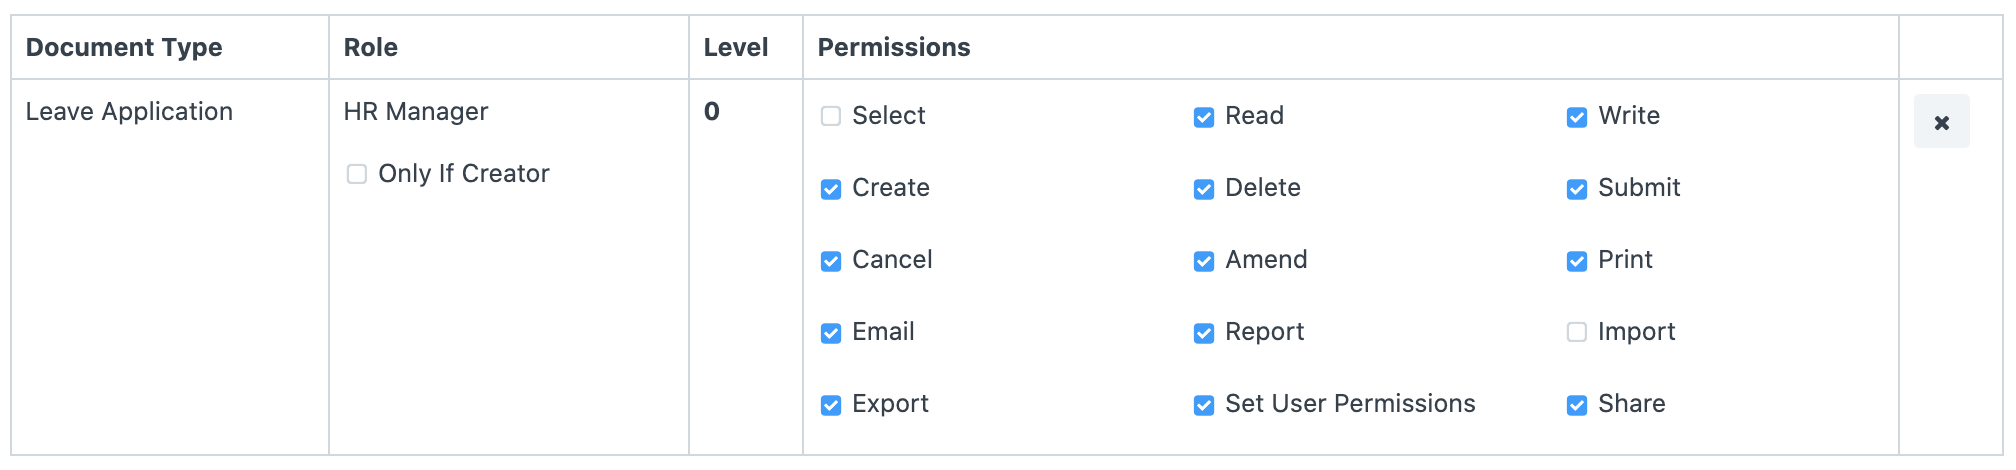
 * HR Manager should be able to see all Leave Applications. Create a Permission Rule for HR Manager at Level 0, with Read permissions. Apply User Permissions should be disabled.
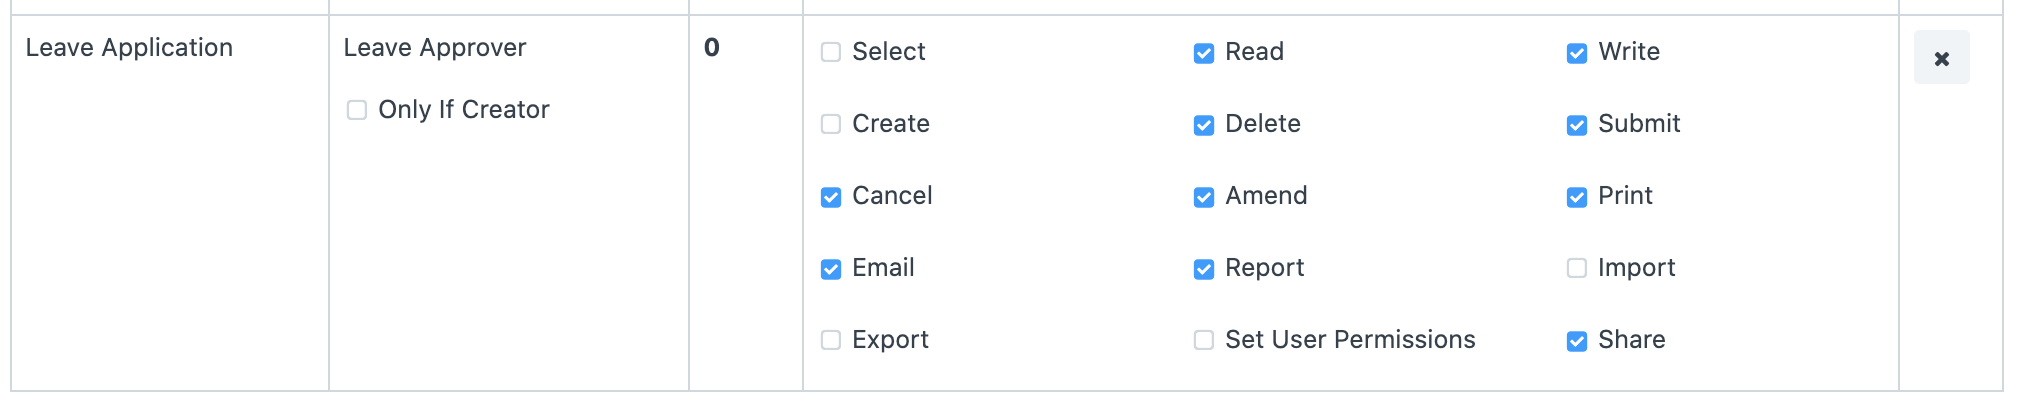
 * Leave Approver should be able to see and update Leave Applications of employees under him/her. Leave Approver is given Read and Write access at Level 0. Relevant Employee Documents should be enlisted in the User Permissions of Leave Approvers. (This effort is reduced for Leave Approvers mentioned in Employee Documents, by programmatically creating User Permission records).
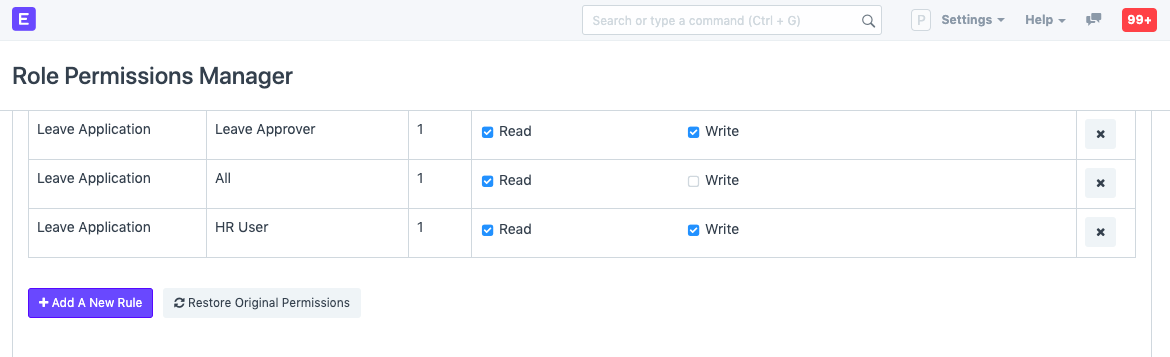
 * It should be Approved/Rejected only by HR User or Leave Approver. The Status field of a Leave Application is set at Level 1. HR User and Leave Approver are given Read and Write permissions for Level 0, while everyone else (All) are given Read permission for Level 1.
 * HR User should be able to delegate Leave Applications to his/her subordinates. HR User is given the right to Set User Permissions. A User with HR User role would be able to define User Permissions on Leave Application for other users.

In case you have correctly assigned the roles but still you're getting errors when accessing documents, refer this page.