Raw Printing
Introduced in Version 12
Sending a string of commands to a printer directly in its native language is called Raw Printing.
Many thermal printers need these raw commands sent to them in order to perform functions like barcode printing, receipt printing, label printing, etc. Raw Printing bypasses the printer's drivers in most cases, making them very fast and reliable. Raw Printing is also capable of doing some advanced features such as cutting receipt paper, kicking out cash drawers, etc.
1. Setting up Raw Printing in ERPNext
1.1 Installing QZ Tray application on the client computer
Download and install the QZ Tray application on the computer to which your thermal printer is connected. This application can be found at its official site. Currently, Windows, macOS, and Linux are supported by QZ Tray. During the installation you will be prompted to install Java if not already installed, please install Java to complete the installation.
Further instructions on installing the QZ Tray Application can be here.
1.2 Create Raw Commands Print Format
To be able to send raw commands to a printer you need to first create a print format in raw commands. Jinja Templating Language is used in raw commands just like in the HTML custom print format.
To create a new print format for Raw Printing:
- Go to print format list: Home > Settings > Printing > Print Format
- Click on New.
- Select the relevant DocType.
- Check the Custom format and Raw Printing options.
- Fill in the Raw Commands field with the required raw commands to be sent to the printer.
Click Save.
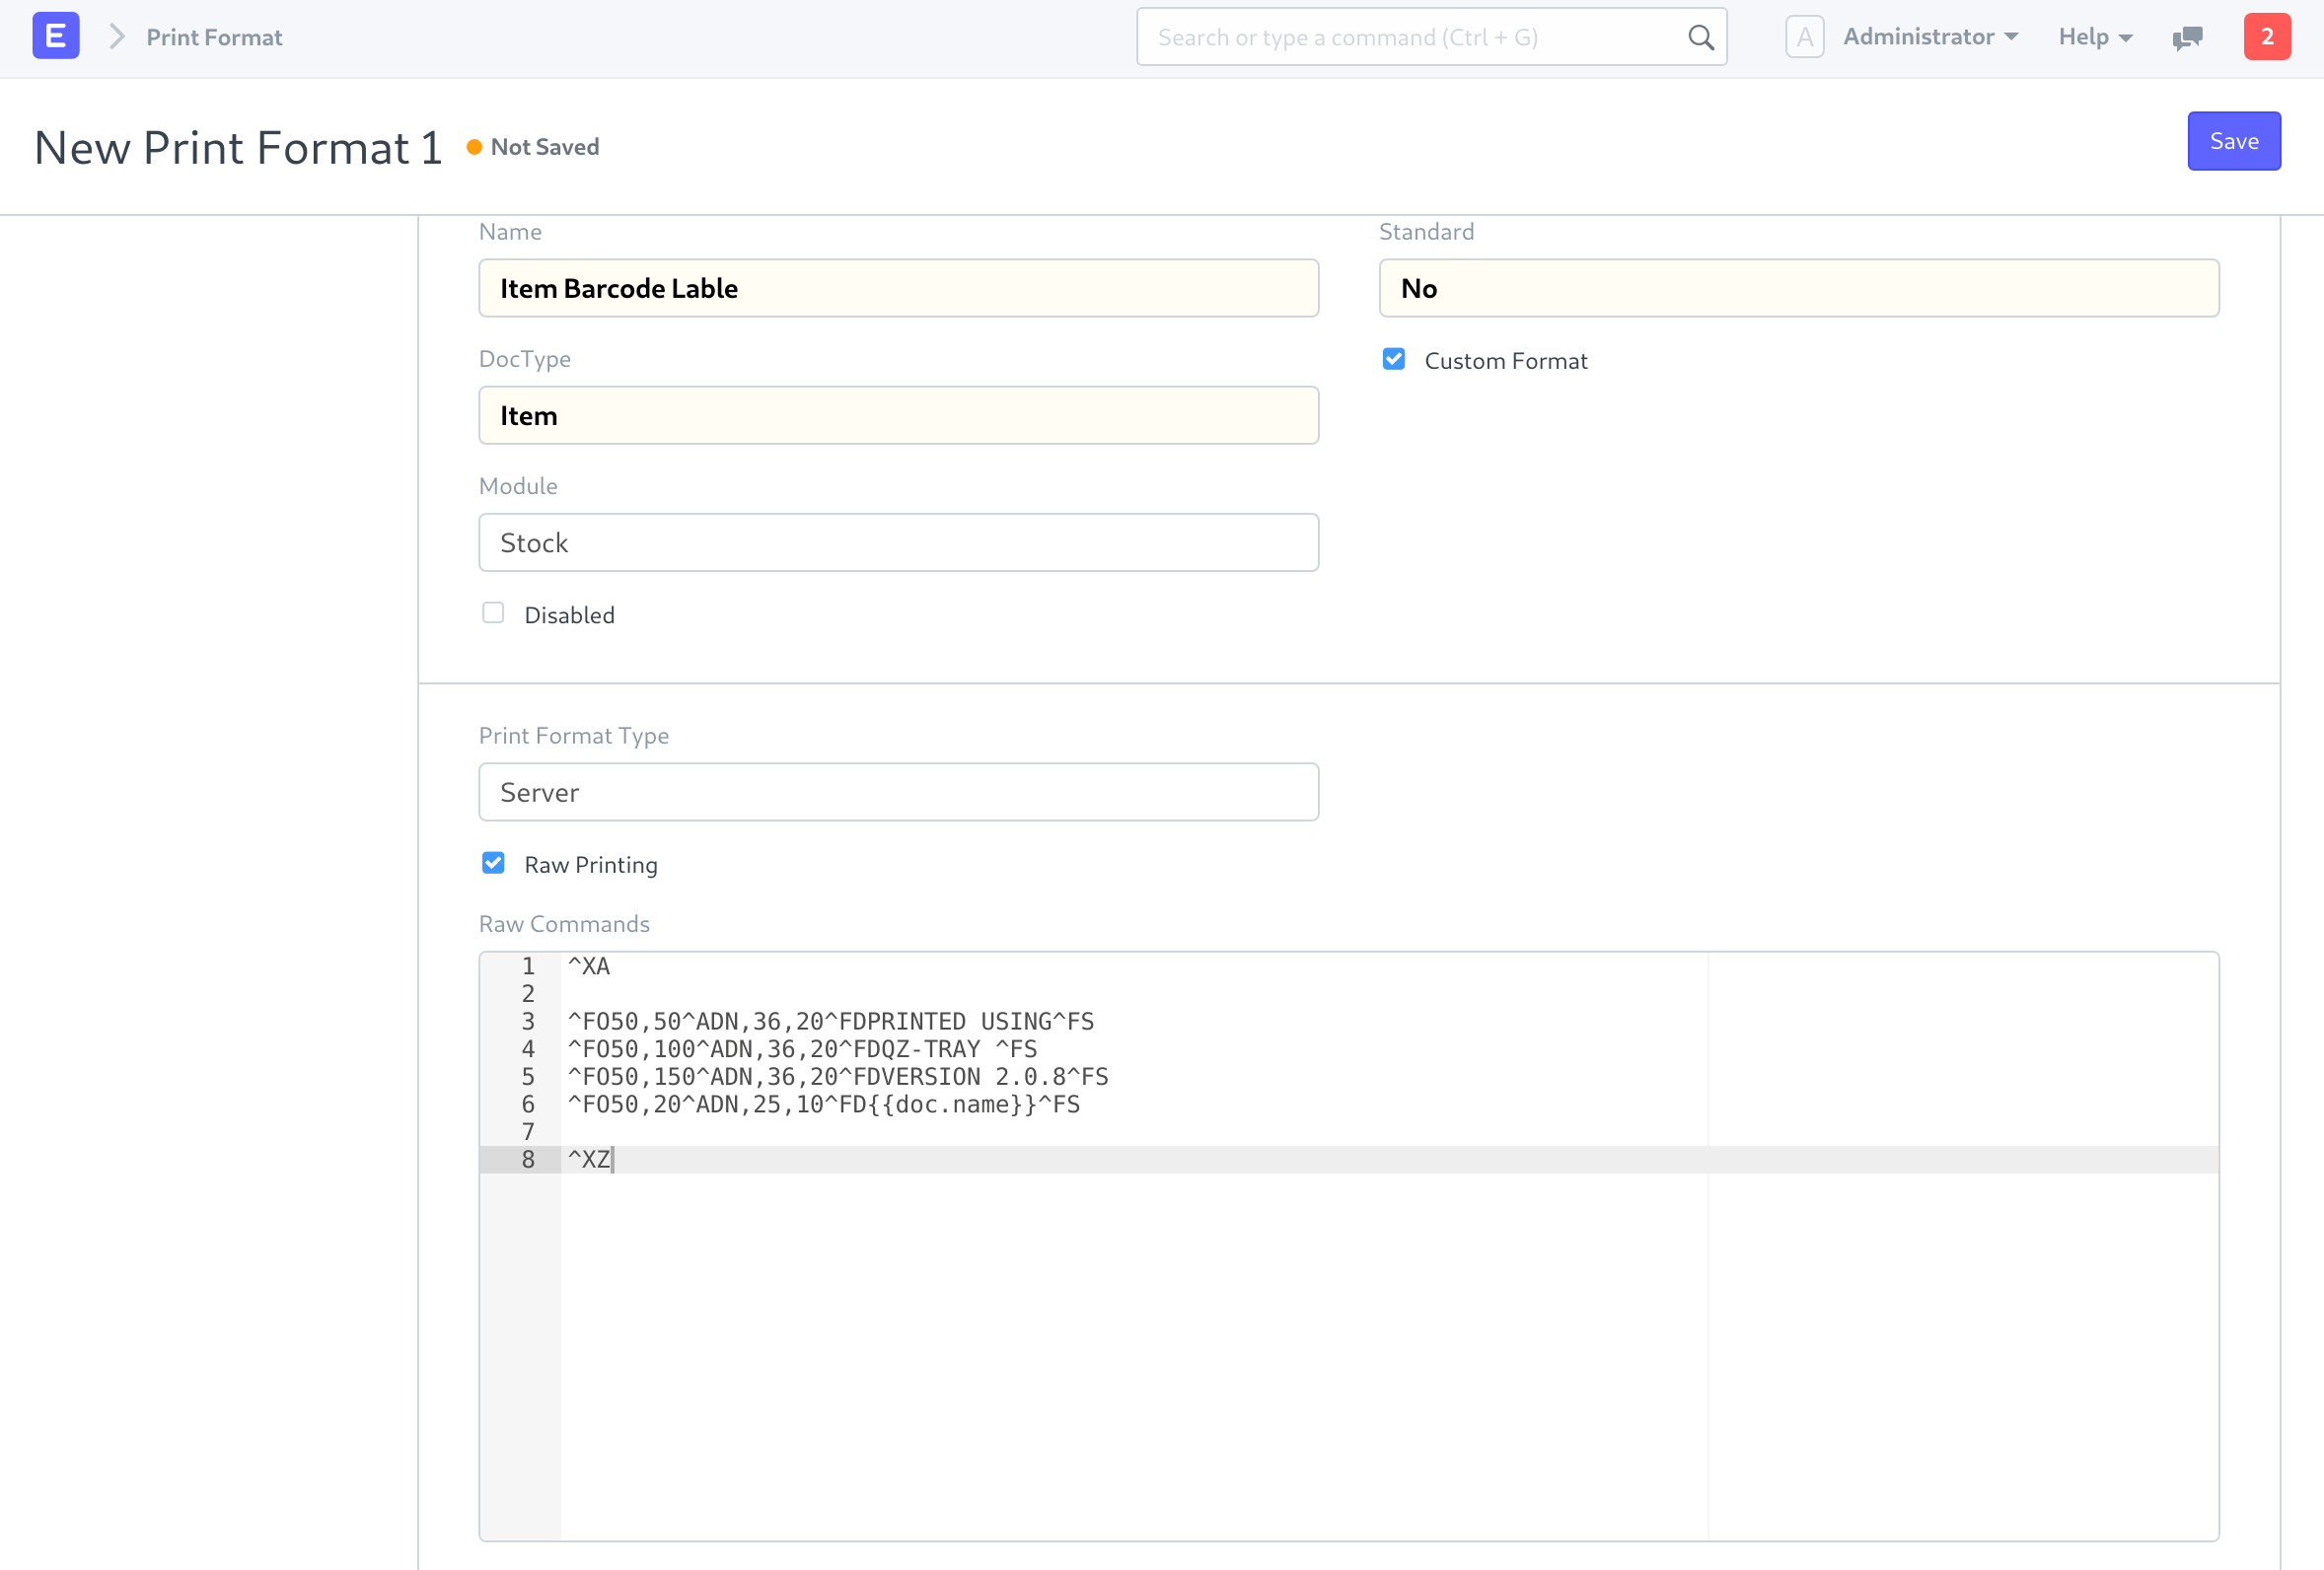
Currently, any string-based printer languages can be used in the Raw Commands field in the print format. Writing raw commands requires knowledge of the printer's native language provided by the printer manufacturer. Please refer to the developer manual provided by the printer manufacturer on how to write their native commands.
1.3 Enable Raw Printing in the Print Setting
To enable Raw Printing:
- Go to: Home > Settings > Printing > Print Settings > Raw Printing.
- Check the Enable Raw Printing option.
- Save.
2. Methods to utilize raw printing in ERPNext
There are two ways to send Raw Printing commands to your printer.
2.1 Clicking print on the print view page
To print a raw command print format from the Document print view:
- Select appropriate print format. For print format in Raw Commands, "No Preview available" message is shown in place of the print preview.
- Click on the print button.
- Please allow the connection prompt from the QZ Tray for the actions that you initiated (Keyboard Shortcut: Alt + A).
You may be asked to select the "print format - printer mapping".
- This mapping is used to send the print commands to the appropriate printer.
- The printer needs to be installed on your computer to be able to map it to a print format.
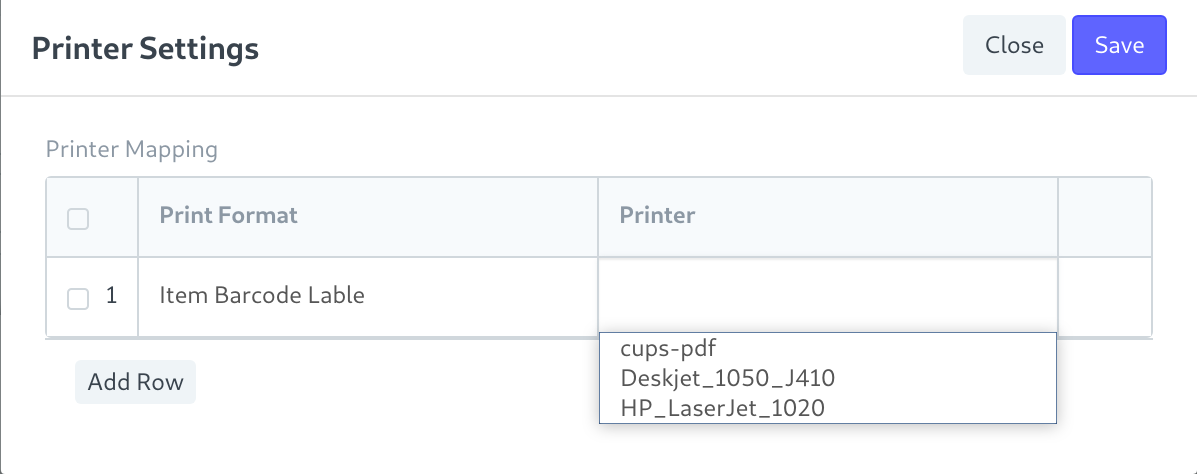
- This mapping is stored locally on the same computer and will have to be set on each client machine.
- You can also edit this by clicking on the Printer Settings button.

2.2 Calling Raw Print functions from a client script
It is often a requirement that a print command has to be issued on a certain event (like submit, save, amend, etc.). It is possible to write a client script to do this for you.
Following are the relevant Raw Print functions:
- function:
frappe.ui.form.qz_connect- A connection wrapper to establish a connection with the QZ Tray application.
- Returns a promise which resolves on successful establishment of a connection.
- Allows active and inactive connections to resolve regardless. Hence it can be called every time before sending a command.
- Usage example:
 frappe.ui.form.qz_connect()
 .then(function () {
 return qz.print(config, data);
 })
 .then(frappe.ui.form.qz_success)
 .catch(err => {
 frappe.ui.form.qz_fail(err);
 });
Here, qz is a global object provided by the qz-tray.js library.
function:
frappe.ui.form.qz_get_printer_list- Gives you the list of printers available to the QZ Tray application
- Returns a promise which resolves to a list of printers
Usage example:
 frappe.ui.form.qz_get_printer_list().then(
 // Required action on getting the printer list.
 // Note: Printer list is a array of strings.
 );
function:
frappe.ui.form.qz_success- Displays a "Print Sent to the printer!" alert to the user. Can be called after the print command is successful.
function:
frappe.ui.form.qz_fail- Displays the error message to the user. Should be called on failure of QZ Tray connection.
You can also directly access the functions provided by the qz-tray.js library via the qz object. Click here for qz-tray.js library documentation. Note: The qz object is initialized only after calling the frappe.ui.form.qz_connect for the first time. In case you require the qz object before that you can use the frappe.ui.form.qz_init.