System Settings
System Setting contains settings for system-wide configuration of the account.
You can localize ERPNext to use particular timezone, date, number or currency format, and also set global session expiry via System Settings.
To open System Settings, go to:
Home > Settings > System Settings
1. Sections in System Settings
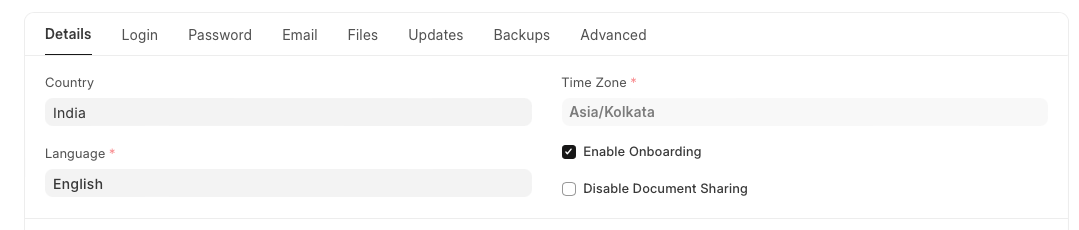
1.1 General
- Country: You can set the default country here, this will be fetched when creating new addresses. If your company has multiple branches in different countries, choose the head office location.
- Time Zone: Sets time automatically based on the time zone.
- Language: Sets the global language for the ERPNext account. Then language will be changed in all the menus, transactions, masters, etc.
- Disable Document Sharing: Disables share access for all users across the system (except Administrator) to make sure access is only given via permissions. Users will only be able to view who the document is shared with and not share the document itself. Additionally, assigning a document to a user will be blocked if the assignee does have access to the document.
- Enable Onboarding: It facilitates the onboarding process for new users. This feature typically provides a series of guided steps and helpful prompts to introduce new users to the ERPNext system, helping them to understand and utilize its features effectively.
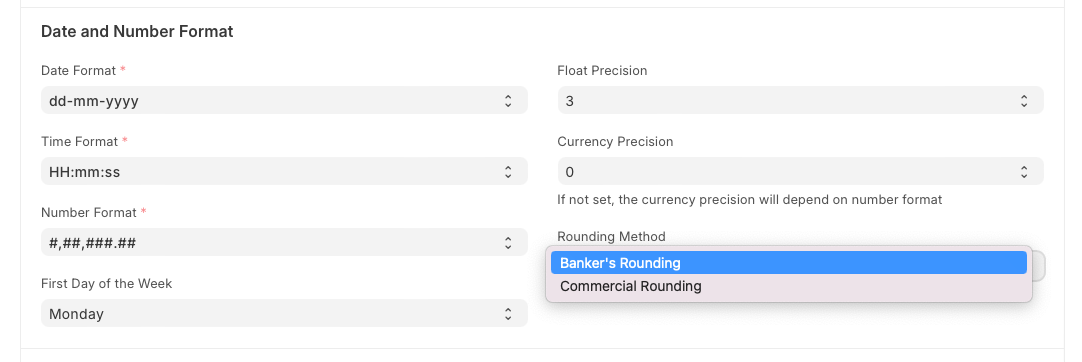
1.2 Date and Number Format
- Date Format: Format in which dates will be displayed. For e.g., dd.mm.yyyy or mm/dd/yyyy. This depends on how dates are formatted in your region.
- Time Format: Format in which time will be displayed. You can choose to show (
HH:mm:ss) or hide seconds by setting the option as (HH:mm) . - Number Format: Format in which numbers will be formatted. For e.g., 1,000 or 1000.00.
- Float Precision: The number of zeros displayed after the decimal point for quantities etc. The range is 2-9. Default is 3.
- Currency Precision: Number of zeros displayed after the decimal point for currency values. If left blank, it will be based on the Number Format.
- First Day of the Week: This can be used to configure the day for start of the week. This affects dynamic filters for week used in list and report views, date seletion layout and calendar view.
- Rounding Method: Specifies rounding method to be used everywhere. The default rounding method is Banker's Rounding which rounds 0.5 to nearest even number. "Commercial Rounding" which rounds 0.5 to next number away from zero, e.g. 1.5 becomes 2.0 and -1.5 becomes -2.0 when rounded.
1.3 Permissions
- Apply Strict User Permissions: When this checkbox is ticked and User Permission is defined for a DocType for a User, then all the documents where the value of the link is blank, will not be shown to that User.
For example: If you set User Permissions for Territory and set the value as India. If the checkbox is unticked, all transactions (sales orders, quotations) with India and blank will be shown to the users. If the Apply Strict User Permissions checkbox is ticked, documents, where Territory is blank, will not be shown to the users. * Allow Older Web View Links (Insecure): The configuration that allows web links with no expiry. Note: Older web links (generated in v13) are considered to be insecure as they had no expiry. It is recommended to keep this configuration unchecked.

1.4 Session
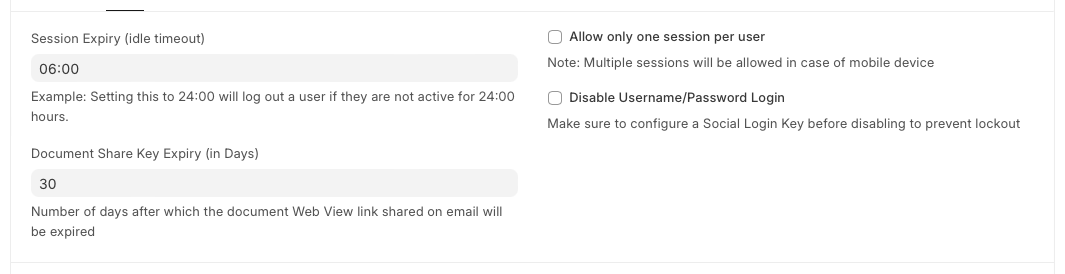
- Session Expiry: Number of idle hours after which you'll be logged out of a session. This helps in better security. For example, if there is no activity for 6 hours, your account will be logged out.
- Document Share Key Expiry (in Days): Number of days after which "document web link" sent via email will be expired.
- Allow only one session per user: If you want to use a single set of credentials for multiple users, tick this checkbox. The number of simultaneous sessions can be changed under User master. Mobile phone sessions are not counted here.
- Disable Username/Password Login: Make sure to configure a Social Login Key before disabling to prevent lockout.
1.5 Login Methods
- Allow Login using Mobile Number: By checking the 'Allow Login using Mobile Number' checkbox, you can log in to ERPNext using a valid mobile number set in your User account.
- Allow Login using User Name: Allow user login via their username set in the User master.
- Login with email link: Allow users to log in without a password, using a login link sent to their email.
- Login with email link expiry (in minutes): Indicates the duration in minutes for which login via email link will be active.

1.6 Brute Force Security
- Allow Consecutive Login Attempts: Consecutive logins after which you'll be locked out of the account for a specific period. This helps if an intruder tries to log in to your account.
- Allow Login After Fail: Seconds after which a login attempt will be allowed after consecutive unsuccessful attempts.

1.7 Two Factor Authentication
On ticking 'Enable Two Factor Auth', the following two options will be seen.
- Bypass Two Factor Auth for users who log in from restricted IP Address: Users who log in from restricted IP addresses will not be asked for Two Factor Authentication. You can restrict IPs from User master under the Restrict IP field.
- Bypass restricted IP Address check If Two Factor Auth Enabled: If checked, all users can log in with Two Factor Authentication regardless if their IP is restricted or not.
- Two Factor Authentication method: Select the authentication method to be used - OTP App, SMS, or email.
- Expiry time of QR Code Image Page: Expiry time for QRCode image if "OTP App" is selected in the method.
- OTP Issuer Name: It refers to the entity responsible for providing or issuing the OTPs used for authentication within the ERPNext system.

1.8 Password
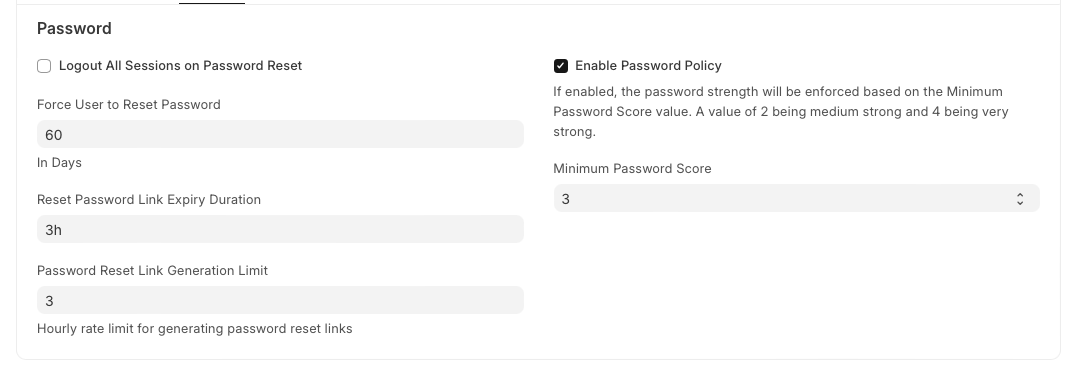
- Logout All Sessions on Password Reset: Once this is checked, all active sessions will be closed as soon as the password is changed.
- Force User to Reset Password: Number of days after which a password reset is mandatory. 0 means no limit.
- Enable Password Policy: Enables a password strength checker so that users have to use strong passwords for their login.
Minimum Password Score: Score for the password strength checker
- 2 is medium
- 3 is strong
- 4 is very strongThe complexity is based on the number of characters, capitalization, special characters, etc.
- Reset Password Link Expiry Duration: This configuration is used to set the duration after which the newly created reset rassword link gets expired. The default expiry for reset password link is 20 minutes. Setting it to "0 Seconds" disables the "Reset Password Link Expiry" functionality.
- Password Reset Link Generation Limit: Using this configuration the limit for number of password reset requests per hour can be set. The default limit is 3. Setting it to 0 will allow unlimited password reset link generation requests.
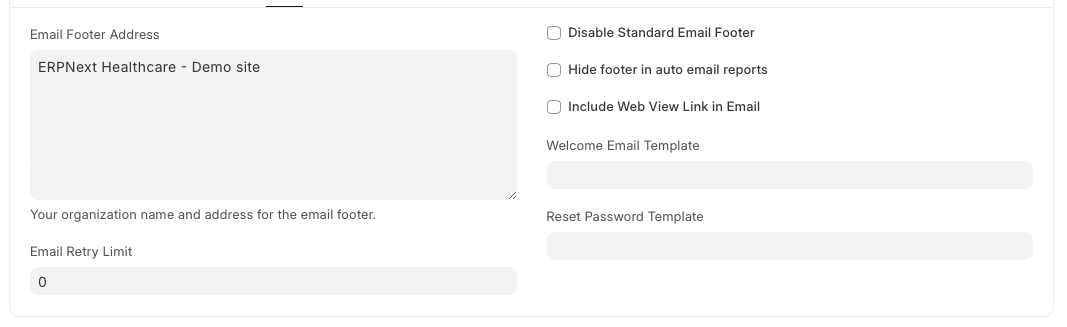
1.9 Email
- Email Footer Address: Organization name, address, and other details can be added here. This will be set as default in all outgoing mails.
- Disable Standard Email Footer: If ticked, the standard email footer will be disabled for outgoing emails.
- Hide footer in auto-email reports: If ticked, footers will be hidden in Auto Email reports.
- Include Web View Link in Email: When you turn on Attach Document Print for a new email, the system attaches a PDF or HTML version of your document to the email. If you also enable Include Web View Link in Email in the System Settings, a link will be added to the email, allowing the recipient to view the document online as a webpage.
- Welcome Email Template: Predefined template for welcome email can be set from the list of available templates.
- Reset Password Template: Predefined template for the password reset activity can be set from the list of available templates.
- Email Retry Limit: It controls how many times the system will attempt to resend an email if the initial sending attempt fails. This is particularly useful in cases where there might be temporary network issues or server problems that prevent the email from being sent successfully on the first try.
1.10 File
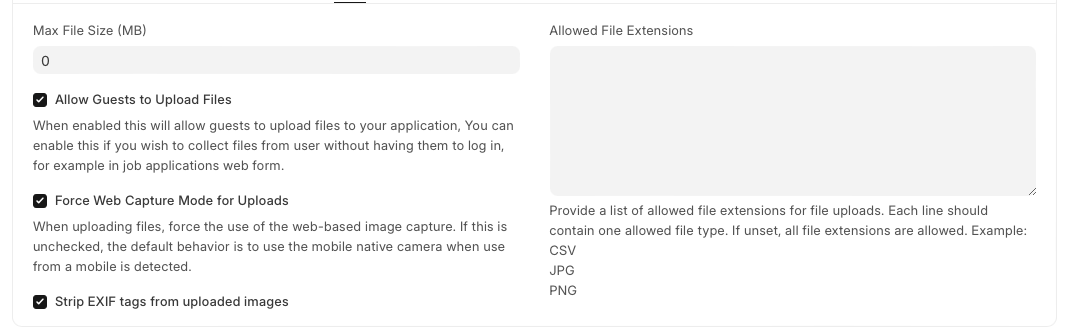
- Max File Size (MB): This option lets you configure the maximum size for any uploaded file file. If not configured, the default maximum size is 25MB.
- Allow Guests to Upload Files: When enabled this will allow guests to upload files to your application, You can enable this if you wish to collect files from user without having them to log in, for example in job applications web form.
- Force Web Capture Mode for Uploads: When uploading files, force the use of the web-based image capture. If this is unchecked, the default behavior is to use the mobile native camera when use from a mobile is detected.
- Remove EXIF tags from uploaded images: Metadata stored in image files in the EXIF file format can be exploited to get sensitive user information. This option lets users remove that data from the images before uploading.
- Allowed File Extensions: Provide a list of allowed file extensions for file uploads. Each line should contain one allowed file type. If unset, all file extensions are allowed.
1.11 Updates
- Disable System Update Notfication: This option disables all version update notfications triggered by the application.
- Disable Change Log Notification:

1.12 Backups
- Number of Backups: In ERPNext you can backup the database as well as your files. Database backups are created automatically while file backups need to be downloaded explicitly.
This field shows the number of backups after which older ones will be deleted. By default, 3 backups are saved over 24 hours. New backups are automatically created every few hours and the newest backup will overwrite the oldest one. For a backup of files, click on the Download Files Backup button in the Download Backups form. * Encrypt Backups: When this option is enabled, ERPNext will encrypt the backup files before storing them. Encryption ensures that even if the backup files are accessed by unauthorized parties, the data within those files remains unreadable without the appropriate decryption key.

1.13 Advanced
- Max auto email report per user: It controls the maximum number of automatic email reports a single user can schedule. This setting helps administrators manage and limit the load on the system by preventing individual users from scheduling an excessive number of automated reports, which could impact overall performance.
- Run Jobs only Daily if Inactive For (Days): This will run scheduled jobs only once a day for inactive sites. Default 4 days if set to 0.
- Show Full Error and Allow Reporting of Issues to the Developer: This will display the whole error on the screen and allow reporting issues. If you have technical knowledge in this area, you can get a better idea of the error by reading the whole message.
- Allow Sending Usage Data for Improving Applications: If enabled, this sends usage data to the engineering team who can improve the application by understanding how the software is being used and identifying common issues.
